Welcome to Club Cobra! The World's largest
non biased Shelby Cobra related site!
- » Representation from nearly all
Cobra/Daytona/GT40 manufacturers
- » Help from all over the world for your
questions
- » Build logs for you and all members
- » Blogs
- » Image Gallery
- » Many thousands of members and nearly 1
million posts!
YES! I want to register an account for free right now!
p.s.: For registered members this ad will NOT show
 
 Main Menu
|
 Nevada Classics
|
 Advertise at CC
|
 January 2025
|
| S |
M |
T |
W |
T |
F |
S |
| |
|
|
1 |
2 |
3 |
4 |
| 5 |
6 |
7 |
8 |
9 |
10 |
11 |
| 12 |
13 |
14 |
15 |
16 |
17 |
18 |
| 19 |
20 |
21 |
22 |
23 |
24 |
25 |
| 26 |
27 |
28 |
29 |
30 |
31 |
|
|
 CC Advertisers
|
|

03-06-2011, 06:17 PM
|
 |
CC Member

|
|
|
Join Date: Feb 2002
Location: Alice Springs, central Australia,
NT
Cobra Make, Engine: Classic revival kit (CR3181), gen III engine, T56 6 speed box, AU XR8 lsd diff
Posts: 5,699
|
|

 Not Ranked
Good stuff, nice floor.
__________________
Cruising in 5th

---------------------------------------------
Never be afraid to do something new, Remember, Amateurs built the Ark: Professionals built the Titanic.
|
-
Advertising


05-30-2011, 03:37 AM
|
 |
CC Member

|
|
|
Join Date: Jan 2009
Location: Tynong North, Melbourne,,
Vic
Cobra Make, Engine: Classic Revival CR3514, LS3, Dual Quads, Holley Dominator EFI, TR6060, VE 3.7 LSD, AP Racing Brakes, 17x8 & 10 Custom Dragway Billet Wheels.
Posts: 601
|
|

 Not Ranked
Just an update on cobbie progress and shed progress,
Bought a complete VE rear cradle,
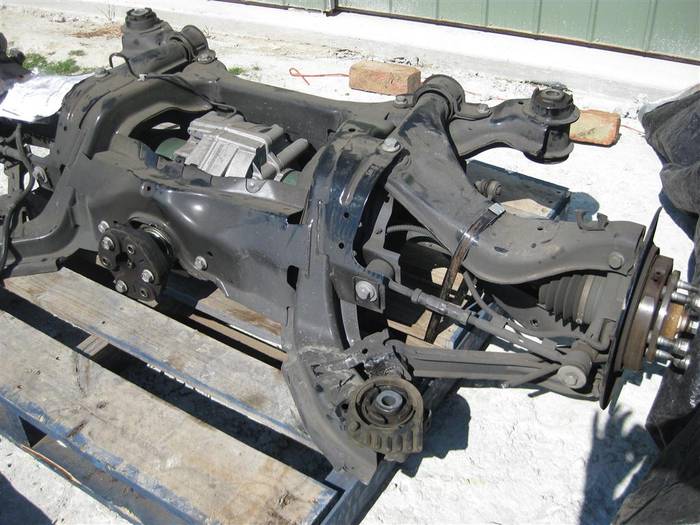
total diassembly, all the required parts cleaned up and ready for paint.
started to re-assemble CV's and axles, but the half shafts from CR are wrong spline, Ian made up some new ones, recieved this week.

Trial fitted the front and rear arms, disassembled and ready for paint.
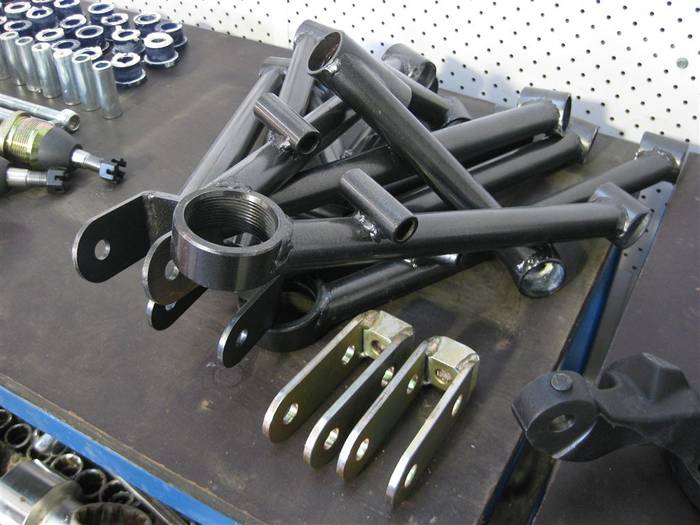
Referbed the front VZ hubs, cleaned up, rust removed and clearcoated

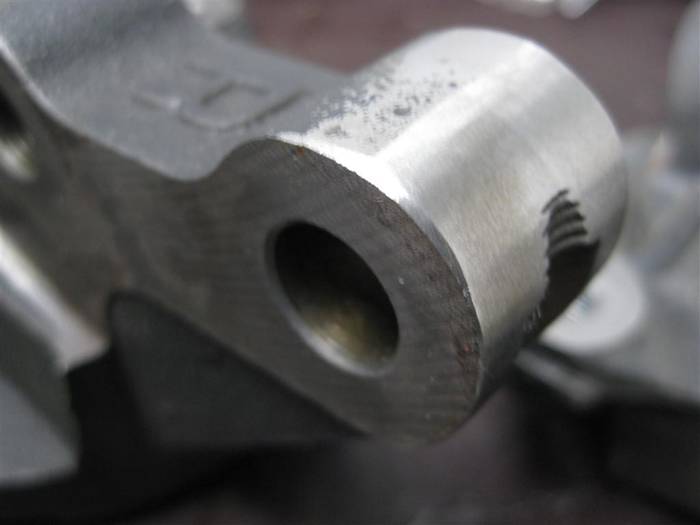
Modified the front VZ knuckles to fit the upper heim joint bracket.
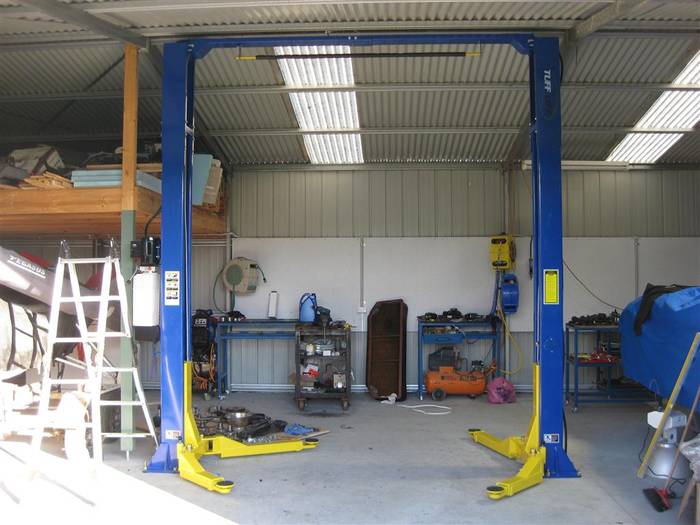
Bought a Tufflift 2 post hoist, was going to get a Radum, but it was slightly too tall for my shed roof, the tuflift is has an adjustable extension, same price.
Painting all the bits this week, although cant make up my mind whether to paint the chassis or leave it gloss black, black tends to show up the dirt, thinking silver ? |

05-30-2011, 03:45 AM
|
 |
CC Member

|
|
|
Join Date: Apr 2008
Location: Melbourne,
VIC
Cobra Make, Engine: Classic Revival CR 3505, LS1, T56 6 Speed, VE 3.45 LSD Rear, 6 Spot AP Fronts, 4 Spot Wilwood Rears
Posts: 1,121
|
|

 Not Ranked
Hi Dave, Great progress. Nice lift. You may want to keep the chassis black if you dont want to see it side or front on. I also ended up painting my underbody exhaust pipes matt black as I didnt like seeing them side on. Each to their own. Well done so far. Rgds Gregg
|

05-30-2011, 04:31 AM
|
 |
CC Member

|
|
|
Join Date: Jan 2009
Location: Tynong North, Melbourne,,
Vic
Cobra Make, Engine: Classic Revival CR3514, LS3, Dual Quads, Holley Dominator EFI, TR6060, VE 3.7 LSD, AP Racing Brakes, 17x8 & 10 Custom Dragway Billet Wheels.
Posts: 601
|
|

 Not Ranked
Hi Gregg, actually feels like slow going, cant believe how much time is spent cleaning back the grime, should progress abit quicker now that im about to coat bits, and the half shafts have turned up,
|

05-30-2011, 05:12 AM
|
 |
CC Member

|
|
|
Join Date: Apr 2006
Location: Mildura,
vic
Cobra Make, Engine: FFR Coupe, 416ci of LS goodness
Posts: 2,349
|
|

 Not Ranked
Looks great Dave, I can't (don't want to) even remember what life was like before I got my hoist!
__________________
Powered by Cu
|

06-15-2011, 10:23 PM
|
 |
CC Member

|
|
|
Join Date: Jan 2009
Location: Tynong North, Melbourne,,
Vic
Cobra Make, Engine: Classic Revival CR3514, LS3, Dual Quads, Holley Dominator EFI, TR6060, VE 3.7 LSD, AP Racing Brakes, 17x8 & 10 Custom Dragway Billet Wheels.
Posts: 601
|
|

 Not Ranked
Back at home for a week, so a bit more progress,
Took the body off the chassis, wasnt as difficult as i expected, basically lift the rear till it clears the roll bar mountings, pull the body forward a few inches to clear front of the chassis and off she comes.
Anybody intending to do this, watch the backend, shes pretty flimsy off the chassis through the centre of the gaurds.
I lifted the body from the rear seat mounting bolt holes (about 75% of weight) and the very front of the body (about 25% weight)
Cleaning up the chassis to paint, and start assembling all the bits i've refurbed and coated.

Front end


Rear End

Painted the diff, new seals while i was at it,

New Superpro bushes throughout the rear arms

If any body wants some detailed pics of the chassis or body specific areas, let me know,
Cheers,
Dave
Try and figure out a good underfloor exhaust system while i'm at it.
Last edited by DaveW; 06-15-2011 at 10:26 PM..
Reason: stuffups
|

06-16-2011, 02:26 AM
|
 |
CC Member

|
|
|
Join Date: Feb 2002
Location: Alice Springs, central Australia,
NT
Cobra Make, Engine: Classic revival kit (CR3181), gen III engine, T56 6 speed box, AU XR8 lsd diff
Posts: 5,699
|
|

 Not Ranked
Looks good Dave, 1 thing I would suggest, with your body off, I would support to under the rear edge of boot floor (same as the chassis would) as I suspect the warping I had in my sill, was caused by the back of the body drooping down.
Otherwise looks great, same method used to remove body from square tube chassis.
__________________

Cruising in 5th

---------------------------------------------
Never be afraid to do something new, Remember, Amateurs built the Ark: Professionals built the Titanic.
|

06-16-2011, 02:30 AM
|
 |
CC Member

|
|
|
Join Date: Feb 2002
Location: Alice Springs, central Australia,
NT
Cobra Make, Engine: Classic revival kit (CR3181), gen III engine, T56 6 speed box, AU XR8 lsd diff
Posts: 5,699
|
|

 Not Ranked
Oh just remembered another suggestion that was made to me while I had my body off, was to "round off" the rear corners of the chassis under boot floor.
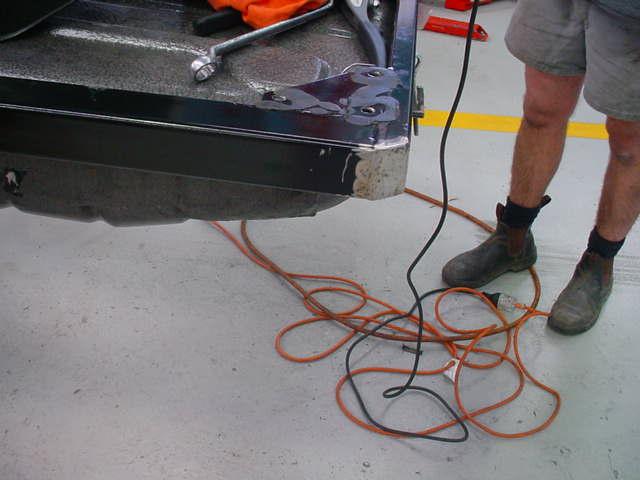
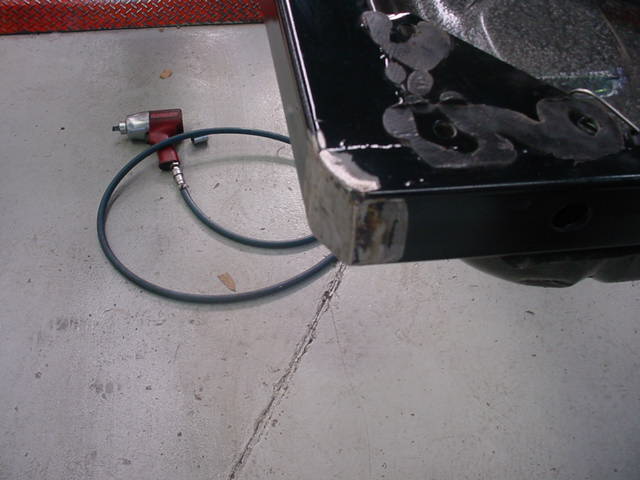
It will give a little room for fingers when lowering the body back on.
__________________

Cruising in 5th

---------------------------------------------
Never be afraid to do something new, Remember, Amateurs built the Ark: Professionals built the Titanic.
|

06-16-2011, 02:55 AM
|
 |
CC Member

|
|
|
Join Date: Jan 2009
Location: Tynong North, Melbourne,,
Vic
Cobra Make, Engine: Classic Revival CR3514, LS3, Dual Quads, Holley Dominator EFI, TR6060, VE 3.7 LSD, AP Racing Brakes, 17x8 & 10 Custom Dragway Billet Wheels.
Posts: 601
|
|

 Not Ranked
Hi Dave, Good suggestion, i made a brace tonight to support the backend while the body is off.
The boot frame is quite different to yours, it clears the body overhang allround, the corners are chamfered allready. see pic

Last edited by DaveW; 06-16-2011 at 03:39 AM..
Reason: more info
|

06-16-2011, 06:44 AM
|
 |
CC Member

|
|
|
Join Date: Feb 2005
Posts: 106
|
|

 Not Ranked
Dave,
looks great im very interested in the new chassis, it appears that Ian has listened to a lot of the feedback from previous builds(us) and changed a few things around, keep the pics coming.
steve
|

06-17-2011, 03:06 AM
|
|
CC Member

|
|
|
Join Date: Oct 2007
Location: Darwin,
NT
Cobra Make, Engine: Classic Revival Kobra,LS7 427
Posts: 380
|
|

 Not Ranked
Hi Dave
I would look at the Chassis brace under the LS7 Ian should have moved it forward for you as I had to get him to move mine forward
|

06-17-2011, 03:34 AM
|
 |
CC Member

|
|
|
Join Date: Jan 2009
Location: Tynong North, Melbourne,,
Vic
Cobra Make, Engine: Classic Revival CR3514, LS3, Dual Quads, Holley Dominator EFI, TR6060, VE 3.7 LSD, AP Racing Brakes, 17x8 & 10 Custom Dragway Billet Wheels.
Posts: 601
|
|

 Not Ranked
Quote:
Originally Posted by alffie

Hi Dave
I would look at the Chassis brace under the LS7 Ian should have moved it forward for you as I had to get him to move mine forward
|
Alfie, G'Day mate,
Ummmmm. He did know i was sticking the ls7 in, but never mentioned the centre brace, have you got a measurement i could check too.
I'm assuming this is to fit the standard drysump option.
cheers
Dave |

06-17-2011, 07:43 PM
|
|
CC Member

|
|
|
Join Date: Oct 2007
Location: Darwin,
NT
Cobra Make, Engine: Classic Revival Kobra,LS7 427
Posts: 380
|
|

 Not Ranked
Dave
I would move that brace forward of the mounts. My engine and trans sit 20mm below my chassis rails and the brace sits right where your sump plug is on the LS7 sump. The trans mounts look like they are in the same location as the old chassis but your engine mounts look to be about 25mm highier, so might clear but I would move it to avoid the hassle of fitting the LS7 and it sits on that brace. Ian should have told you about this. Also if you have the Corvette style install kit you may have cut out your inner guard to fit the altenater even though Ian says the corvette gear will fit.
Unless you are getting a custom sump the only dry sump that I know of is the GM factory sump.
|

06-18-2011, 05:23 AM
|
 |
CC Member

|
|
|
Join Date: Jan 2009
Location: Tynong North, Melbourne,,
Vic
Cobra Make, Engine: Classic Revival CR3514, LS3, Dual Quads, Holley Dominator EFI, TR6060, VE 3.7 LSD, AP Racing Brakes, 17x8 & 10 Custom Dragway Billet Wheels.
Posts: 601
|
|

 Not Ranked
Hi Alfie,
The factory dry sump is already fitted to the donk,
Ill have to take some measurements to see where it al sits, before i cut and move,
|

09-03-2011, 04:12 AM
|
 |
CC Member

|
|
|
Join Date: Jan 2009
Location: Tynong North, Melbourne,,
Vic
Cobra Make, Engine: Classic Revival CR3514, LS3, Dual Quads, Holley Dominator EFI, TR6060, VE 3.7 LSD, AP Racing Brakes, 17x8 & 10 Custom Dragway Billet Wheels.
Posts: 601
|
|

 Not Ranked

Its been a couple of months since i uploaded some progress pics so here goes a bit of story and pics.
I started assembling the CR suspension bits about 2 months ago to the chassis after cleaning, smoothing and painting, and became very disappointed with the paint finish on the chassis, minor touches and scuffs were peeling off the paint in very large flakes, the paint was a polyurethane black by CR, it soon became obvious that the chassis hadn't been sandblasted as advised or very well cleaned before painting, especially around the front end, so its been totally stripped (sandblasted), primed, filled and sanded so many times i have no finger prints left.
I originally had requested a silver chassis from CR but this couldn't be accommodated with the suggested PE paint so i had accepted that it would be black.
The fix up gave me the opportunity to do it so here is some pics of the suspension partially re-assembled before i had to scoot OS again.

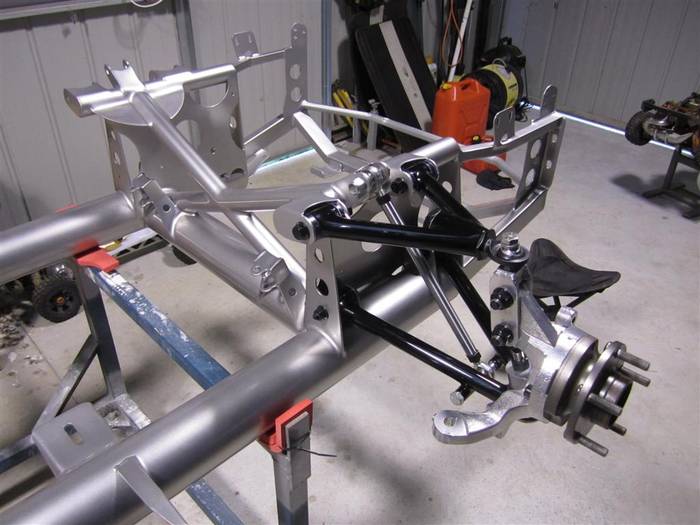
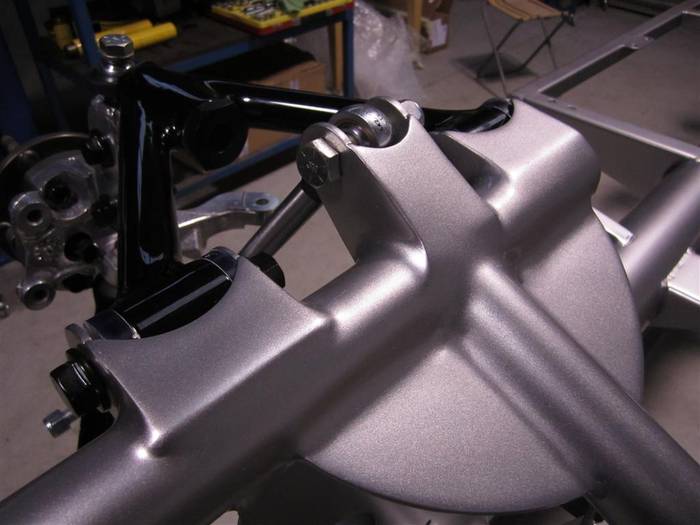

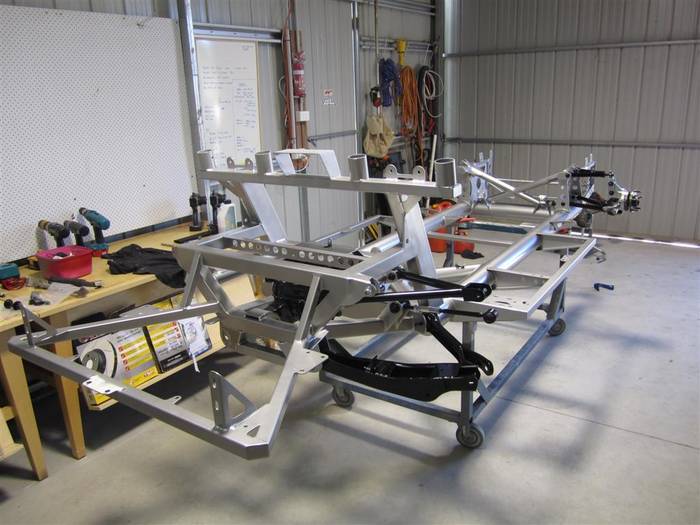

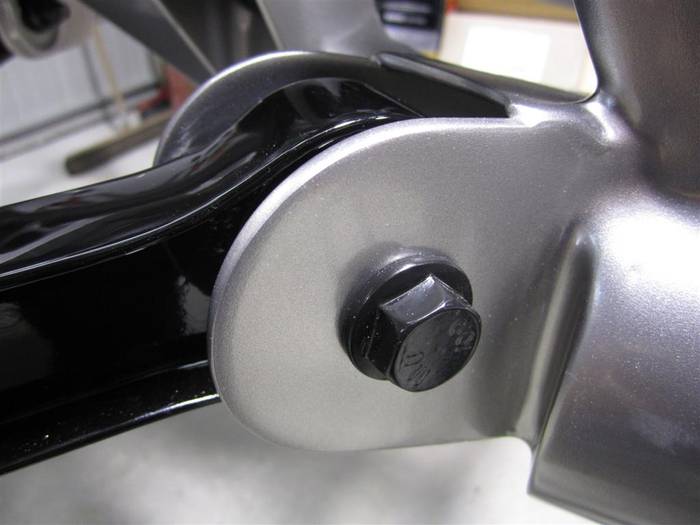
Diffs in, but there is some fowling with the tailshaft mount interfering on the handbrake cable mount, not sure what the issue there is yet but minor prob.
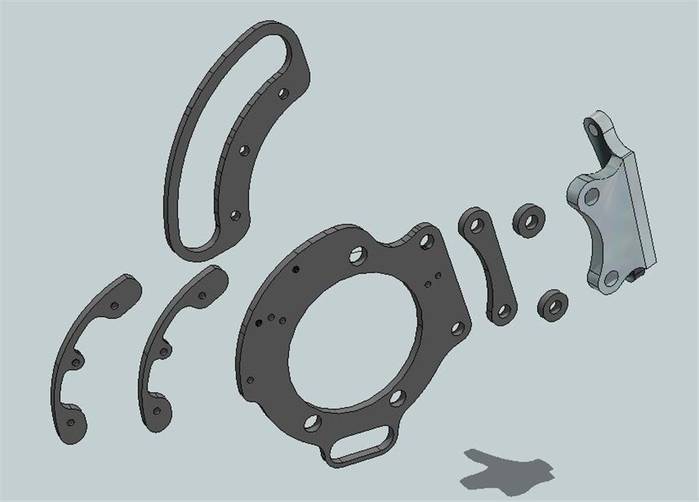
When i get back I'll assemble the halfshafts and finish off the custom caliper mounts i've created for the back brakes.
Due to the size of the caliper mounting bosses on the rear VE knuckles, no after market calipers will fit with less than a 350 mm rear disc, far to big for the 17" rims, I've toiled over this for months using cad to try and make things fit, and the only solution i can come up with is to machine of the mount and make a new caliper mount.
Some pics of the design below, welcome any thoughts...
I've trialled up a sample to suit and will fit Ford Territory rear discs (328x26) to move the disc in a further 5mm for caliper wheel clearance.
The territory RR handbrake is same as VE.
Cant thank the guys at DBA and RaceBrakes in Melb, unbelievable advise and assistance.
When i get back home, i'll take some pics of prototypes i made and stick them up for a gander.

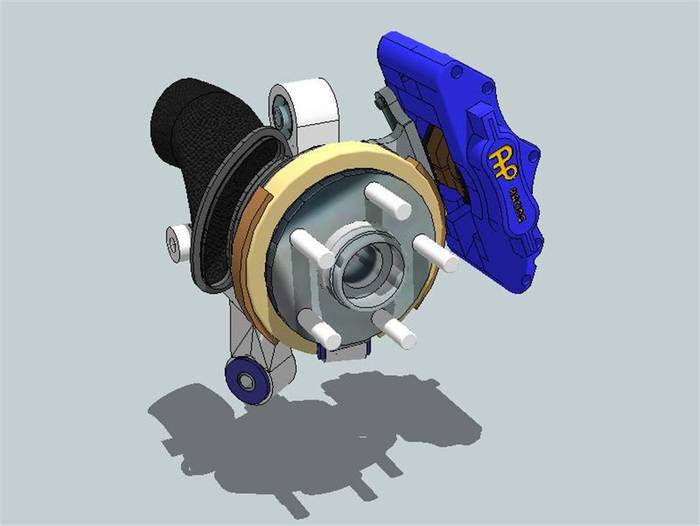
The bits i need to finish making, including the rear disc spigot to suit larger Ford disc center.

Hope to catch up with some of you at the Nats.
Dave
Last edited by DaveW; 09-03-2011 at 04:15 AM..
Reason: error
|

09-03-2011, 07:15 AM
|
 |
CC Member

|
|
|
Join Date: Feb 2002
Location: Alice Springs, central Australia,
NT
Cobra Make, Engine: Classic revival kit (CR3181), gen III engine, T56 6 speed box, AU XR8 lsd diff
Posts: 5,699
|
|

 Not Ranked
The chassis is looking fantastic Dave.
The CAD drawing also look great.
Look forward to saying Hi at the Nationals.
__________________

Cruising in 5th

---------------------------------------------
Never be afraid to do something new, Remember, Amateurs built the Ark: Professionals built the Titanic.
|

09-03-2011, 05:10 PM
|
 |
CC Member

|
|
|
Join Date: Apr 2008
Location: Melbourne,
VIC
Cobra Make, Engine: Classic Revival CR 3505, LS1, T56 6 Speed, VE 3.45 LSD Rear, 6 Spot AP Fronts, 4 Spot Wilwood Rears
Posts: 1,121
|
|

 Not Ranked
Hi Dave, Boy that chassis looks great, you wont wnat to put the body back on it. ONe suggestion I thought of whilst you are doing things to the chassis is you may want to think now about where you will stamp the VIN no. I stamped mine on the front cross brack, but it was very difficult given they are round tubes. And I have to sand it down first to get a good imprint. I hate you have to do that to your nicely painted one. Food for thought. Some people stamp the VIN onto a plate and wled it onto the chassis. Have fun Looks Great. rgds Gregg
|

09-03-2011, 05:48 PM
|
 |
CC Member

|
|
|
Join Date: Jan 2009
Location: Tynong North, Melbourne,,
Vic
Cobra Make, Engine: Classic Revival CR3514, LS3, Dual Quads, Holley Dominator EFI, TR6060, VE 3.7 LSD, AP Racing Brakes, 17x8 & 10 Custom Dragway Billet Wheels.
Posts: 601
|
|

 Not Ranked
Greg, excellent thought, I hadn't considered where to stamp
I'll weld on a plate for future stamping.
|

09-03-2011, 10:34 PM
|
 |
CC Member

|
|
|
Join Date: Apr 2006
Location: Mildura,
vic
Cobra Make, Engine: FFR Coupe, 416ci of LS goodness
Posts: 2,349
|
|

 Not Ranked
Nice work Dave, looks fantastic.
__________________
Powered by Cu
|

09-04-2011, 02:09 AM
|
 |
CC Member

|
|
|
Join Date: Jul 2004
Cobra Make, Engine: 347 Stroker Morrison Injection. Registered.
Posts: 1,440
|
|

 Not Ranked
That chassis looks fantastic. At first glance I thought Ian had learnt to weld properly, then I saw a close up and realized the work you've done, and only one word can describe it, "UNBELIEVABLE". The new chassis is really going to set the car of when you open the bonnet or put it up on your hoist. I can't believe Ian is responsible for that design.
Boxhead's right about using some braces to save the body, these are a couple of pic's of the braces I made to stop the body from cracking. I used them right through the build until the body went on for the last time.
Seeing your car makes me want to start again!


Regards.
__________________
Mando
|
 Posting Rules
|
You may not post new threads
You may not post replies
You may not post attachments
You may not edit your posts
HTML code is Off
|
|
|
All times are GMT -7. The time now is 01:56 PM.
|
|




 Linear Mode


