Welcome to Club Cobra! The World's largest
non biased Shelby Cobra related site!
- » Representation from nearly all
Cobra/Daytona/GT40 manufacturers
- » Help from all over the world for your
questions
- » Build logs for you and all members
- » Blogs
- » Image Gallery
- » Many thousands of members and nearly 1
million posts!
YES! I want to register an account for free right now!
p.s.: For registered members this ad will NOT show
 
 Main Menu
|
 Nevada Classics
|
 Advertise at CC
|
 January 2025
|
| S |
M |
T |
W |
T |
F |
S |
| |
|
|
1 |
2 |
3 |
4 |
| 5 |
6 |
7 |
8 |
9 |
10 |
11 |
| 12 |
13 |
14 |
15 |
16 |
17 |
18 |
| 19 |
20 |
21 |
22 |
23 |
24 |
25 |
| 26 |
27 |
28 |
29 |
30 |
31 |
|
|
 CC Advertisers
|
|
 13Likes 13Likes

06-16-2014, 03:40 AM
|
 |
CC Member

|
|
|
Join Date: Mar 2014
Location: Perth,
W.A
Cobra Make, Engine: FFR, GT FPV 5.4L 290kw Boss
Posts: 179
|
|

 Not Ranked

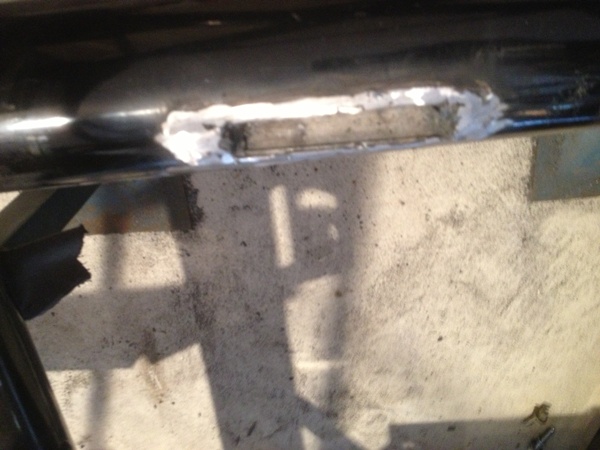
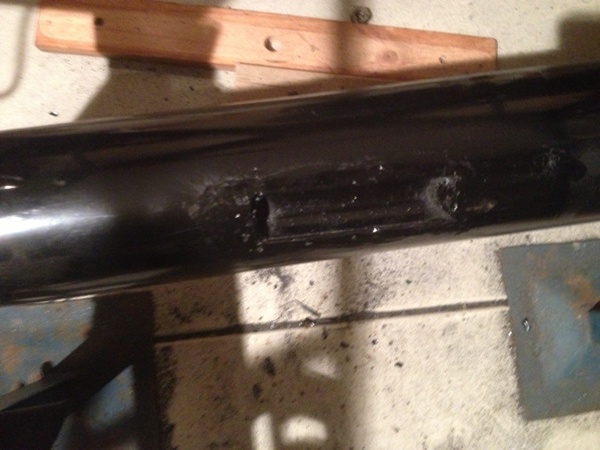
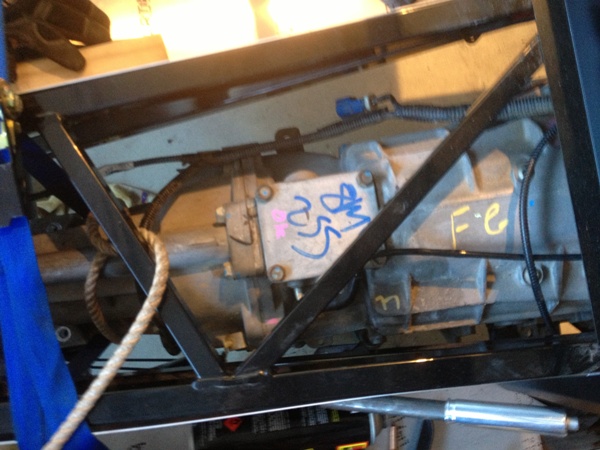
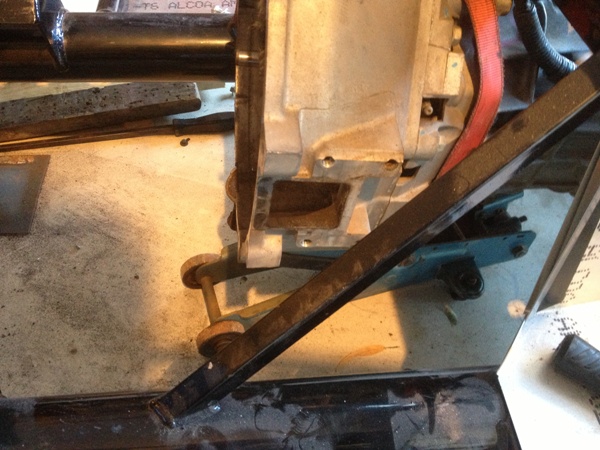
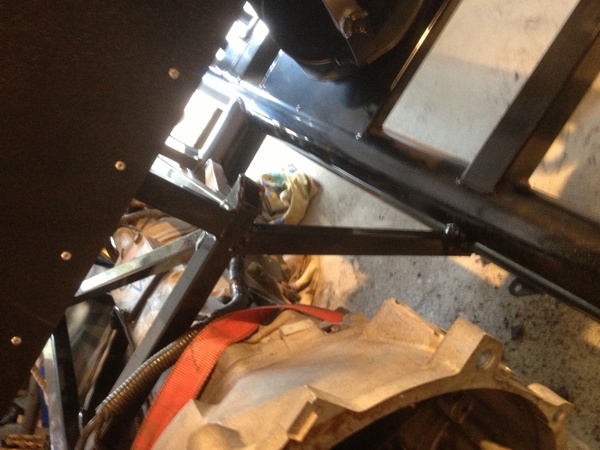
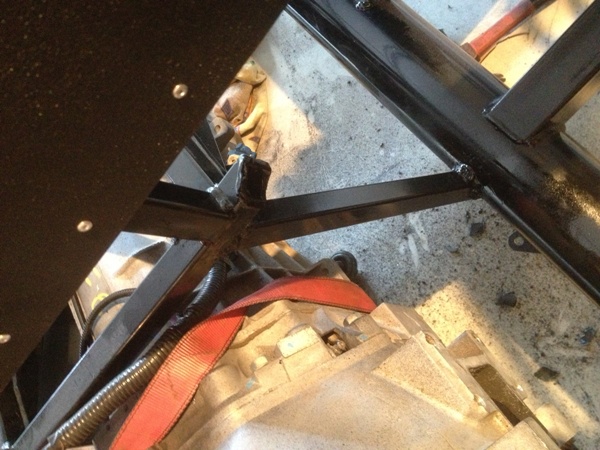
Well been crazy busy with family visits and such but finally got back into today by dropping the body on to see where the motor was going to sit. Unfortunately it was sitting too high because the intake was pushing the bonnet up by an inch or so out with plasma cutter and mig and managed to drop it by the required amount and still left about 4mm clearance on the harmonic balance thus far. And now that's where the real fun began starting with the gearbox, I mounted the box outside the car and then proceeded to drop it in as one unit (But) the box is so damn long I couldn't get it up on the rear crossmember and clear the tunnel/firewall and to top it off the OHC's were hitting on the front body support rail.
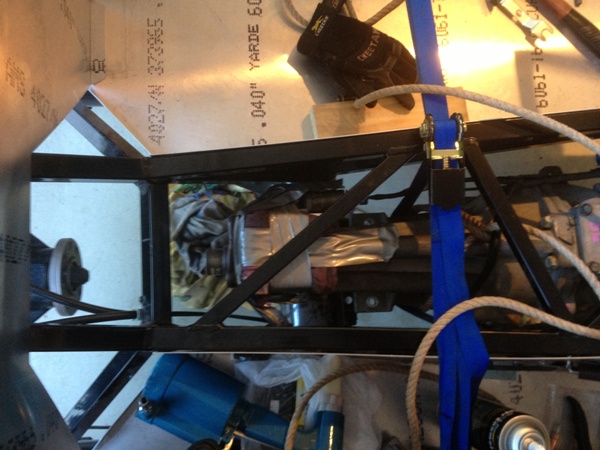
So messed about for several hours trying alternative solutions but came up short or should I dare say long Lol. So separated the gearbox and shoved that up into position strapped it up dropped the motor back on the floor shut the shed door went and sat down and just cracked a can because tomorrow is another day. 

|
-
Advertising


06-17-2014, 02:47 AM
|
 |
CC Member

|
|
|
Join Date: Mar 2014
Location: Perth,
W.A
Cobra Make, Engine: FFR, GT FPV 5.4L 290kw Boss
Posts: 179
|
|

 Not Ranked
|

06-17-2014, 07:19 AM
|
 |
CC Member

|
|
|
Join Date: Jul 2010
Location: Perth,
WA
Cobra Make, Engine: FFR Mk4 Roadster, LS3, TR6060, 8 3/4"
Posts: 432
|
|

 Not Ranked
Hi Psycho,
just to throw it out there, I have a LS3 and a TR6060 and I was no where near having to notch the front cross member. Are you sure you do not have the motor too far forwards? And I was able to install these already bolted together. I put the gearbox support in after the gearbox was in position.
__________________
Tim
FFR Mk4 Roadster
HSV Clubsport R8
|

06-17-2014, 07:43 AM
|
 |
CC Member

|
|
|
Join Date: Jan 2001
Location: Sunbury,
VIC
Cobra Make, Engine: Rat Rod Racer, LS1 & T56
Posts: 5,391
|
|

 Not Ranked
Could you have got away with a smaller under drive harmonic balancer? The one I put on my LS1 is about 1.5" smaller than the original.
Cheers
__________________
Mike Murphy
Melbourne Australia
|

06-17-2014, 12:16 PM
|
|
CC Member

|
|
|
Join Date: Jan 2005
Location: Hillsboro,
OR
Cobra Make, Engine: Scratch built CSX style frame, Carbon fiber body, 393 Stroker, T-bird IRS, T5
Posts: 1,623
|
|

 Not Ranked
I'm pretty sure the FF5 kits weren't really engineered to handle the 5.4 engine due to the extra width.
I'll be interested to see how you install the steering bits, headers, and the footbox so you still have room to use the pedals.
Lots of pics would be helpful for many guys wanting to use the 5.4 powerplant but haven't gotten over these hurdles yet....
Bob
|

06-17-2014, 03:43 PM
|
 |
CC Member

|
|
|
Join Date: Mar 2005
Location: Perth,
wa
Cobra Make, Engine: Pace Alumina 427 #69
Posts: 1,615
|
|

 Not Ranked
Im pretty sure you need 10mm clearence to a rotating part
__________________
RF12 414 Windsor 8 stack ,6spd, Avons
|

06-17-2014, 06:33 PM
|
 |
CC Member

|
|
|
Join Date: Mar 2014
Location: Perth,
W.A
Cobra Make, Engine: FFR, GT FPV 5.4L 290kw Boss
Posts: 179
|
|

 Not Ranked
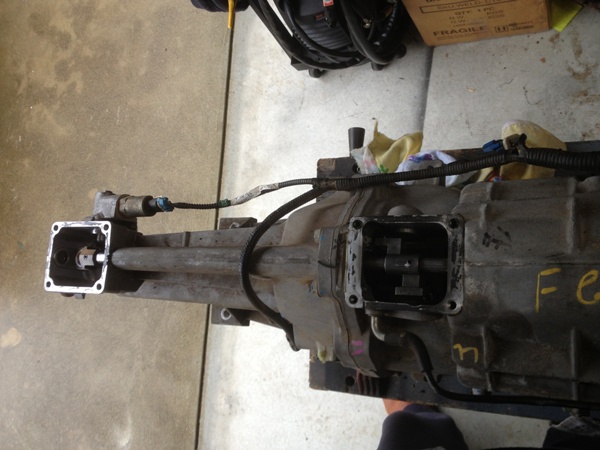
Jethrow no the motor isn't too far forward it's just the size difference between ford and Chev donks and the TR6060 is out of a FG so the rear extension is ridiculously long, when I refer to the gearbox and the rear crossmember in my previous post it's not the mount its the structural cross beam I haven't even mounted the the gearbox mounts.
Mike I did consider that option but as the crossmember is so large I thought it would be easier to notch it than try and remove the the pulley in the end I think AlbanyCobra sums it up the best you need 10mm clearance all round the motor.
Thanks for the feedback fellas I really appreciate your thoughts and opinions
Regards Psycho
|

06-17-2014, 07:01 PM
|
 |
CC Member

|
|
|
Join Date: Mar 2014
Location: Perth,
W.A
Cobra Make, Engine: FFR, GT FPV 5.4L 290kw Boss
Posts: 179
|
|

 Not Ranked
Bob you are right with the size of the 5.4l yes I have had to slightly modify the foot box and even the pedal box I have spaced the motor back over to the left hand side as the US push it couple of inches to the right hand side, the steering is not so much of an issue with out the headers fitted but may have to change once i start to fabricate them I have a few pics in my albums and a lot more still on my phone, once I get more time I will upload those mods 
Regards Psycho |

06-18-2014, 12:09 AM
|
 |
CC Member

|
|
|
Join Date: Aug 2013
Location: redcliffe,
qld
Cobra Make, Engine: Kirkham 427SC 482 Cammer
Posts: 700
|
|

 Not Ranked
Quote:
Originally Posted by PSYCHO

the TR6060 is out of a FG so the rear extension is ridiculously long, when I refer to the gearbox and the rear crossmember in my previous post it's not the mount its the structural cross beam I haven't even mounted the the gearbox mounts.
Regards Psycho
|
Why not change the rear housing on the box to T56 and move the engine back. This would make your weight exchange a lot better and reduce understeer from having the weight transferred backwards a bit. This would also assist with gear shifter position. |

06-18-2014, 12:31 AM
|
 |
CC Member

|
|
|
Join Date: Jan 2001
Location: Sunbury,
VIC
Cobra Make, Engine: Rat Rod Racer, LS1 & T56
Posts: 5,391
|
|

 Not Ranked
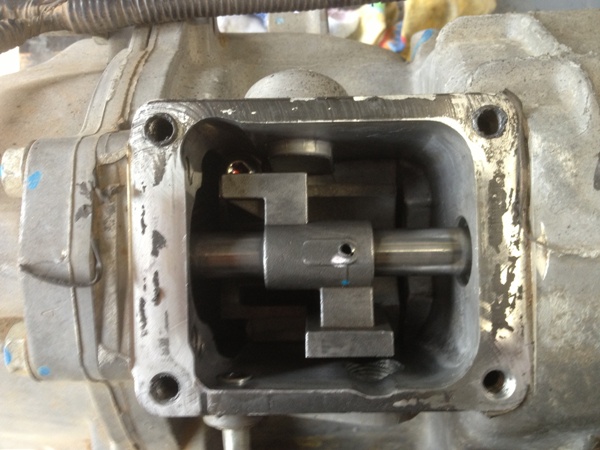
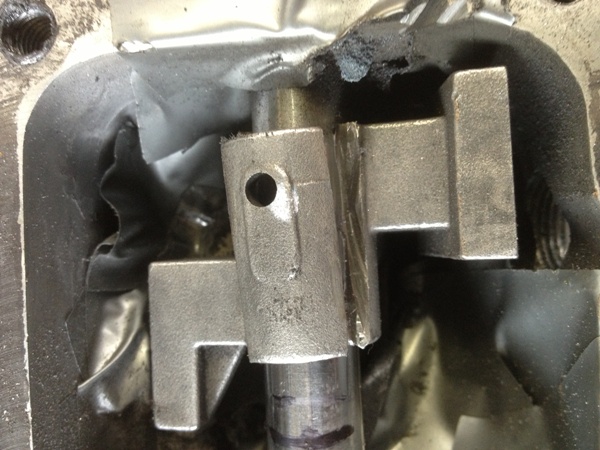
You could probably swap to the main shaft and extension housing from a GM T56 for a shorter box. Most of the parts are interchangeable in the T56 box.
Cheers
__________________
Mike Murphy
Melbourne Australia
|

06-18-2014, 04:15 AM
|
 |
CC Member

|
|
|
Join Date: Mar 2014
Location: Perth,
W.A
Cobra Make, Engine: FFR, GT FPV 5.4L 290kw Boss
Posts: 179
|
|

 Not Ranked
|

06-18-2014, 05:31 AM
|
 |
CC Member

|
|
|
Join Date: Mar 2004
Location: Warwick,
Qld
Cobra Make, Engine: DRB, FORD 302W,T5
Posts: 487
|
|

 Not Ranked
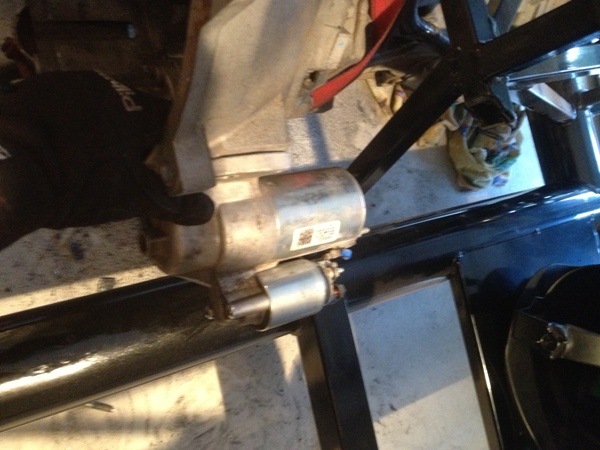
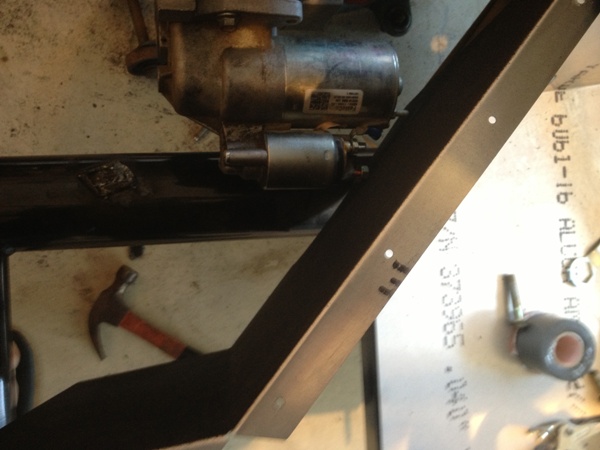
There is another bell housing with the starter tucked up under the block where they used to be -- if thats any help.
The one you have is the "Aston Martin" version go for the "American " version -- apparently
|

06-18-2014, 08:14 AM
|
 |
CC Member

|
|
|
Join Date: Jan 2002
Location: Melbourne, Australia,
VIC
Cobra Make, Engine: AP Pace427 (AP4033) GM L77 6.0L TR6060
Posts: 838
|
|

 Not Ranked
Quote:
Originally Posted by PSYCHO

|
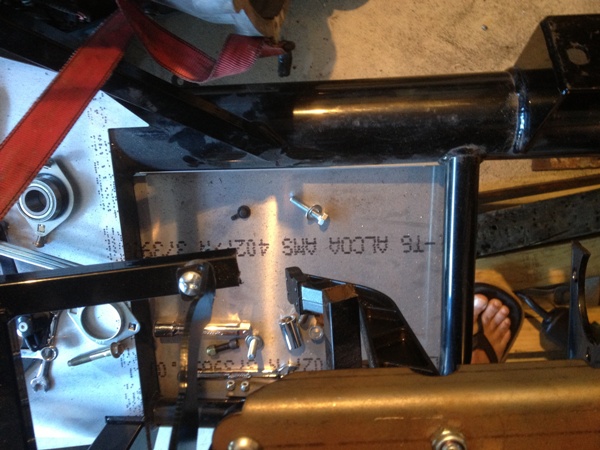
Love the steel caps footwear psycho!

__________________
Guy
Cobra Progress guye-cobra.blogspot.com
|

06-18-2014, 07:18 PM
|
 |
CC Member

|
|
|
Join Date: Mar 2014
Location: Perth,
W.A
Cobra Make, Engine: FFR, GT FPV 5.4L 290kw Boss
Posts: 179
|
|

 Not Ranked
|

06-18-2014, 07:54 PM
|
 |
CC Member

|
|
|
Join Date: Jan 2001
Location: Sunbury,
VIC
Cobra Make, Engine: Rat Rod Racer, LS1 & T56
Posts: 5,391
|
|

 Not Ranked
Chinese Safety boots. I spent a lot of time working in China back in the 90's. So many building sites I saw where guys just wear shorts and flip flops and they are welding or wiring up reo, pouring concrete etc. Ouch!
__________________
Mike Murphy
Melbourne Australia
|

06-25-2014, 04:08 AM
|
 |
CC Member

|
|
|
Join Date: Mar 2014
Location: Perth,
W.A
Cobra Make, Engine: FFR, GT FPV 5.4L 290kw Boss
Posts: 179
|
|

 Not Ranked
|

06-26-2014, 02:35 AM
|
 |
CC Member

|
|
|
Join Date: Jun 2013
Location: Cairns,
qld
Cobra Make, Engine: Drb, 302 Comp cam, Cobra Nationals 2001 and 2002
Posts: 206
|
|

 Not Ranked
Keep the pictures coming. Its looking good. What is your opinion on the kit overall?
Ian
|

06-26-2014, 03:04 AM
|
 |
CC Member

|
|
|
Join Date: Mar 2014
Location: Perth,
W.A
Cobra Make, Engine: FFR, GT FPV 5.4L 290kw Boss
Posts: 179
|
|

 Not Ranked
Thanks Ian,
The kit is very comprehensive and would be very easy to complete if you stay with in FFR's parameters BUT as we all know everybody is different and customising to ones own taste is what keeps us all individuals and very busy lol. Wow that sounded a little deep heheheh
Thanks mate
Regards Psycho
|

07-06-2014, 04:45 AM
|
 |
CC Member

|
|
|
Join Date: Mar 2014
Location: Perth,
W.A
Cobra Make, Engine: FFR, GT FPV 5.4L 290kw Boss
Posts: 179
|
|

 Not Ranked
|

07-06-2014, 04:49 AM
|
 |
CC Member

|
|
|
Join Date: Oct 2008
Location: Perth,
WA
Cobra Make, Engine: G-Force Mk1, LS1, T56, Jag S3 suspension
Posts: 587
|
|

 Not Ranked
Looks great! I'm bring mine over to you...
|
 Posting Rules
|
You may not post new threads
You may not post replies
You may not post attachments
You may not edit your posts
HTML code is Off
|
|
|
All times are GMT -7. The time now is 12:22 PM.
|
|


 13Likes












 Linear Mode


