Welcome to Club Cobra! The World's largest
non biased Shelby Cobra related site!
- » Representation from nearly all
Cobra/Daytona/GT40 manufacturers
- » Help from all over the world for your
questions
- » Build logs for you and all members
- » Blogs
- » Image Gallery
- » Many thousands of members and nearly 1
million posts!
YES! I want to register an account for free right now!
p.s.: For registered members this ad will NOT show
 
 Main Menu
|
 Nevada Classics
|
 Advertise at CC
|
 December 2024
|
| S |
M |
T |
W |
T |
F |
S |
| 1 |
2 |
3 |
4 |
5 |
6 |
7 |
| 8 |
9 |
10 |
11 |
12 |
13 |
14 |
| 15 |
16 |
17 |
18 |
19 |
20 |
21 |
| 22 |
23 |
24 |
25 |
26 |
27 |
28 |
| 29 |
30 |
31 |
|
|
|
|
|
 CC Advertisers
|
|
 250Likes 250Likes

05-06-2016, 12:26 AM
|
 |
CC Member

|
|
|
Join Date: Feb 2002
Location: Alice Springs, central Australia,
NT
Cobra Make, Engine: Classic revival kit (CR3181), gen III engine, T56 6 speed box, AU XR8 lsd diff
Posts: 5,699
|
|

 Not Ranked
Jeebus Mike.
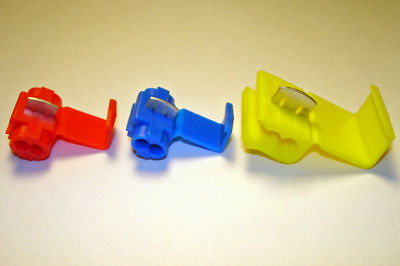
I thought I did a pro job when I bought a couple hundred colour coded ones of these.
__________________
Cruising in 5th

---------------------------------------------
Never be afraid to do something new, Remember, Amateurs built the Ark: Professionals built the Titanic.
|
-
Advertising


05-06-2016, 04:52 AM
|
 |
CC Member

|
|
|
Join Date: Mar 2010
Location: Gold Coast,
QLD
Cobra Make, Engine: Arntz, TKO600, 460
Posts: 818
|
|

 Not Ranked

Quote:
Originally Posted by Aussie Mike

Hi Leigh,
Just on the subject of wiring. I just bought a couple of connector kits off eBay. Pretty impressed with the quality. The connector kit comes with the crimp tool to suit. The connectors have silicon seals to keep dust and moisture out. They look very OEM and in fact one of the kits I bought is the connectors used in Harley Davidson motorcycles.
I bought This kit and the pins are rated to 7.5A per pin.
Deutsch DTM Connector Kit
I also bought this kit which has larger pins rated to 13A per pin.
Deutsch DT Connector
The project I'm currently working on is cleaning up the engine loom and the rest of the wiring. I originally used those cheap Narva plastic multi spade connectors as that was all that was readily available. I'll keep you posted on how these work out.
Cheers |
Thanks Mike for the heads up on these, I didn't even know these existed, and great connectors for many items. Nothing like awesome connectors to be hidden in places so it looks like that are no wires anywhere.

|

05-06-2016, 04:56 AM
|
 |
CC Member

|
|
|
Join Date: Mar 2010
Location: Gold Coast,
QLD
Cobra Make, Engine: Arntz, TKO600, 460
Posts: 818
|
|

 Not Ranked
Quote:
Originally Posted by boxhead

Jeebus Mike.
I thought I did a pro job when I bought a couple hundred colour coded ones of these.
 |
Dave, that is the style what I presumed I would be using, but the force is strong and leading me in a different path. |

05-06-2016, 06:15 AM
|
 |
CC Member

|
|
|
Join Date: Jul 2013
Location: South Bend,
In
Cobra Make, Engine: B & B 289
Posts: 197
|
|

 Not Ranked
 electrical connectors
FYI, a couple of years ago I bought a rebuilt salvage car that had an engine fire. The body shop that did the repair used this type of connectors to repair the harness. After a year or so I started to have electrical problems, every one of which was related to these connectors corroding or otherwise going bad. Eventually I had the whole harness replaced after spending beaucoup time and money troubleshooting various intermittent electrical gremlins. Since then I have never used these, solder and shrink tube is now my connection of choice.
|

05-06-2016, 06:36 AM
|
 |
CC Member

|
|
|
Join Date: Jan 2001
Location: Sunbury,
VIC
Cobra Make, Engine: Rat Rod Racer, LS1 & T56
Posts: 5,391
|
|

 Not Ranked
Quote:
Originally Posted by leroy17

Thanks Mike for the heads up on these, I didn't even know these existed, and great connectors for many items. Nothing like awesome connectors to be hidden in places so it looks like that are no wires anywhere.
|
I only found them recently myself when I went looking for Delphi connectors.
Cheers
__________________
Mike Murphy
Melbourne Australia
|

05-06-2016, 04:44 PM
|
 |
CC Member

|
|
|
Join Date: Sep 2010
Location: redcliffe,
qld
Cobra Make, Engine: venom motorsports /ls1 auto
Posts: 500
|
|

 Not Ranked
aren't they only to connect trailer plugs to your harness heheh !!
__________________
not all your babies are your children
|

05-09-2016, 09:24 PM
|
 |
CC Member

|
|
|
Join Date: Sep 2004
Location: Canberra,
ACT
Cobra Make, Engine: G-Force Cobra '68 302, T-5, Jag 3.77 LSD.
Posts: 993
|
|

 Not Ranked
They are great for attaching your chuck key to your drill cable with a bit of electrical wire.
__________________
SLIPRY
|

09-23-2016, 04:02 PM
|
 |
CC Member

|
|
|
Join Date: Mar 2010
Location: Gold Coast,
QLD
Cobra Make, Engine: Arntz, TKO600, 460
Posts: 818
|
|

 Not Ranked

Well it has been a long time between updates and to be honest most of the progress has been checking, cutting, grinding, checking, measuring, reading, learning and so on.
So, originally I was working on a quick restoration and I have since learned another lesson on not presuming all was ok first. The front subframe was blasted and powder coated and rebuilt. When installing and checking alignment, the 50x50 box tube mounts were not straight and did not sit flush with the chassis mount. Also now the car had been lowered considerably the LCA angles were 'off'.
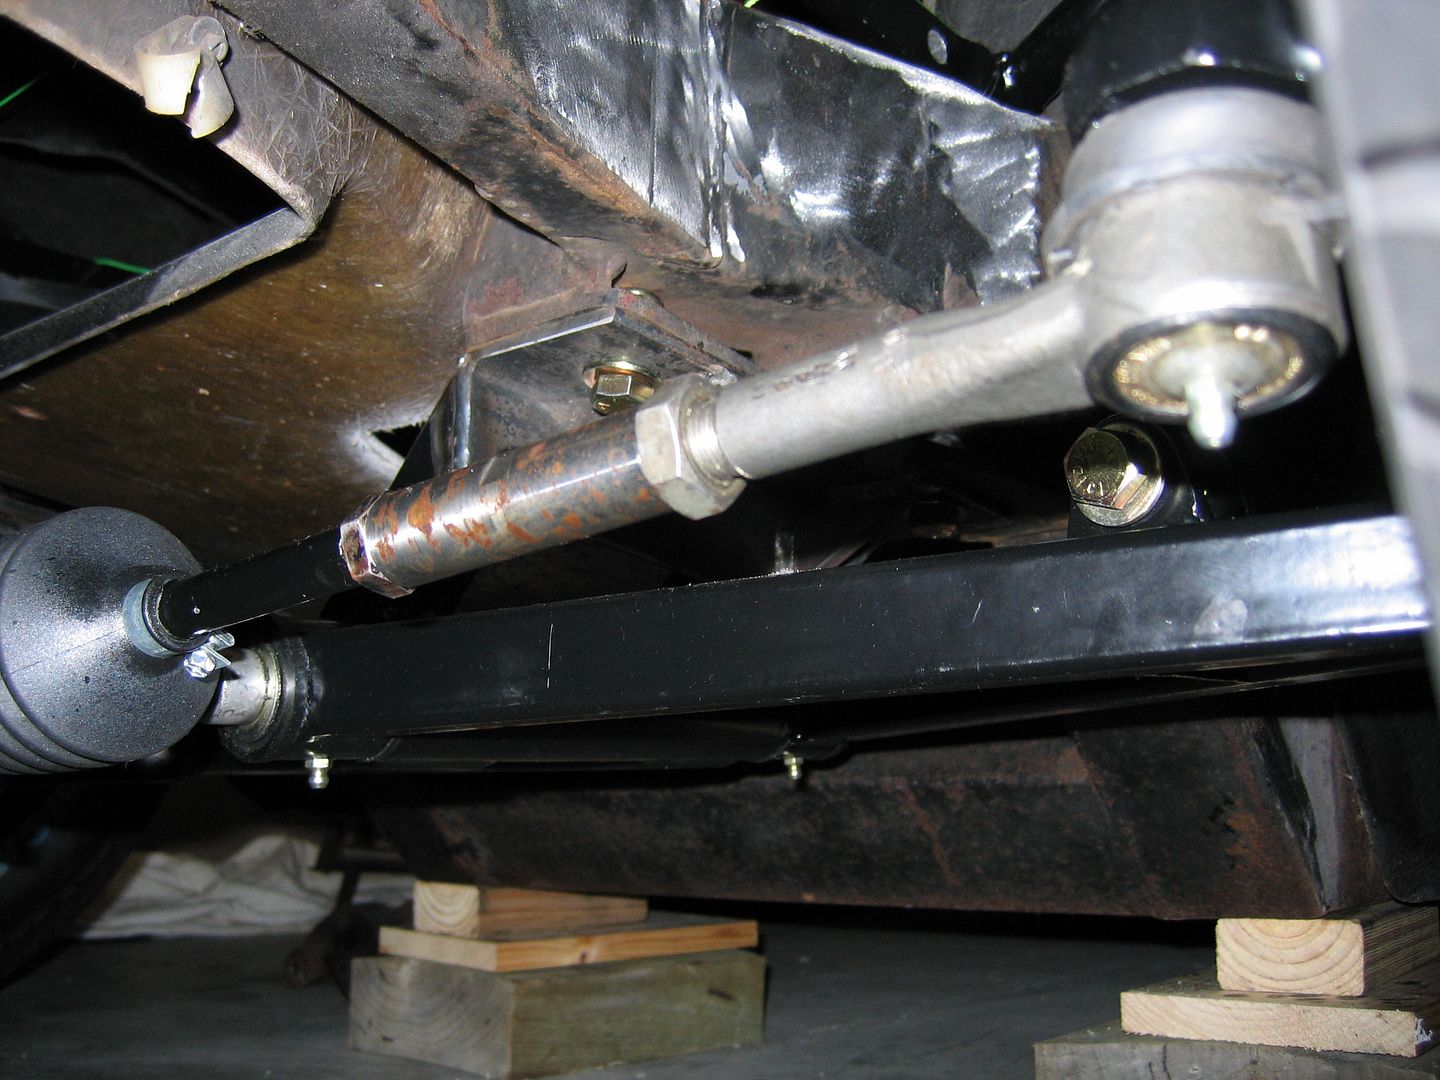
So, these were cut off , angle construction steel and braces made and welded on at nearly 50mm lower. This essentially lifted the steering rack and corrected the LCA angle and provided better clearance underneath. Will be cleaned up and re-coated once all alignment is confirmed right as I may bring forward a little for increased caster.
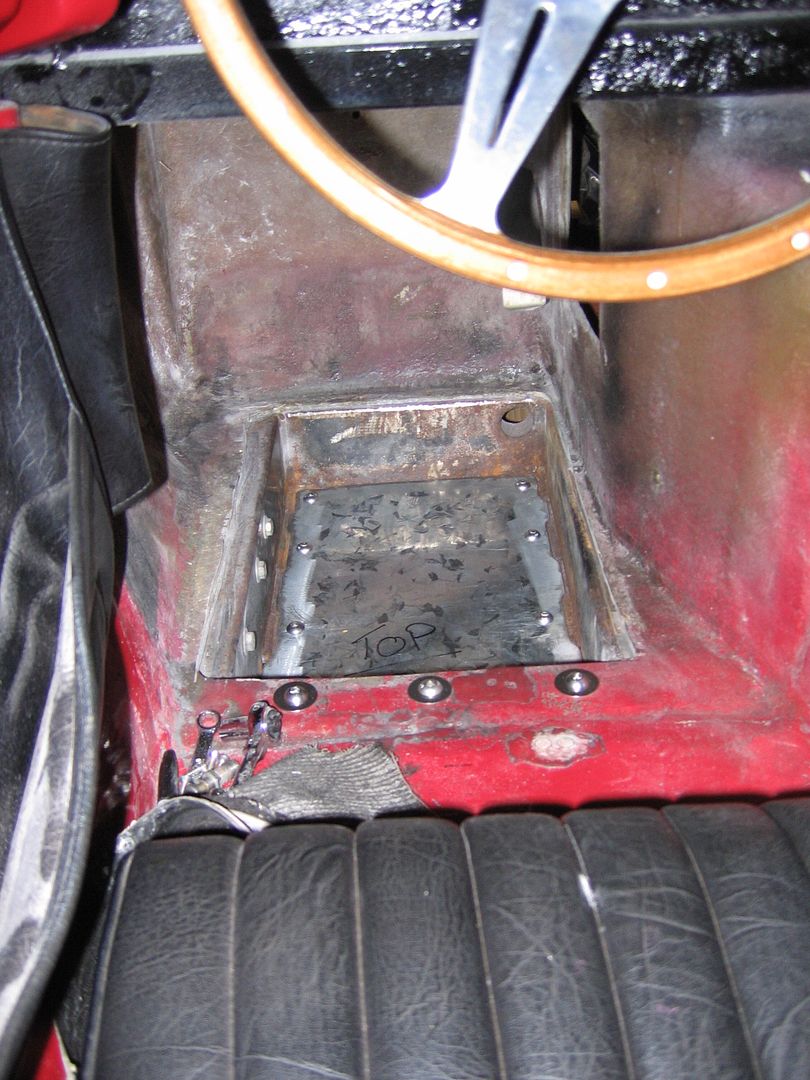
Next up was making a drop floor base that bolts in to where original mounts were for the adjustable pedal box. The floor has dropped by 105mm, plenty more foot room and the base has a 60degree angle at the back (not a squared off drop) to join the original floor underneath. For final fitting, this will be sealed and floor covering trimmed so all smooth under foot.
And finally on this update is the correction of the roll bar. This was originally mounted to the main chassis on brackets that were vertical, these were both mounted in the boot (for simplicity I would say).To me, this just looked wrong, it was to far back and to far to the center of the car as well as being to tall at nearly 16.5 inches above the body. Problem is that there is no other location to mount these as there is nothing else but empty space.
First up was to cut all the previous mounts off the rollbar, mounts and the leg mount as well but retain using the original bar which is a 12 inch centered 1.75 inch 3mm thick (bar and leg) and clean up to prepare for welding.
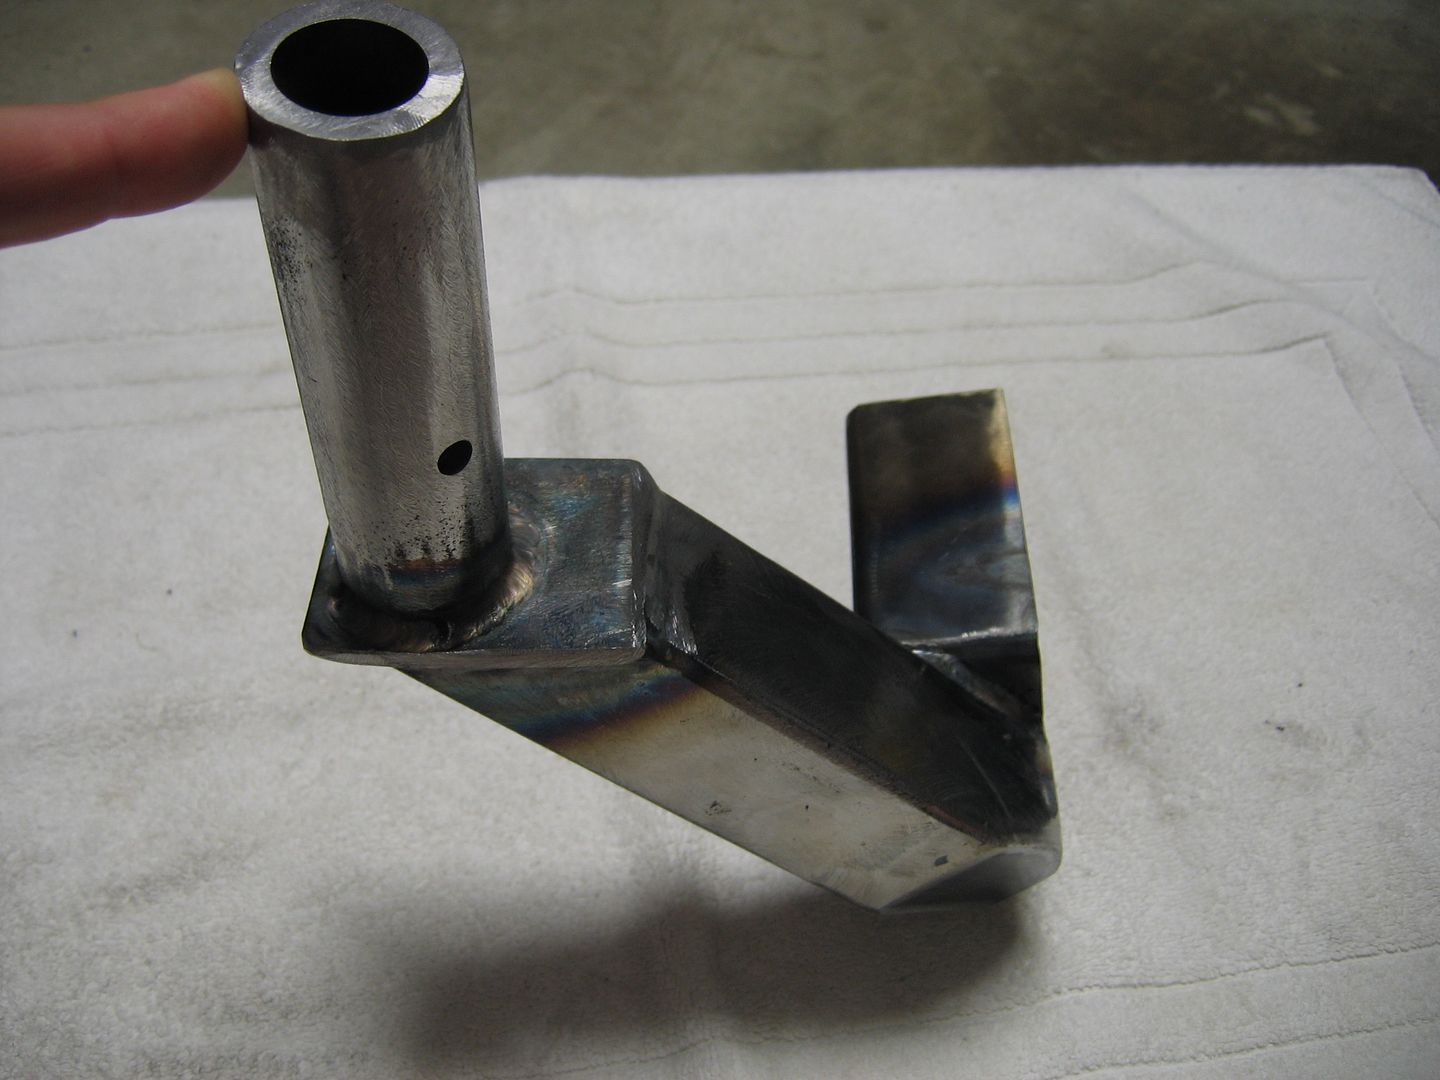
Now, I have been trying to use as much as possible any of the original mounts and material as I could from the original car in keeping with restoration and that it has been with the car for 35 years as well. So, with the outer rollbar mount I retained the original mount and mounting holes in the chassis, however made an extension that goes outward and forward. This was actually used with part of the subframe mount box tube cut off. This now comes up through the wheel well and there is plenty of clearance to the wheel and the mount securely boltsto the chassis in three locations and joints on three faces on the chassis. The inner mount was again retained with making an extension that goes forward, this has been braced and also bolts to the chassis using a mount that the body brace mounts to. So this actually slips over a chassis rail, bolted in two places and the side bolts to the perpendicular chassis rail. Overall it appears that this will be plenty strong and I never plan on testing this anyway.
The rear leg was changed to suit the new angles and the mount goes back to the chassis mount on the boot floor. This was in the original position and is a solid well made mount so there was no need to change this.
Now I know that the original cars did not have rollbar centered with the seat and steering wheel, however this is just how it worked with the mounts as the inner arch and boot (trunk) were in the way.
Hope that the pics makes sense of the about blurb.
Subframe new mount plate and brace.
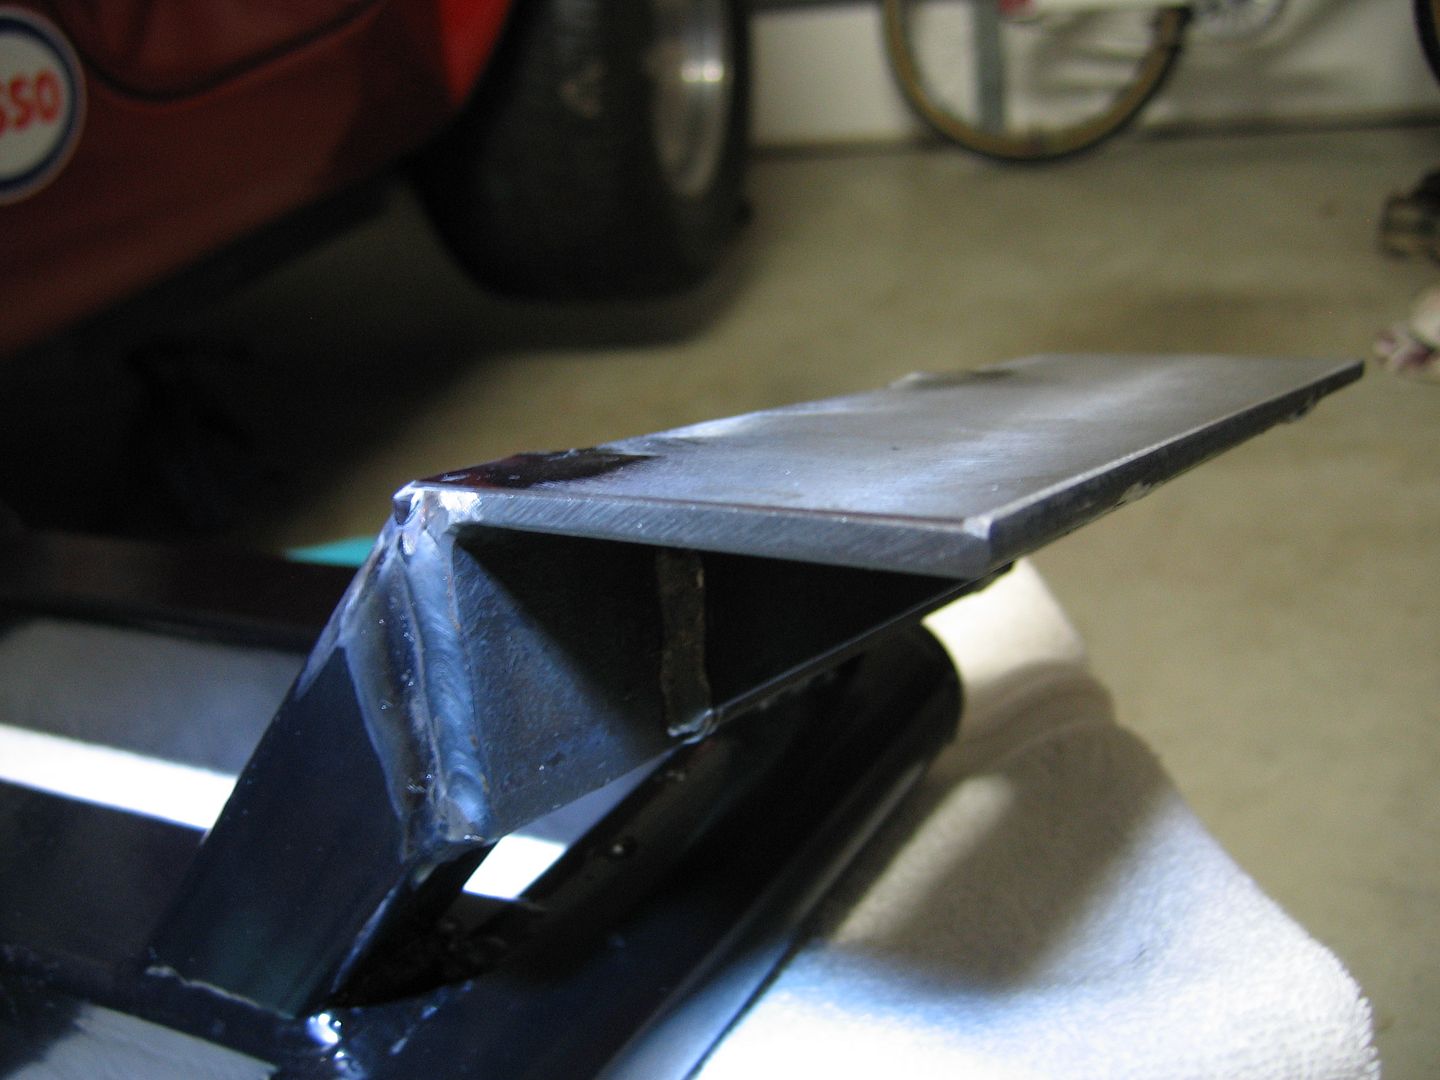

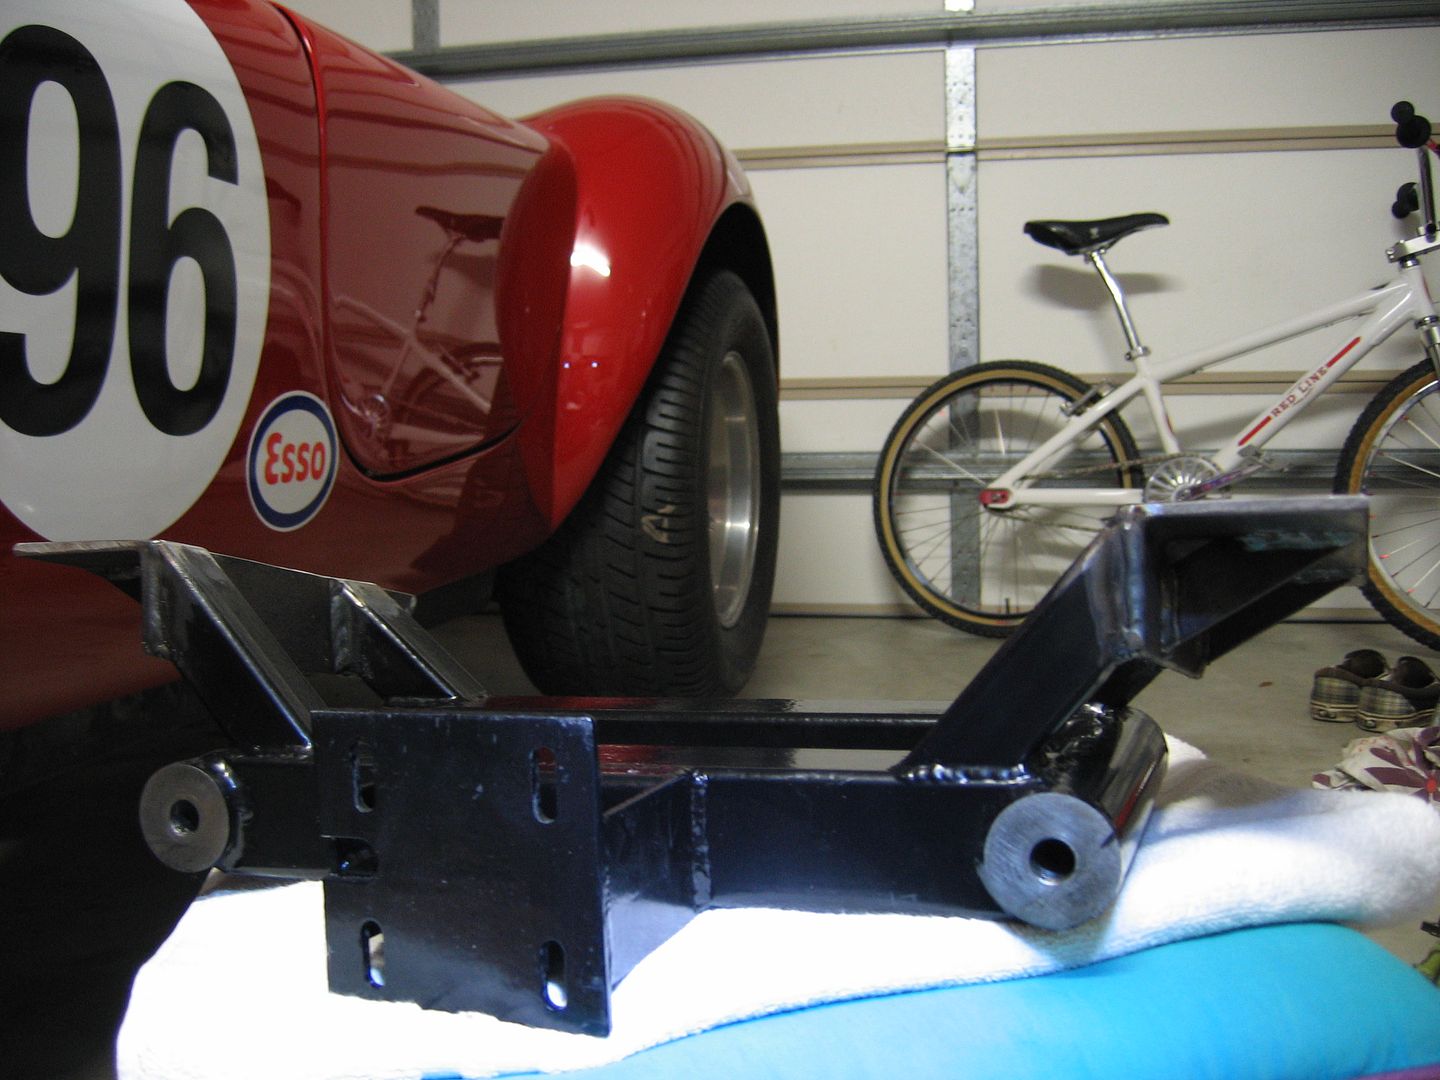
Underneath front, the timber blocks are there to support chassis which sits evenly all round, sure it looks back yard, but it works with exactly 133mm clearance.
Drop floor plate.
Roll bar mount outer.
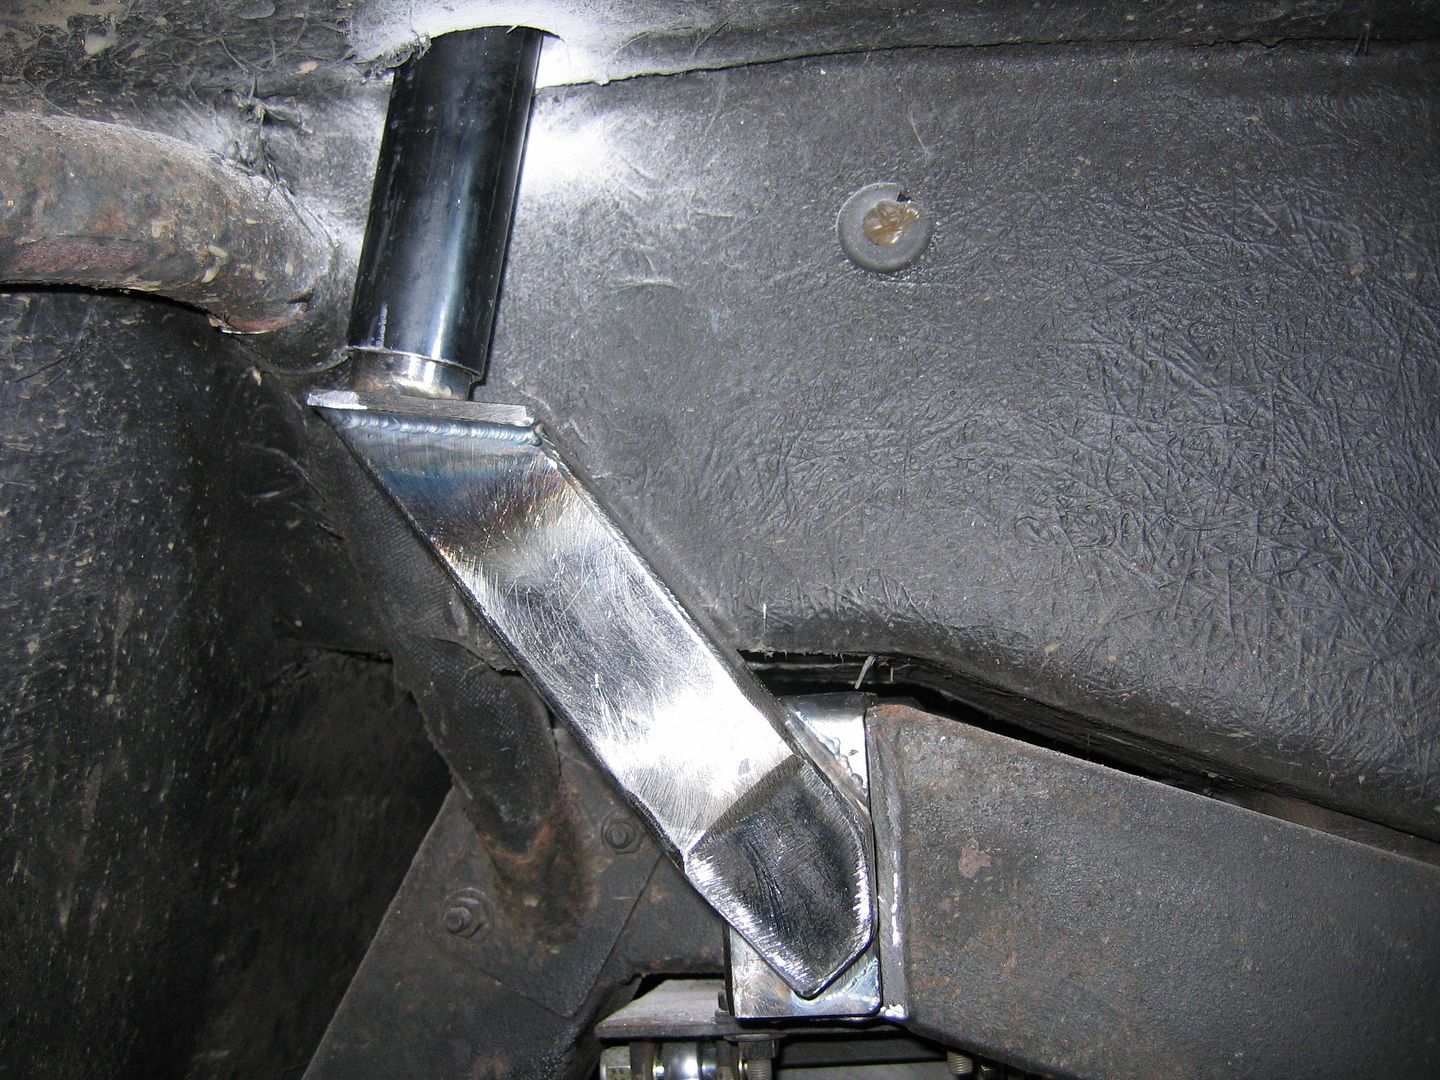

Rollbar mount inner.
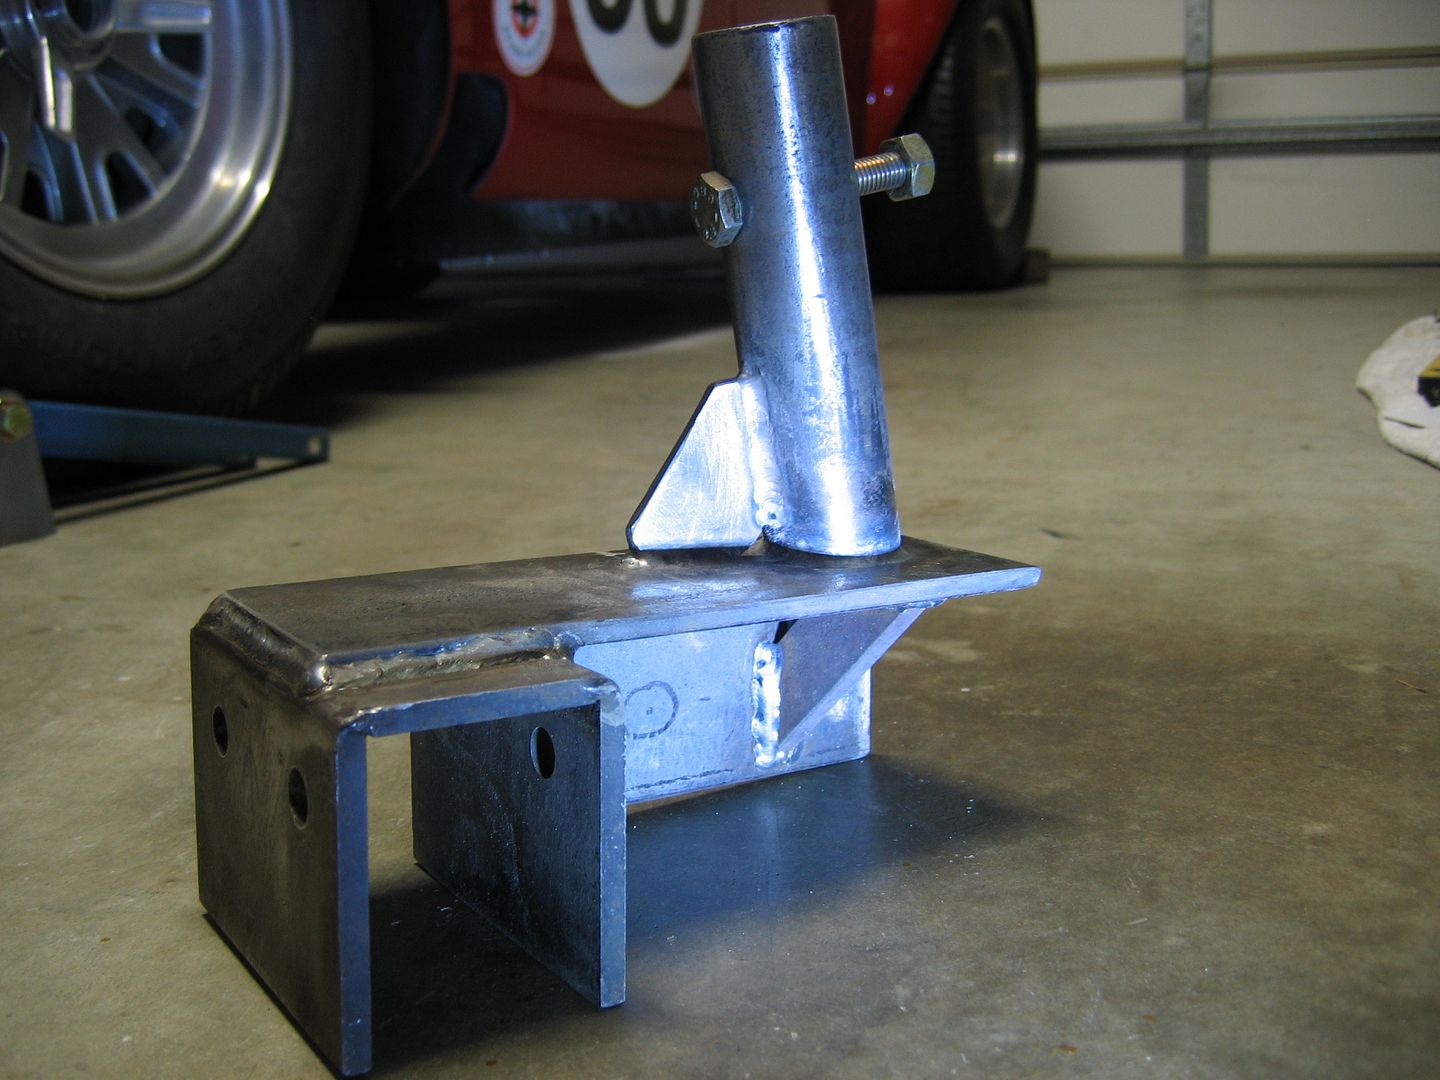
Rear leg, not welded yet, mock up. This is sleaved at the top and will have a threaded bolt mount, more pics on this once finished.

This shows how much the bar was moved, and yes the holes will be filled and painted.
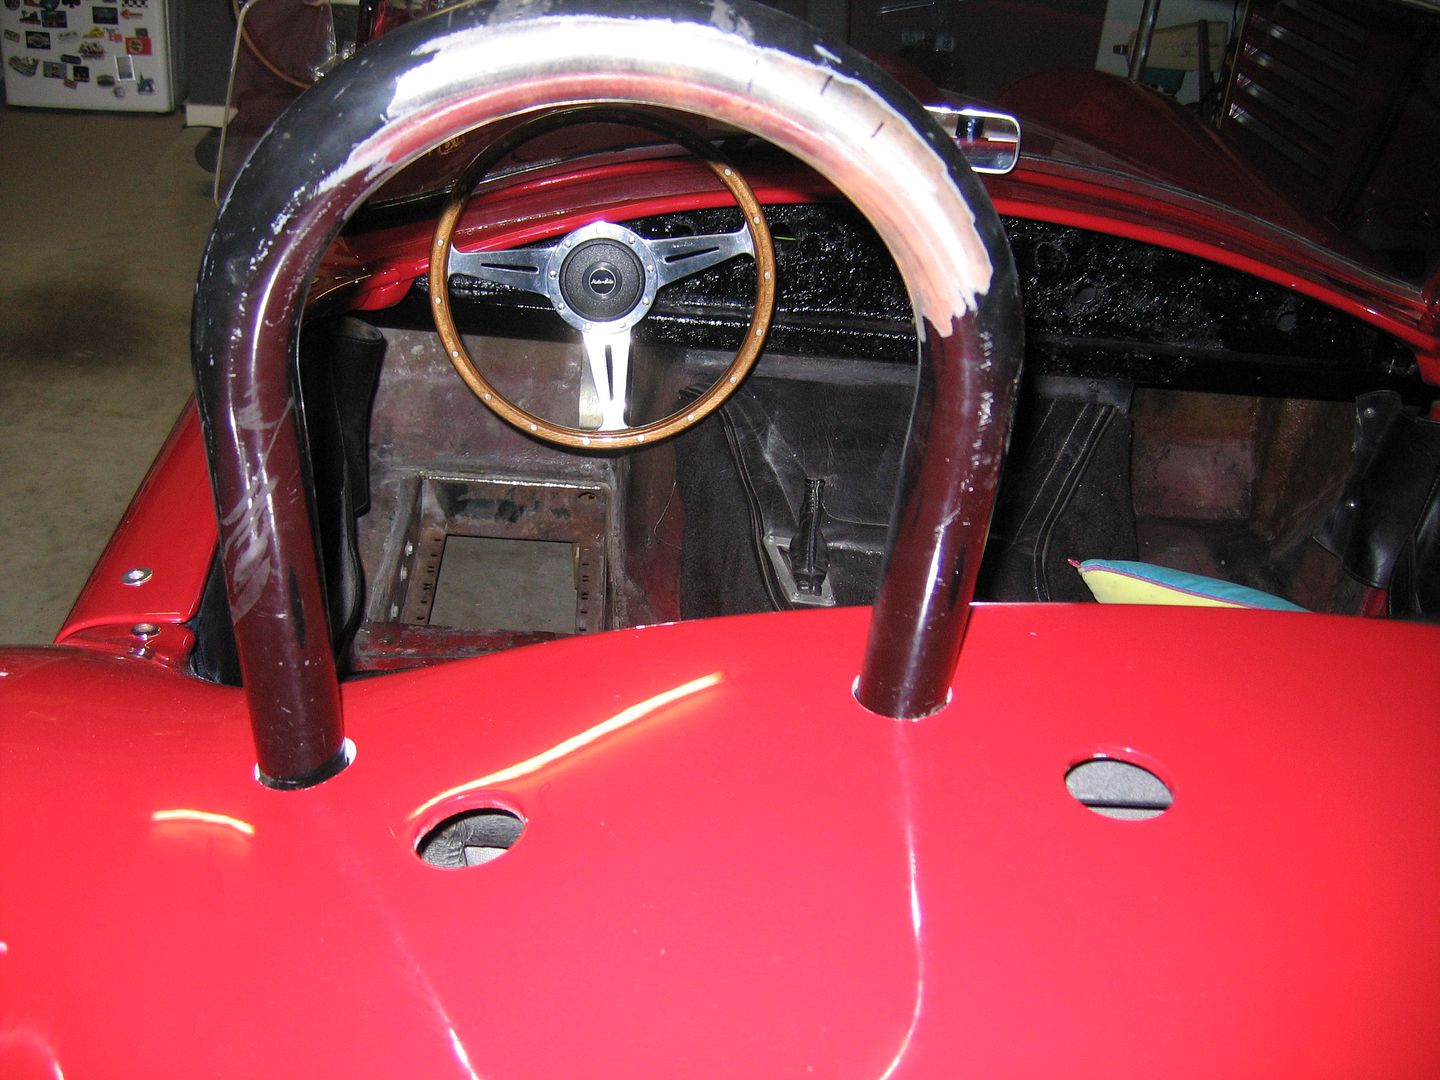
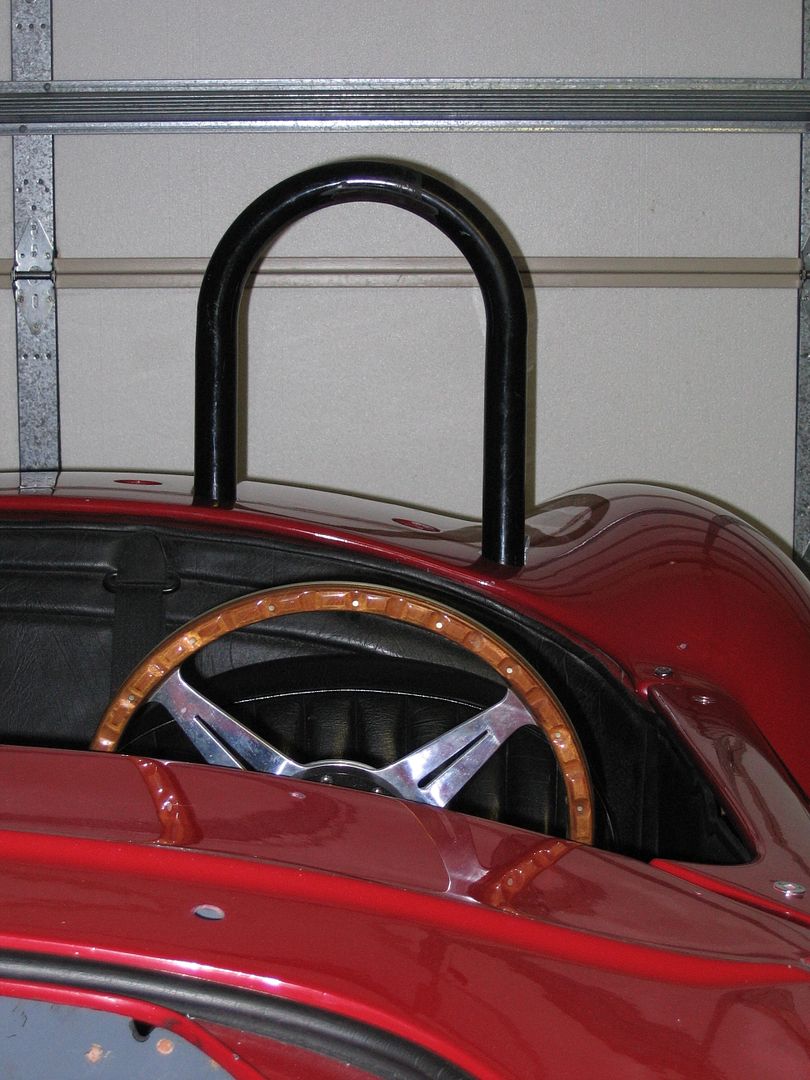
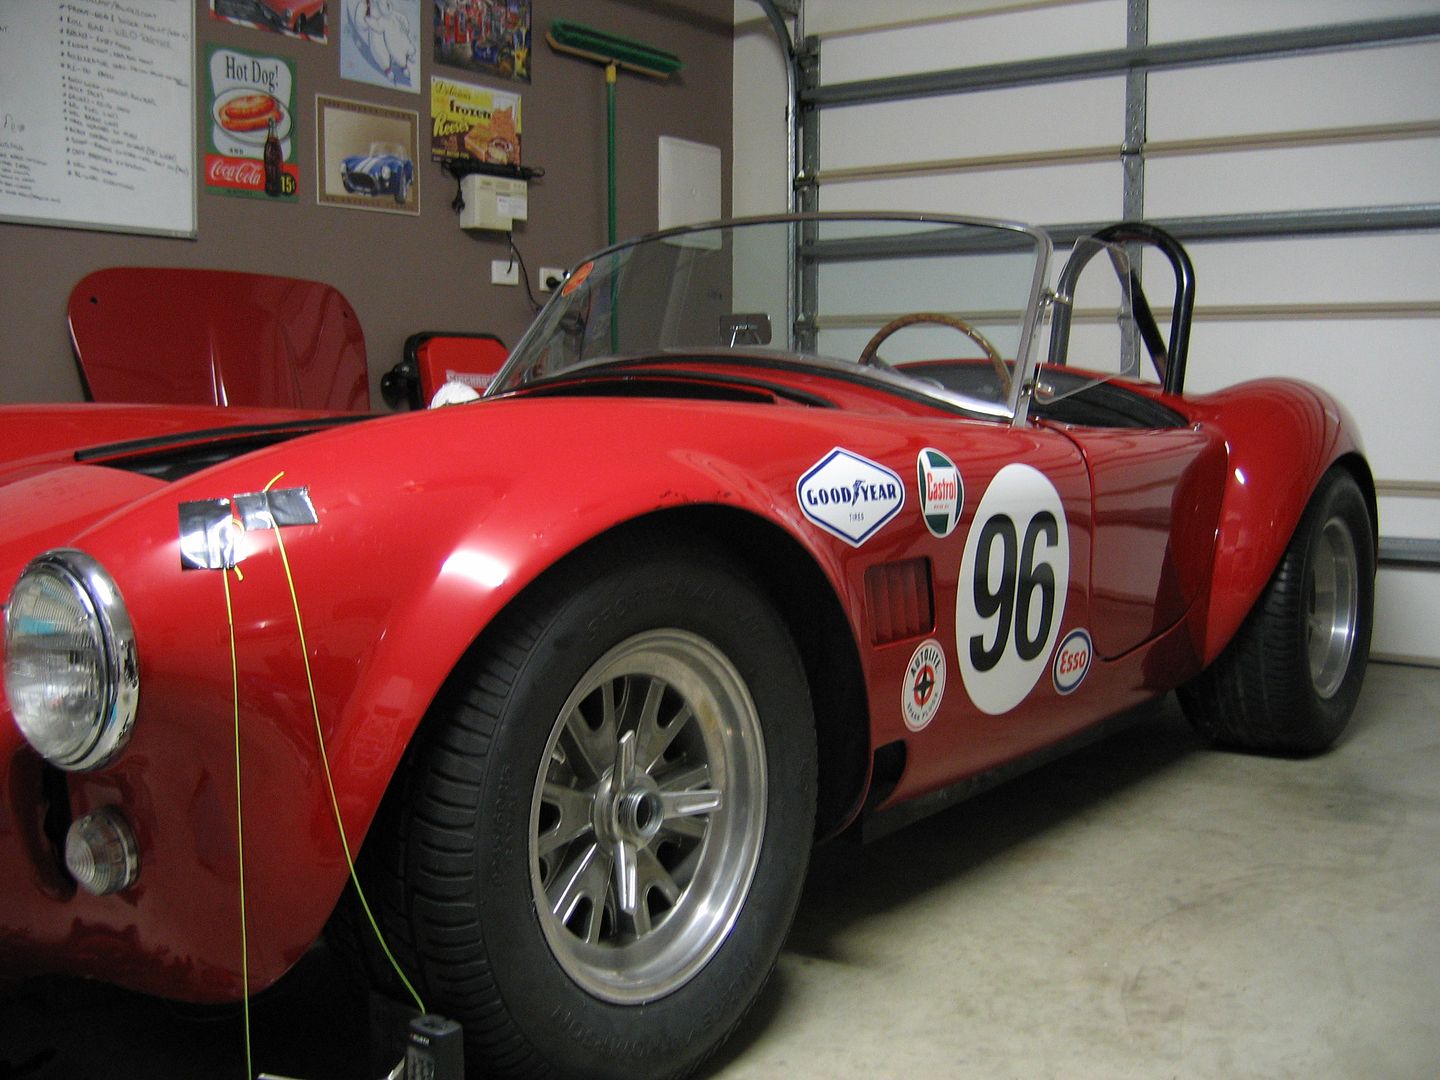
Roll bar now sits at 12.5 inch above body (measured at center) with a 10.5 degree lean back (rather than previous vertical). When seated my head will comfortably be below the rollbar.
Last edited by leroy17; 09-23-2016 at 04:30 PM..
|

09-23-2016, 04:19 PM
|
 |
CC Member

|
|
|
Join Date: Sep 2010
Location: redcliffe,
qld
Cobra Make, Engine: venom motorsports /ls1 auto
Posts: 500
|
|

 Not Ranked
looks like a new paint job is on the list now liegh
__________________
not all your babies are your children
|

09-26-2016, 01:32 PM
|
 |
CC Member

|
|
|
Join Date: Mar 2010
Location: Gold Coast,
QLD
Cobra Make, Engine: Arntz, TKO600, 460
Posts: 818
|
|

 Not Ranked
Quote:
Originally Posted by renovationinnov

looks like a new paint job is on the list now liegh
|
Not necessarily Rob. Remember, this is just a quick tidy up and refresh.
I can absolutely, positively, without question say that there is a chance that this may not be repainted.
. |

09-27-2016, 01:44 AM
|
 |
CC Member

|
|
|
Join Date: Sep 2010
Location: redcliffe,
qld
Cobra Make, Engine: venom motorsports /ls1 auto
Posts: 500
|
|

 Not Ranked
do tell how are you going to hide the old roll bar holes
as I cant think how
pm sent
__________________
not all your babies are your children
|

10-10-2016, 06:14 AM
|
 |
CC Member

|
|
|
Join Date: Mar 2010
Location: Gold Coast,
QLD
Cobra Make, Engine: Arntz, TKO600, 460
Posts: 818
|
|

 Not Ranked

So, like with everything, each change or modification leads to a change in something else which usually has to be addressed.
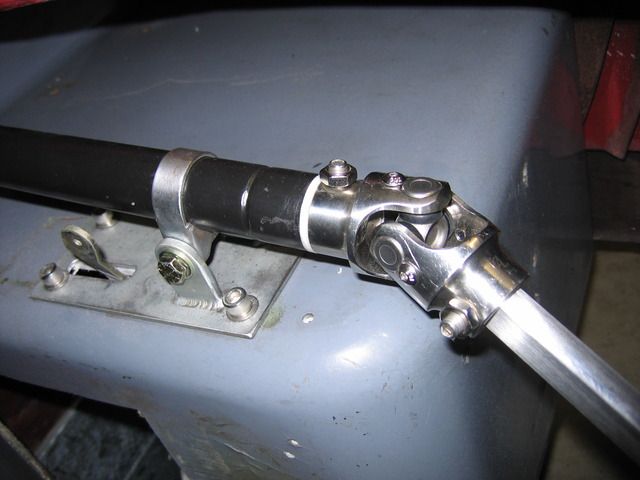
With the lifting of the front subframe the steering rack is now in a more desirable position in the quest to reduce/eliminate bump steer. Also I moved the steering column approx 50 mm closer to the dash which has created more cabin arm room. Therefore now I have a requirement for a shorter intermediate shaft.
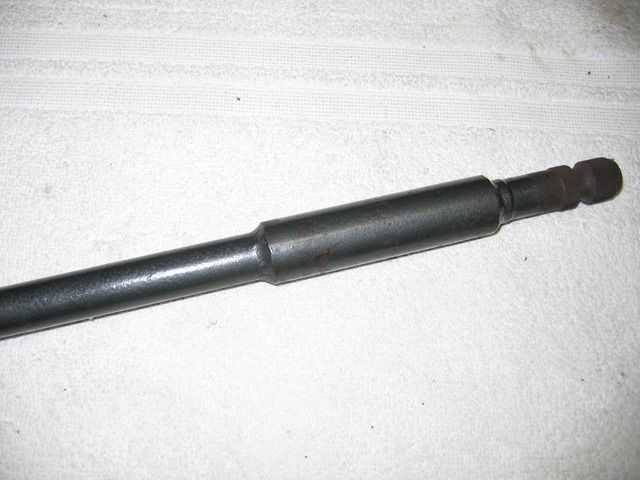
This leads me to replace something that I was not really at one with. The intermediate shaft has a uni welded to one end and was cut and sleeved at the other end to get the right length. So, out goes the intermediate shaft and both unis. New unis which were a perfect tight fit to the pinion (which is new) and a new one piece double D intermediate shaft. The end of the steering was machined down to remove the beaten splines and have a perfect fit into the DD uni. This was shortened with a self-lubricating shim made to go between the uni and the column housing. This keeps the bushing at the end of the column clean, eliminated any play and no risk of metal to metal contact.
Now at this stage, steering set up sorted.
Old column end to be shortened and DD machined.
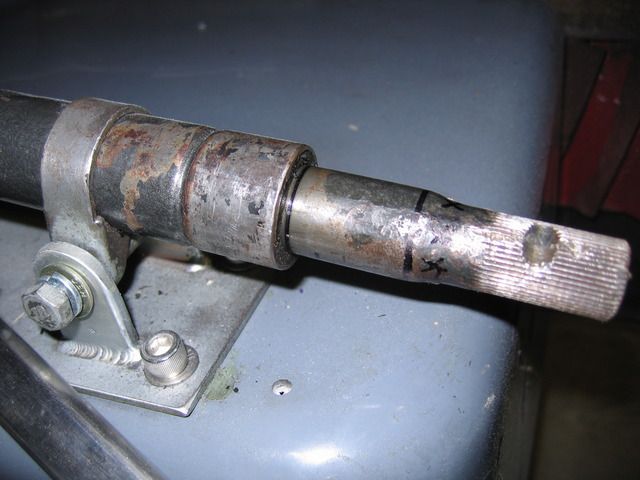
Old intermediate shaft (sleeved).
This was to be the replacement uni, however with the worn splines, no matter how tight it was, there was still some play. The retailer was kind enough to take this back with full refund as no longer suits my purpose.
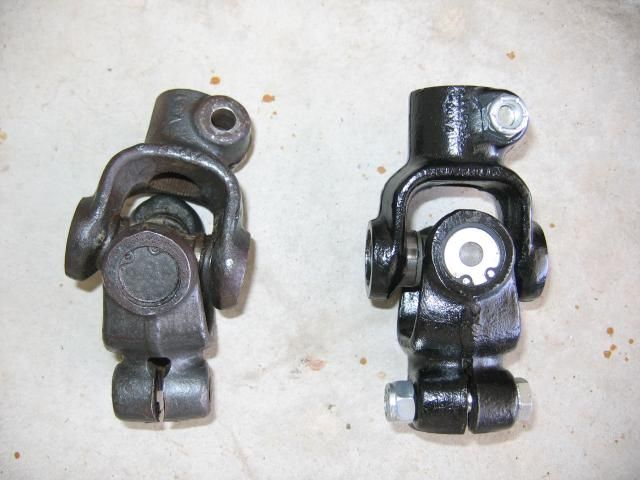
New uni (same as used in Pace 427, see, I have an easy build just like the Pace guys.)
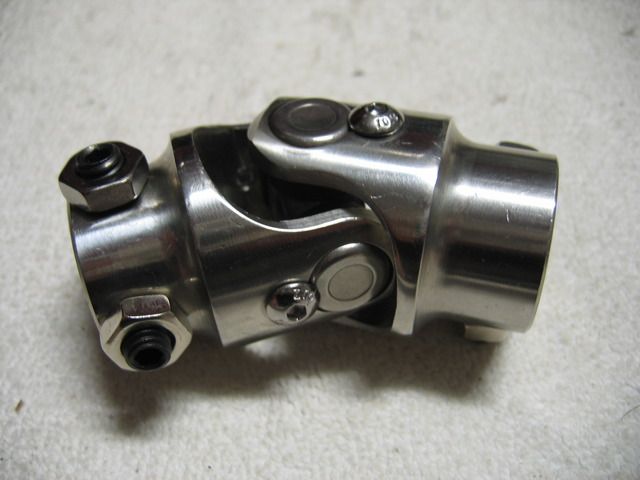
Finished with clean up, paint, machining, shim (white thing between uni and column housing), uni and DD intermediate shaft.
Last edited by leroy17; 10-10-2016 at 06:28 AM..
|

10-10-2016, 07:45 AM
|
 |
CC Member

|
|
|
Join Date: Mar 2005
Location: Perth,
wa
Cobra Make, Engine: Pace Alumina 427 #69
Posts: 1,615
|
|

 Not Ranked
I like your thinking, i have some welded steering components in my GT40, i really dont like them I need to get them out.
__________________
RF12 414 Windsor 8 stack ,6spd, Avons
|

04-27-2017, 01:28 AM
|
 |
CC Member

|
|
|
Join Date: Jan 2001
Location: Sunbury,
VIC
Cobra Make, Engine: Rat Rod Racer, LS1 & T56
Posts: 5,391
|
|

 Not Ranked
How's the rebuild going Leroy, Haven't seen an update for a while.
Cheers
__________________
Mike Murphy
Melbourne Australia
|

04-27-2017, 03:12 PM
|
 |
CC Member

|
|
|
Join Date: Mar 2010
Location: Gold Coast,
QLD
Cobra Make, Engine: Arntz, TKO600, 460
Posts: 818
|
|

 Not Ranked
Hey Mike, you know, I did not realise that it was this long. Life event have side tracked me a little, however I got plenty of pics. Will load some pics and stuff to bore people on the weekend.
Your update has spured me on.
|

04-27-2017, 04:47 PM
|
 |
CC Member

|
|
|
Join Date: Nov 2008
Location: Brisbane Australia. Cobra:Arntz Chev 454,
Posts: 847
|
|

 Not Ranked
Quote:
Originally Posted by leroy17

Will load some pics and stuff to bore people on the weekend.
|
Mate seeing photos of the incredible work you're doing on this restoration of a grand old car triggers many thoughts and feelings in me, but boredom sure ain't one of 'em.
__________________
Don.
|

04-27-2017, 05:55 PM
|
 |
CC Member

|
|
|
Join Date: Mar 2010
Location: Gold Coast,
QLD
Cobra Make, Engine: Arntz, TKO600, 460
Posts: 818
|
|

 Not Ranked
Thanks Don,
Well a big step forward is that the car, engine, and gearbox are all in the same room.... so time to get things going again.
Cheers mate.
|

04-27-2017, 06:05 PM
|
 |
CC Member

|
|
|
Join Date: Jan 2001
Location: Sunbury,
VIC
Cobra Make, Engine: Rat Rod Racer, LS1 & T56
Posts: 5,391
|
|

 Not Ranked
Quote:
Originally Posted by leroy17

Thanks Don,
Well a big step forward is that the car, engine, and gearbox are all in the same room.... so time to get things going again.
Cheers mate.
|
Excellent! Looking forward to an update. I've been really enjoying following your rebuild.
Life has a tendency to give you some ups and downs. 2016 was a pretty horrible year for our family. Happy to be moving forward now.
Cheers
__________________
Mike Murphy
Melbourne Australia
|

12-26-2022, 09:43 AM
|
|
CC Member

|
|
|
Join Date: Mar 2012
Cobra Make, Engine:
Posts: 4
|
|

 Not Ranked
I was looking through this thread and recognized my garage, I was the one who sold it to you or your friend who bought it…?
nice to see the car again and your doing a beautiful job bringing her back!
Dennis
Email address: passan74@comcast.net |

02-26-2023, 03:48 AM
|
|
CC Member

|
|
|
Join Date: Mar 2022
Cobra Make, Engine: RCM
Posts: 3
|
|

 Not Ranked
I just read this thread from start to finish. Did you get it finished Leroy17?
|
 Posting Rules
|
You may not post new threads
You may not post replies
You may not post attachments
You may not edit your posts
HTML code is Off
|
|
|
All times are GMT -7. The time now is 05:48 PM.
|
|




 250Likes


 Linear Mode


