 
 Main Menu
|
 Nevada Classics
|
 Advertise at CC
|
| S |
M |
T |
W |
T |
F |
S |
| |
|
|
1 |
2 |
3 |
4 |
| 5 |
6 |
7 |
8 |
9 |
10 |
11 |
| 12 |
13 |
14 |
15 |
16 |
17 |
18 |
| 19 |
20 |
21 |
22 |
23 |
24 |
25 |
| 26 |
27 |
28 |
29 |
30 |
31 |
|
|
 CC Advertisers
|
|
 23Likes 23Likes

05-27-2013, 06:57 PM
|
 |
CC Member

|
|
|
Join Date: Apr 2009
Location: Little Rock area,
AR
Cobra Make, Engine: ERA Street Roadster #782 with 459 cu in FE KC engine, toploader, 3.31
Posts: 4,525
|
|

 Not Ranked
Lippy - back to your question. I believe you are asking about the trunk floor pan which is about 3/16 inch above the fuel tank. I drilled my holes with the tank installed. The bit tagged the tank a few times but nothing more than a peck. Removing the tank would be safer, or an adjustable drill stop collar would work also. But you might look closely - seems like ERA had predrilled most of these holes but since I was having some problem getting the big trunk floor pan to line backup all the way around, I re-drilled some of them.
|

05-27-2013, 07:49 PM
|
|
CC Member

|
|
|
Join Date: Oct 2003
Posts: 4,078
|
|

 Not Ranked
Quote:
Originally Posted by patrickt

You don't happen to have an audio file of your Cobra, do you?
|
A vid.
__________________
Chas.
|

06-03-2013, 04:58 PM
|
|
CC Member

|
|
|
Join Date: Apr 2012
Location: Bay Area (Peninsula),
CA
Cobra Make, Engine: ERA 427, 427/487 side-oiler
Posts: 1,248
|
|

 Not Ranked

I finished the trunk panels, and everything went great. There are some corners in the aluminum where you can see light (they are installed tightly, that's just the design) so I plan to seal some of the corners/joints with aluminum-colored sealer I found at McMaster-Carr. I think I'm officially addicted to McMaster-Carr, BTW.
One small bump in the road - I will install seat heaters and realized after I installed the aluminum interior panels under the doors that I didn't run the seat heater wires under the panels. So I either have to: (1) remove those panels and install the wires underneath, or (2) run the wires alongside, under the carpet. I think I'm going to remove the panels, which involves removing and reinstalling a bunch of rivets and some structural sealing glaze. I just want to be very careful that I don't enlarge the rivet holes so I ordered a punch that is meant to drive out the mandrel stubs (also from McMaster), and then I can carefully drill out the aluminum rivet bodies. Any thoughts or tips would be appreciated.

|

06-03-2013, 05:15 PM
|
 |
Senior Club Cobra Member

|
|
|
Join Date: Feb 2007
Cobra Make, Engine: KMP 539, a Ton of Aluminum
Posts: 9,591
|
|

 Not Ranked
Do you really need heated seats for the SF Bay Area?
If it's too cold for my butt, then it's too cold to get the oil circulating. |

06-03-2013, 05:26 PM
|
|
CC Member

|
|
|
Join Date: Apr 2012
Location: Bay Area (Peninsula),
CA
Cobra Make, Engine: ERA 427, 427/487 side-oiler
Posts: 1,248
|
|

 Not Ranked
Quote:
Originally Posted by RodKnock

Do you really need heated seats for the SF Bay Area?
If it's too cold for my butt, then it's too cold to get the oil circulating. |
No, but this is about want, not need. Heated seats may help on early morning drives to work, and they may also help get my wife into the car. |

06-25-2013, 09:18 PM
|
|
CC Member

|
|
|
Join Date: Apr 2012
Location: Bay Area (Peninsula),
CA
Cobra Make, Engine: ERA 427, 427/487 side-oiler
Posts: 1,248
|
|

 Not Ranked

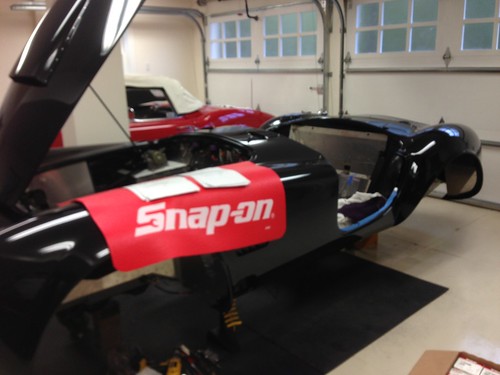
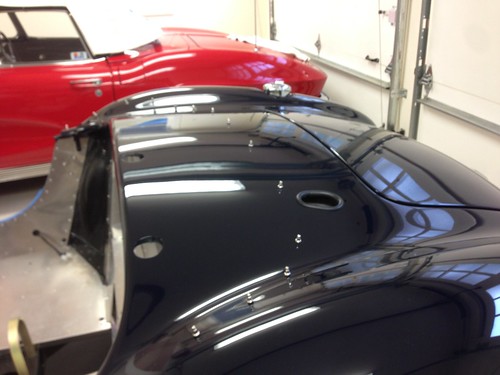
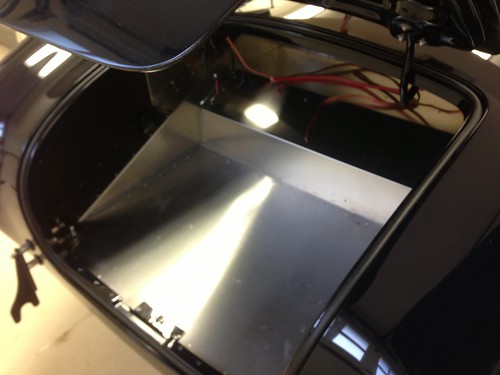
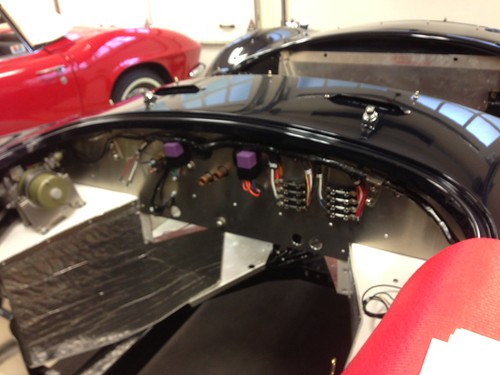
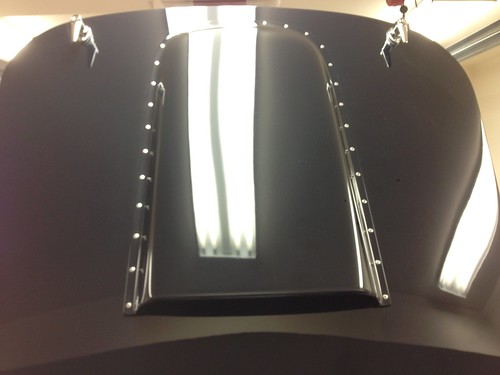
We are making good progress, and my kids are really into the project. We usually spend an afternoon on the weekend, and one or two nights during the week for an hour or so.
Since my last post, we have:
- Removed aluminum panels around doors so I could install the seat heater wires properly, and reinstalled the panels
- Finished installing and sealing all of the aluminum panels
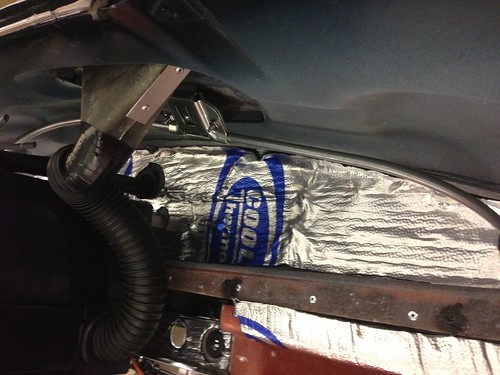
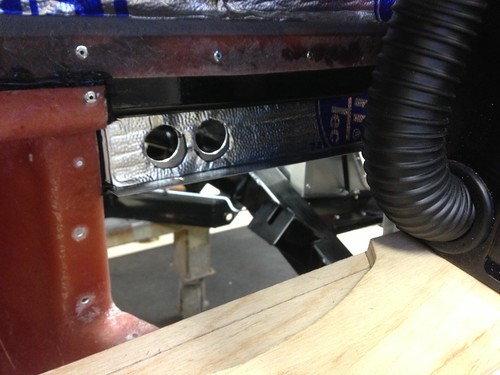
- Installed insulation on the firewall interior, top of the footboxes (interior), and tunnel
- Completed most of the wiring (dashboard, engine bay, trunk)
- Made an aluminum sheet metal bracket for a power socket, and installed it under the dashboard. Also installed the brackets for the seat heater buttons under the dash
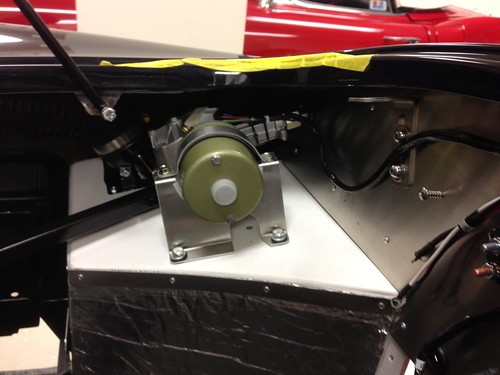
- Installed the windshield wiper motor and mechanism
- Installed the tonneau snaps
- Installed weatherstripping around the trunk, and on the hood. I learned my lesson with this adhesive a long time ago and used it *very* sparingly. It turned out great, no seeping glue, etc.
- Riveted the hood scoop
 Untitled
 by Lippy111, on Flickr
 Untitled
 by Lippy111, on Flickr
 Untitled
 by Lippy111, on Flickr
 Untitled
 by Lippy111, on Flickr
 Untitled
 by Lippy111, on Flickr
 Untitled
 by Lippy111, on Flickr
 Untitled
 by Lippy111, on Flickr
 Untitled
 by Lippy111, on Flickr
Last edited by lippy; 06-25-2013 at 09:27 PM..
|

06-25-2013, 09:31 PM
|
|
CC Member

|
|
|
Join Date: May 2013
Location: drexel hill,
pa
Cobra Make, Engine: searching for my dream car
Posts: 8
|
|

 Not Ranked
car looks great , i like the vette next to it as well . 2 great toys you have .how hard is the build of this car ?
|

06-25-2013, 09:31 PM
|
 |
Senior Club Cobra Member

|
|
|
Join Date: Dec 2007
Cobra Make, Engine: ERA FIA 'Street' Build
Posts: 2,128
|
|

 Not Ranked
Looks like you and your helpers have been busy. I can understand the need to go back and get the seat heater wires in just the way you want them, it's worth the extra effort to get things to your liking as you are likely to only do this once. What's next on the list?
|

06-25-2013, 09:43 PM
|
|
CC Member

|
|
|
Join Date: Apr 2012
Location: Bay Area (Peninsula),
CA
Cobra Make, Engine: ERA 427, 427/487 side-oiler
Posts: 1,248
|
|

 Not Ranked
Quote:
Originally Posted by tkb289

What's next on the list?
|
Some more insulation, finish up the hydraulic lines, install the oil cooler/brackets, and start on the suspension. Maybe some 3M Paint Defender on the rear fenders and lower/front. I'll be ready to drop the engine in when I get it from Brent, probably in late July or early August.
Thanks for the recommendation on Accessories Plus. I had my primaries and sidepipes ceramic coated, and I received the call today that they are done. I'll pick them up later in the week. Excited to see them.
Last edited by lippy; 06-25-2013 at 10:07 PM..
|

06-25-2013, 09:47 PM
|
|
CC Member

|
|
|
Join Date: Apr 2012
Location: Bay Area (Peninsula),
CA
Cobra Make, Engine: ERA 427, 427/487 side-oiler
Posts: 1,248
|
|

 Not Ranked
Quote:
Originally Posted by roxx

car looks great , i like the vette next to it as well . 2 great toys you have .how hard is the build of this car ?
|
Thanks. The Vette has been deprived of some attention lately but I still get it out a few times per month.
The ERA is a pretty easy car to put together. Things line up the way they should, and everything makes sense. The kit is really well done. Our build is taking a bit more time then it would otherwise because we are using a lot of upgraded fasteners/Pemnuts, etc., but it's going faster then I expected. |

06-26-2013, 06:06 AM
|
 |
CC Member

|
|
|
Join Date: Apr 2009
Location: Little Rock area,
AR
Cobra Make, Engine: ERA Street Roadster #782 with 459 cu in FE KC engine, toploader, 3.31
Posts: 4,525
|
|

 Not Ranked
Great progress. Makes me look like a real slacker - I haven't hardly touched mine since March due to a landscaping project. I agree on the weatherstripping - work 3 or 4 inches at a time and go sparingly on the adhesive.
|

06-26-2013, 06:10 AM
|
 |
Half-Ass Member

|
|
|
Join Date: Jun 2005
Cobra Make, Engine: ERA #732, 428FE (447 CID), TKO600, Solid Flat Tappet Cam, Tons of Aluminum
Posts: 22,011
|
|

 Not Ranked
Quote:
Originally Posted by DanEC

Great progress. Makes me look like a real slacker - I haven't hardly touched mine since March due to a landscaping project. I agree on the weatherstripping - work 3 or 4 inches at a time and go sparingly on the adhesive.
|
I think most high-quality, individual builds of ERA cars seem to take about three years. |

06-26-2013, 09:50 AM
|
|
CC Member

|
|
|
Join Date: Apr 2012
Location: Bay Area (Peninsula),
CA
Cobra Make, Engine: ERA 427, 427/487 side-oiler
Posts: 1,248
|
|

 Not Ranked
Quote:
Originally Posted by DanEC

Great progress. Makes me look like a real slacker - I haven't hardly touched mine since March due to a landscaping project.
|
Dan, I sympathize. Two years ago we moved into a house that needed quite a bit of work, so I spent every weekend on house projects. Once the Cobra came, I decided to take a break from the list of house projects. The Cobra is sort of a break for me and I'm not doing *anything* on the house that doesn't require immediate attention until this car is built. Only way to keep my sanity. |

06-26-2013, 11:41 AM
|
 |
CC Member

|
|
|
Join Date: Apr 2009
Location: Little Rock area,
AR
Cobra Make, Engine: ERA Street Roadster #782 with 459 cu in FE KC engine, toploader, 3.31
Posts: 4,525
|
|

 Not Ranked
Quote:
Originally Posted by patrickt

I think most high-quality, individual builds of ERA cars seem to take about three years.
|
I'm going on 3-1/2 years now. As an excuse I ordered mine as a retirement project but then after I retired they came after me and convinced me to come back to work until they could find my replacement. 3 -1/2 years later they have found my replacement but they also found a lot of other stuff they wanted me to do. However, there does appear to be some light at the end of the tunnel and I may finally be re-released at the end of August. My wife has been taken care of with the swimming pool and landscaping so hopefully I can finish my retirement Cobra project.
Lippy - I also have a Corvette camped out in my garage - a 66. It's also been largely ignored for the last several years - I think even more than yours. That's something else I need to get back to some occassional drives in it one of these days. |

07-06-2013, 08:05 PM
|
|
CC Member

|
|
|
Join Date: Apr 2012
Location: Bay Area (Peninsula),
CA
Cobra Make, Engine: ERA 427, 427/487 side-oiler
Posts: 1,248
|
|

 Not Ranked
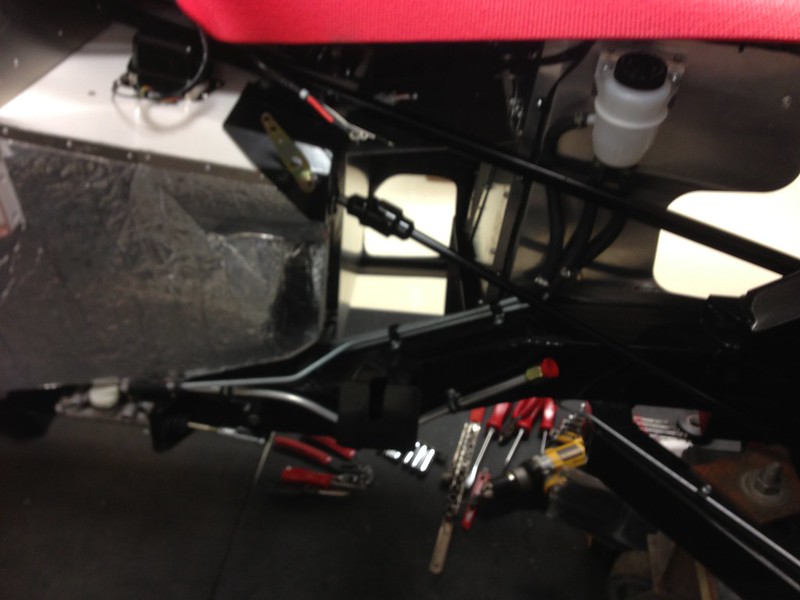
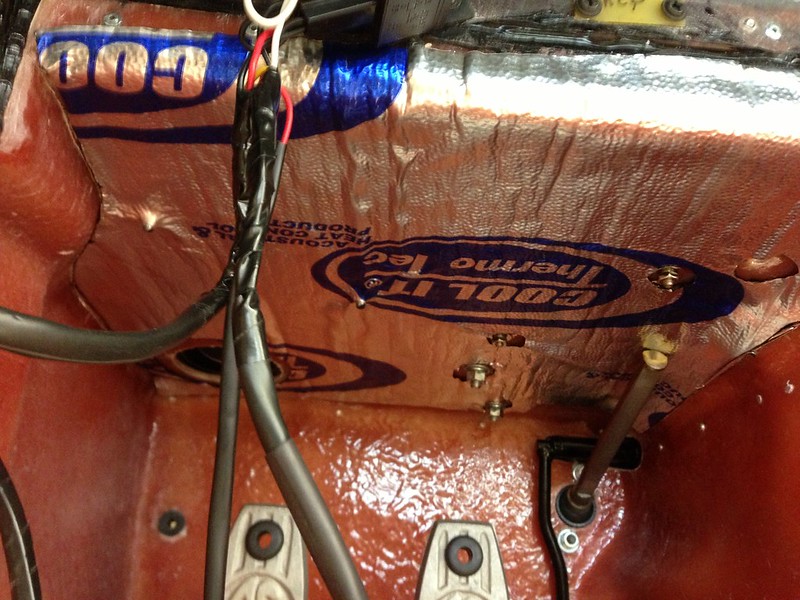
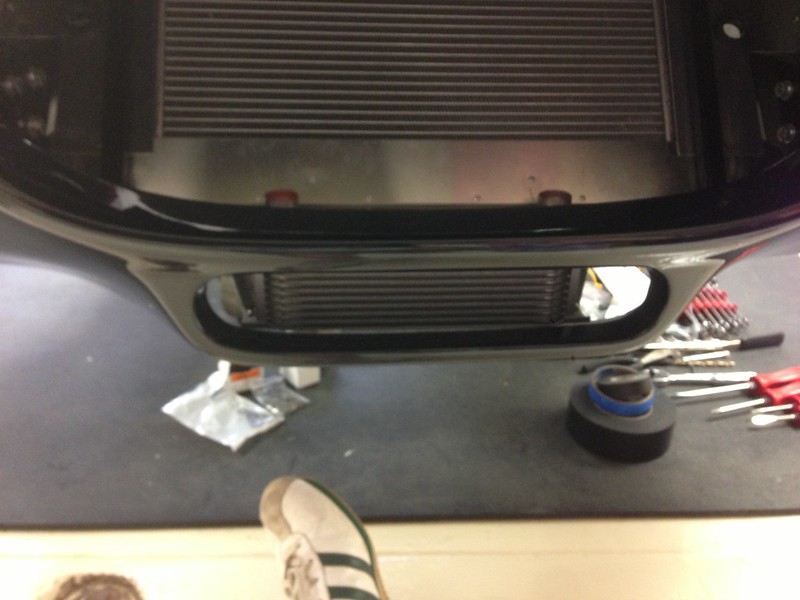
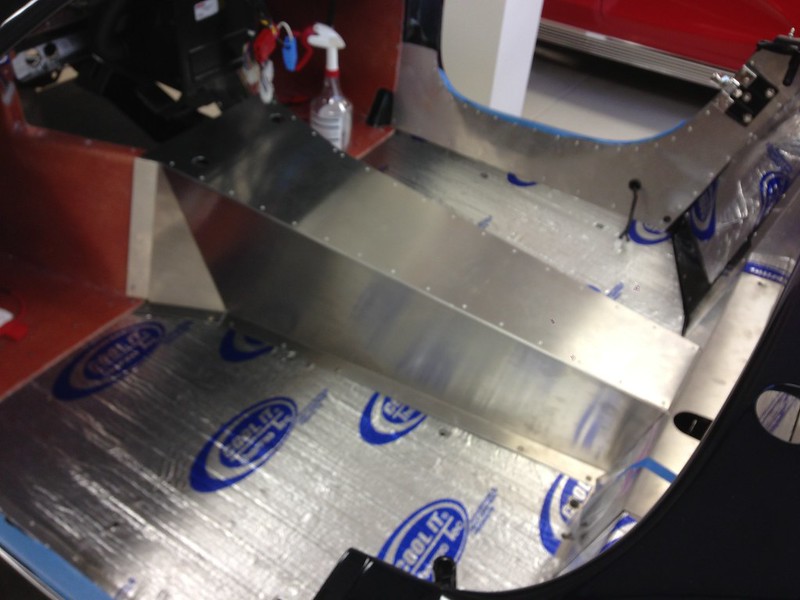
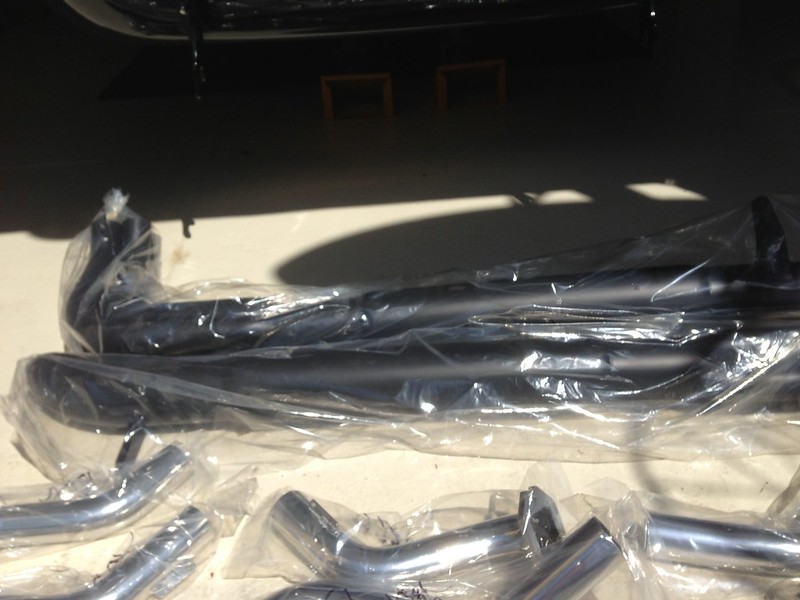
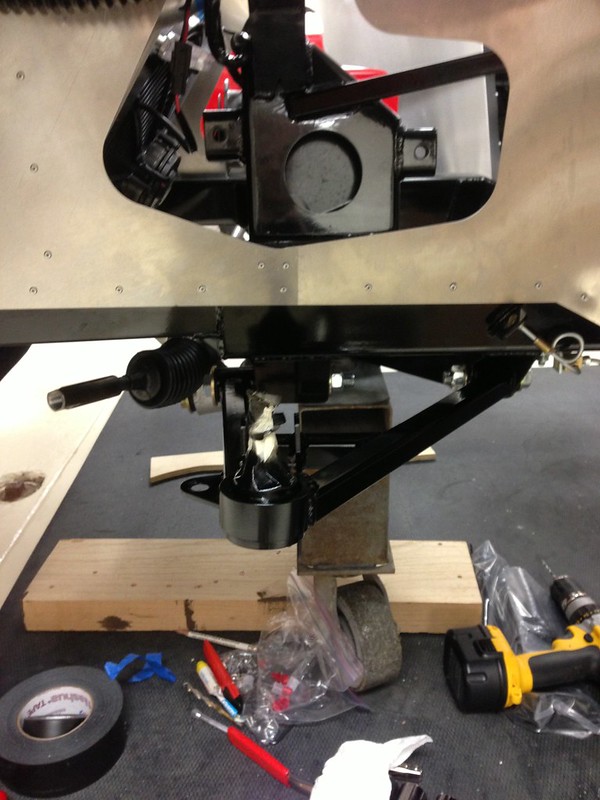
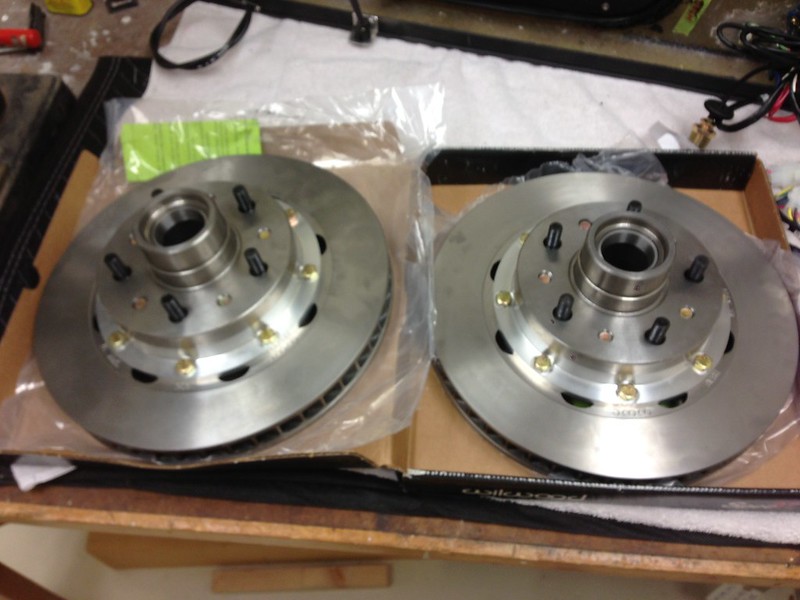
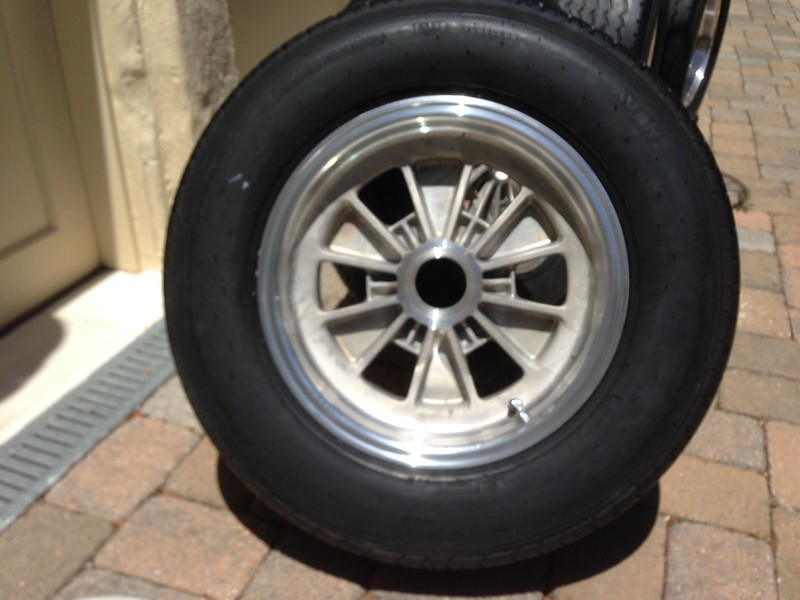
Over the last couple of weeks, we've begun the front suspension, put together the rotors/hubs, finished the final insulation, hooked up the hydraulic lines, picked up the headers and sidepipes from the ceramic coater, installed the oil cooler, and mounted the tires. Right now I'm deciding on a fuel delivery system and planning the stereo.
 Untitled
 by Lippy111, on Flickr
 Untitled
 by Lippy111, on Flickr
 Untitled
 by Lippy111, on Flickr
 Untitled
 by Lippy111, on Flickr
 Untitled
 by Lippy111, on Flickr
 Untitled
 by Lippy111, on Flickr
 Untitled
 by Lippy111, on Flickr
 Untitled
 by Lippy111, on Flickr
Last edited by lippy; 07-06-2013 at 08:12 PM..
|

07-20-2013, 09:52 PM
|
|
CC Member

|
|
|
Join Date: Apr 2012
Location: Bay Area (Peninsula),
CA
Cobra Make, Engine: ERA 427, 427/487 side-oiler
Posts: 1,248
|
|

 Not Ranked
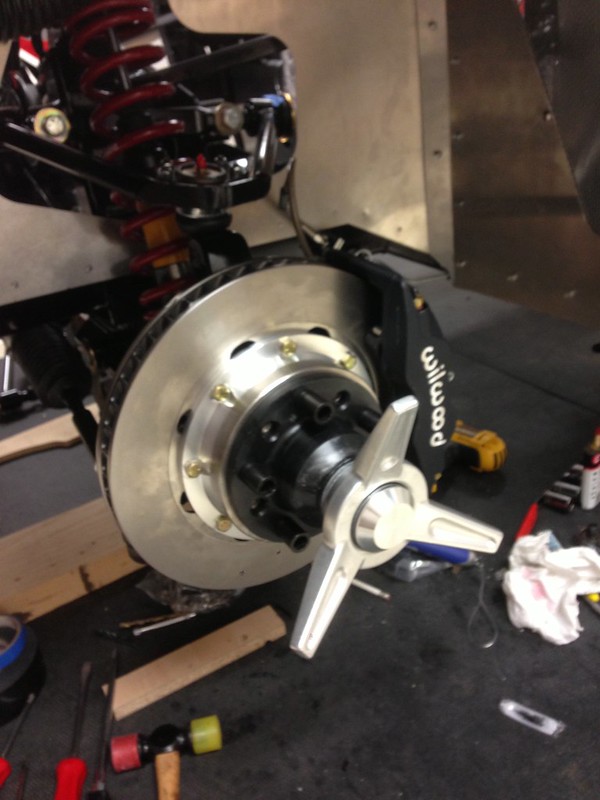
Front suspension and brakes done, both sides.
I installed the pins on my bolt-on/5-pin adapters, and used the metal alignment guide to make sure they are straight. But when I tried to slide a wheel on, I couldn't get it to slide in. How difficult should it be to slide the wheel onto the pins? Do you lube the pins? Thanks.
 Untitled
 by Lippy111, on Flickr |

07-21-2013, 02:25 AM
|
|
CC Member

|
|
|
Join Date: Apr 2008
Location: Near Chichester, Sussex by the sea......,
UK
Cobra Make, Engine: Crendon 427 S/C 428 FE+toploader
Posts: 668
|
|

 Not Ranked
Great pics, nice build.
Can I just ask, as I have sen this on a few US cars, why is Cool-It matting put on the floor and side of the car? I would not have thought it gets very hot there?
|

07-21-2013, 06:07 AM
|
 |
Half-Ass Member

|
|
|
Join Date: Jun 2005
Cobra Make, Engine: ERA #732, 428FE (447 CID), TKO600, Solid Flat Tappet Cam, Tons of Aluminum
Posts: 22,011
|
|

 Not Ranked
Quote:
Originally Posted by lippy

I installed the pins on my bolt-on/5-pin adapters, and used the metal alignment guide to make sure they are straight. But when I tried to slide a wheel on, I couldn't get it to slide in. How difficult should it be to slide the wheel onto the pins? Do you lube the pins? Thanks.
|
It should not be difficult. If the pins are properly aligned the tire and wheel should go on pretty easily with a dab of anti-seize on them. Squatting in front of your hub, while lifting 295/50's straight out in front of you, gets tiring pretty fast. Maybe one of your pins is a little crooked? |

07-21-2013, 06:25 AM
|
 |
CC Member

|
|
|
Join Date: Apr 2009
Location: Little Rock area,
AR
Cobra Make, Engine: ERA Street Roadster #782 with 459 cu in FE KC engine, toploader, 3.31
Posts: 4,525
|
|

 Not Ranked

I slathered plenty of anti-sieze lube on pins and hubs of both the wheels and the adaptor. Once they had been on a time or two I wiped the excess off. I also used the 5-pin wheels and adaptors (I know we are looked down on amongst the 6-pin crowd) and had a problem on my rear wheels because the ERA lug bolts were too long and had to be trimmed off per the instructions from Vintage Wheels. The fronts were OK.
I wanted to maintain as much length as possible and trimmed them with an air driven cut off wheel after marking them with a template. But I managed to get a couple that were just a few hundreds too long and when I tightened the adaptor and pins in position their over length (and end surfaces not being 100% flat) cocked the pins just enough that the wheels would not slide on.
After realizing this I went back over the lug bolts with my micrometer and figured out the couple that needed a touch of grinding to shorten them and re-installed and then the wheels went on OK just with thumping on the sidewalls with my palms. I learned that it doesn't take much to distort the adaptor and pin very slightly to create interference.
I think Vintage just brought out FIA wheels - is that what you are using or Trigos? Did you trim the rear lug bolts?
|

07-21-2013, 06:39 AM
|
 |
CC Member

|
|
|
Join Date: Apr 2009
Location: Little Rock area,
AR
Cobra Make, Engine: ERA Street Roadster #782 with 459 cu in FE KC engine, toploader, 3.31
Posts: 4,525
|
|

 Not Ranked

Referring to Patrick's comments - I have dollies under the wheels of my car so I can roll it around and push it into a storage position. Even if you don't have a need for them for that purpose, I would recommend going down to Harbor Frieght and buying one of their jacking floor dollies. Even an inexpensive wheel dolly will work OK. When removing a wheel slide that thing under it and lower the cars weight to where it is just making solid contact, spin off the spinner and just slide that wheel off with the dolly and roll it aside - no lifting or straining. The beauty is that if you don't turn the rotor while doing what you need to do in there - the dolly keeps the wheel in the same exact position as you took it off in. Just roll it back in position. Make sure the hub is concentric with the wheel opening and it just slide back on perfectly with no lifting, turning to re-align pins, pulled back muscles, curse words or kicking the dog. It's vritually effortless. I'm 62 and it good shape but I just don't like lifting these heavy tires and trying to get the pins to line up correctly anymore while straining my back.

|
 Posting Rules
|
You may not post new threads
You may not post replies
You may not post attachments
You may not edit your posts
HTML code is Off
|
|
|
All times are GMT -7. The time now is 08:48 PM.
Links monetized by VigLink
|


