 
 Main Menu
|
 Nevada Classics
|
 Advertise at CC
|
| S |
M |
T |
W |
T |
F |
S |
| |
|
|
|
|
1 |
2 |
| 3 |
4 |
5 |
6 |
7 |
8 |
9 |
| 10 |
11 |
12 |
13 |
14 |
15 |
16 |
| 17 |
18 |
19 |
20 |
21 |
22 |
23 |
| 24 |
25 |
26 |
27 |
28 |
29 |
30 |
|
 CC Advertisers
|
|
 390Likes 390Likes

08-16-2018, 02:06 AM
|
 |
CC Member

|
|
|
Join Date: Aug 2009
Location: Adelaide,
SA
Cobra Make, Engine: AP 289FIA 'English' spec.
Posts: 13,150
|
|

 Not Ranked
Quote:
Originally Posted by tkb289

.....That's a tidy setup with a lot of adjustability and it looks very stout as well. What's next on the list?
- Tim
|
Hi Tim,
Thanks. Yes, "stout" describes it adequately.
I should point out that I regard my car as masculine, definitely not feminine, so "stout" is an appropriate way to describe his rear end 
Next? Fill the diff. with oil so that I don't forget to do it later.
Will check the manual, but I'm thinking probably the fuel tank and filler and associated bits would be next.
Cheers,
Glen
Last edited by xb-60; 08-16-2018 at 05:30 PM..
|

08-23-2018, 01:55 AM
|
 |
CC Member

|
|
|
Join Date: Aug 2009
Location: Adelaide,
SA
Cobra Make, Engine: AP 289FIA 'English' spec.
Posts: 13,150
|
|

 Not Ranked
Have moved on to the installation of the fuel tank.
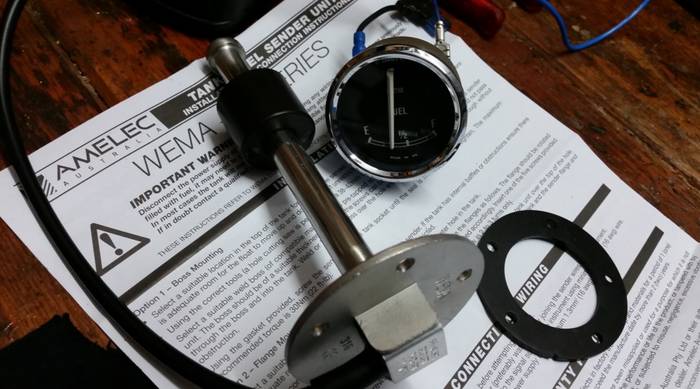
First task is to install the fuel level sender. I have the gauge, which is an early MGB unit, now with the correct early Cobra double-vee bezel.
Sourced the new fuel level sender from Gauge Works Gaugeworks - Specialist Gauge Supply, Advice & Calibration Services (Albert Park, Adelaide, SA).
Here’s the sender at quarter full and gauge at quarter full (note position of float):
Here’s the sender at full and gauge at full (float is at the top of its travel):
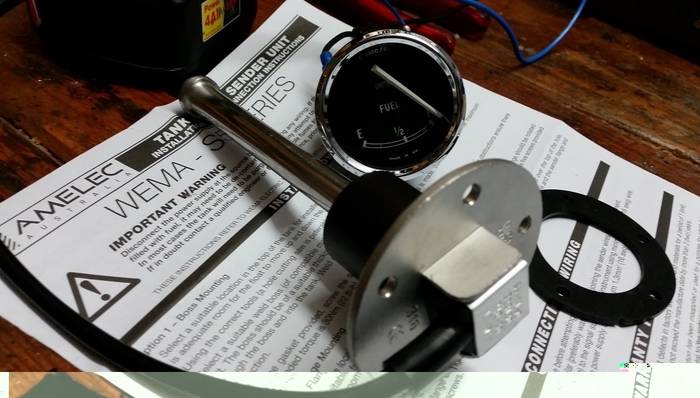
Now that I have the correct (as in working correctly) sender, I can now fit it and continue with the tank installation 
Cheers,
Glen |

08-31-2018, 11:50 PM
|
 |
CC Member

|
|
|
Join Date: Aug 2009
Location: Adelaide,
SA
Cobra Make, Engine: AP 289FIA 'English' spec.
Posts: 13,150
|
|

 Not Ranked
….now that the sender is in and tested, continuing with the tank installation.
Here’s what the trunk/boot looks like now with the tank finally fully installed.
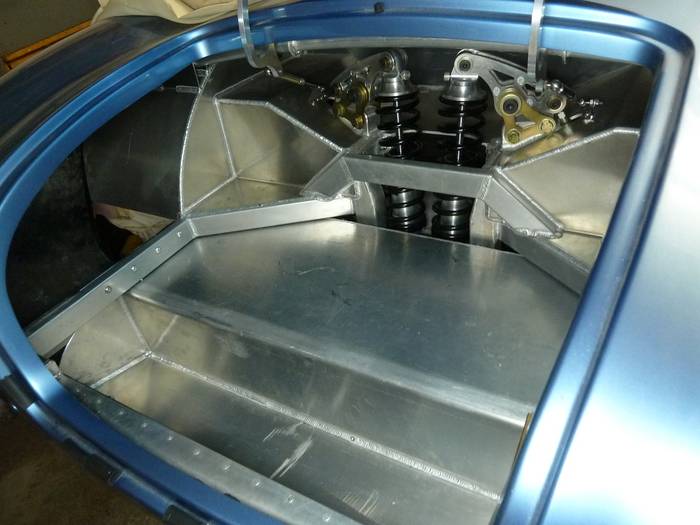
….and:
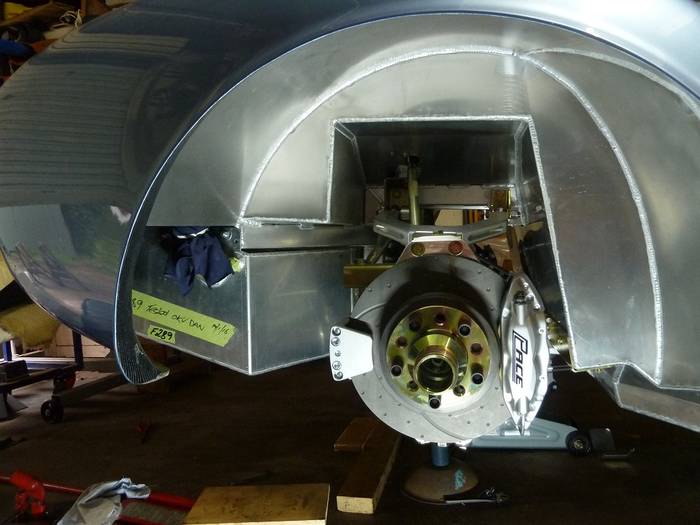
Happy with the final result, although it took me a lot longer to fit than I thought.
Had to notch the extremities of the rear skirt to enable fitment; that can’t be seen except from underneath though:
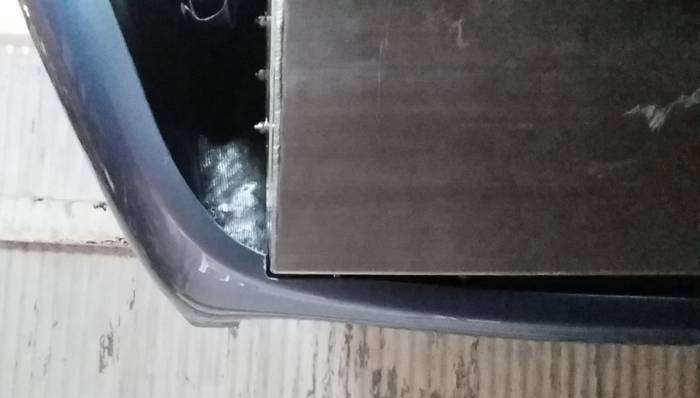
Side view:
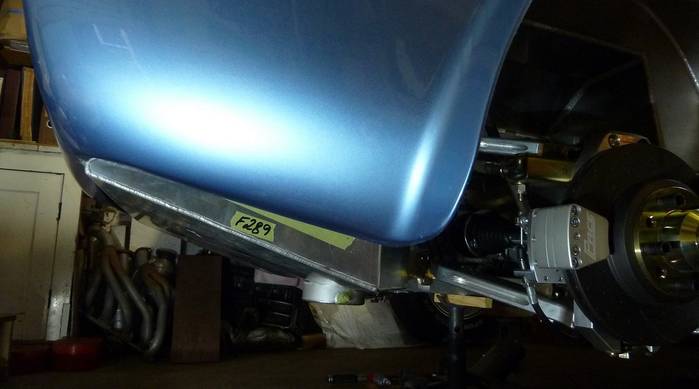
Tank is not too obvious unless you’re down on hands and knees.
Cheers,
Glen |

09-01-2018, 05:27 AM
|
 |
CC Member

|
|
|
Join Date: Aug 2013
Location: Canandaigua,
NY
Cobra Make, Engine: SPF MKII Riverside Racer FIA
Posts: 2,496
|
|

 Not Ranked
Nice work Glen. Looks fine. If anybody gets down on their hands and knees to look underneath and complain at all, give them a boot in the appropriate target 
Doesn't it always take longer than we expect.
Jim
__________________

|

10-20-2018, 04:34 AM
|
 |
CC Member

|
|
|
Join Date: Aug 2009
Location: Adelaide,
SA
Cobra Make, Engine: AP 289FIA 'English' spec.
Posts: 13,150
|
|

 Not Ranked
Way over time for an update.
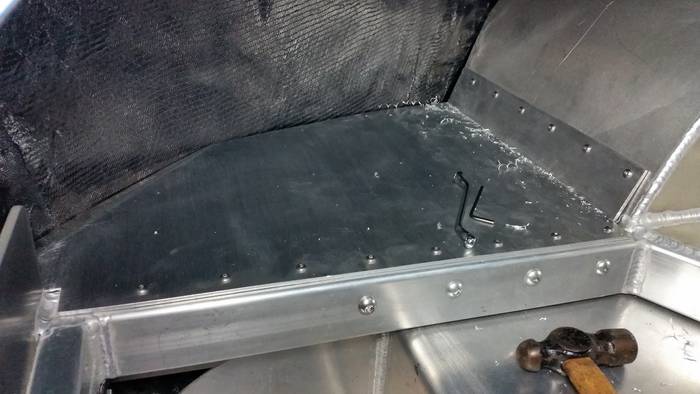
Fuel tank installation complete, but still ancillary stuff to work on, so here’s the floor panel on the left side of the tank:
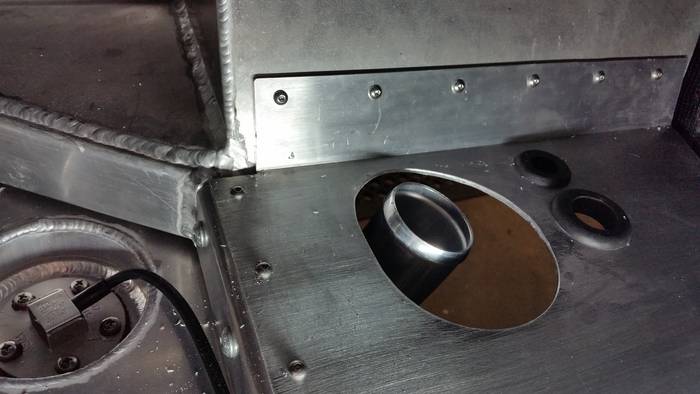
….and floor panel on the right side of the tank, with the clearance hole for the fuel filler and the grommets for the fuel breather and charcoal canister hoses:
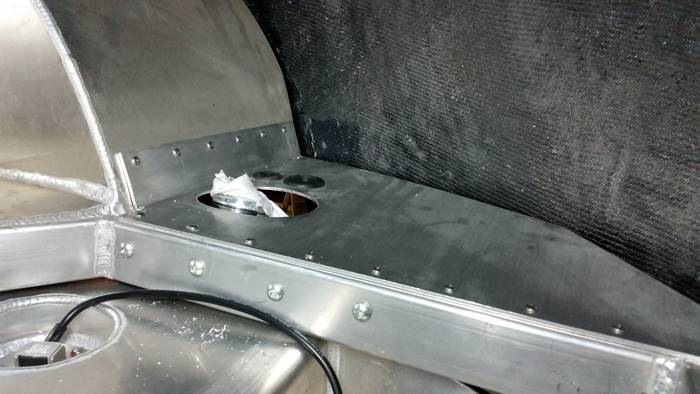
I needed to elongate the hole in the panel quite a lot to give sufficient clearance for the filler tubing/hose, so when I’ve finished the filler connection, I’ll make up a split panel to fit snug around the hose and close off this hole:
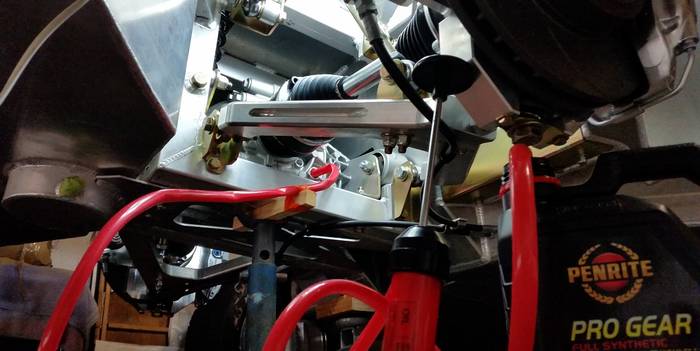
….and finally got around to filling the diff.
Now working on the tubing connection between the filler and the tank.
More soon.
Cheers,
Glen
Last edited by xb-60; 10-20-2018 at 04:45 AM..
|

10-20-2018, 05:12 AM
|
 |
CC Member

|
|
|
Join Date: Aug 2013
Location: Canandaigua,
NY
Cobra Make, Engine: SPF MKII Riverside Racer FIA
Posts: 2,496
|
|

 Not Ranked
Nice work Glen. Those panels look quite professional. Smart idea to add the two piece split panel at the end, rather than trying to make the hole exact and spend hours trying to get the tube through it correctly to make the connection.
Jim
__________________

|

10-20-2018, 10:44 PM
|
 |
CC Member

|
|
|
Join Date: Aug 2009
Location: Adelaide,
SA
Cobra Make, Engine: AP 289FIA 'English' spec.
Posts: 13,150
|
|

 Not Ranked
Thanks Jim. An AP FIA chassis design is already "quite professional", so I'm trying to at least meet that standard or maybe even improve on it as I progress.
Time to work on the fuel tank inlet pipe. The flex pipe is as-supplied; I decided to take a different approach with a bent-up stainless pipe, so here's my solution so far:
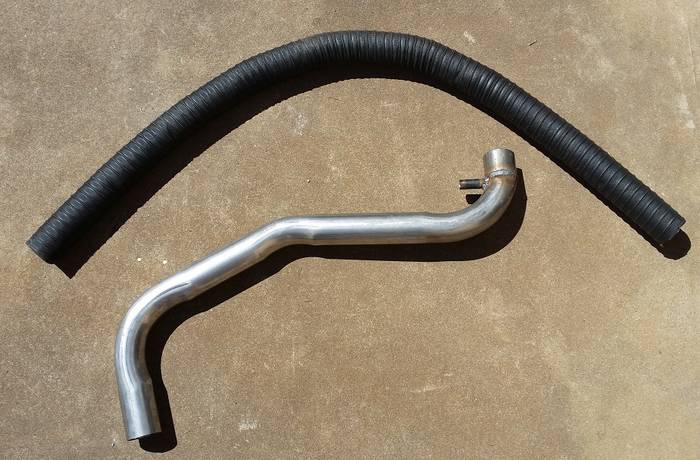
Still a few adjustments required to make it fit correctly, but it should work quite nicely 
Cheers,
Glen
Last edited by xb-60; 10-21-2018 at 12:28 AM..
|

10-21-2018, 03:23 AM
|
 |
CC Member/Contributor

|

|
|
Join Date: Sep 2016
Location: (Beautiful) Sequim,
WA
Cobra Make, Engine: Pacific Roadster, 347 cu.in. 5-speed
Posts: 1,994
|
|

 Not Ranked
Glen, the build is coming along great. But then expect nothing less from you, Brother. The shop "Old School" is finally working on mine again, should be done by years end, YEA! Cheers Tom.
|

10-22-2018, 04:00 PM
|
 |
CC Member

|
|
|
Join Date: Aug 2009
Location: Adelaide,
SA
Cobra Make, Engine: AP 289FIA 'English' spec.
Posts: 13,150
|
|

 Not Ranked
Hi Tom. It’s a quiet night here so I looked up “Old School” in Port Orchard. Sounds like a nice workshop to visit, and I like the sound of the owner, Joe. His comments …. “If you want to talk to the owner, it's me. If you want to see the manager or the technician who will do the work on your vehicle, it's me. If you'd like to discuss the brand of coffee offered or the reading material available in the customer waiting area, again, it's me. I wear all the hats.”
Sense of humour as well ….”I am a husband, father and avid bicycle rider. I floss my teeth daily and am a lifetime Patches Pal.” I think I would like him and his shop.
He and his shop sound a little like a local guy that I sometimes use here in Adelaide. Nice to know there are still some good and reliable “old school” places out there.
What stage is he at with your car?
Cheers,
Glen
|

10-26-2018, 09:26 PM
|
 |
CC Member

|
|
|
Join Date: Aug 2009
Location: Adelaide,
SA
Cobra Make, Engine: AP 289FIA 'English' spec.
Posts: 13,150
|
|

 Not Ranked
Fuel inlet/breather pipes and lines are almost complete.
Here's what it looks like inside the boot (trunk)
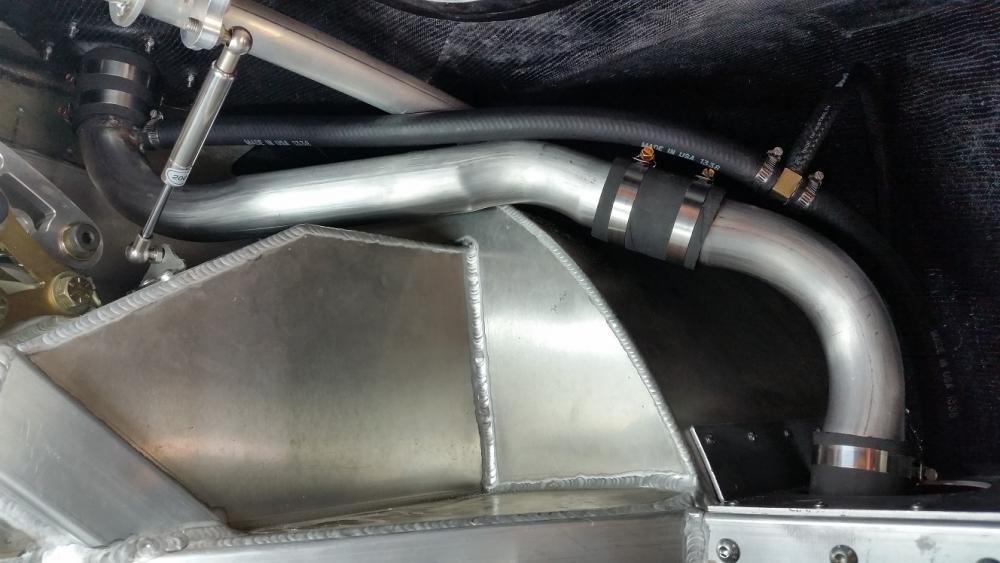
Cheers,
Glen |

10-27-2018, 01:56 AM
|
 |
CC Member

|
|
|
Join Date: Jan 2004
Location: Queanbeyan,
NSW
Cobra Make, Engine: AP 289 USRRC #98 The Ken Miles Tribute Car
Posts: 1,134
|
|

 Not Ranked
Looks the goods Glen.
Keep up the good work.
Cheers
__________________
289 FIA Cobras RULE! 
|

10-27-2018, 05:38 AM
|
 |
CC Member/Contributor

|

|
|
Join Date: Sep 2016
Location: (Beautiful) Sequim,
WA
Cobra Make, Engine: Pacific Roadster, 347 cu.in. 5-speed
Posts: 1,994
|
|

 Not Ranked

Hi Glen, Joe at Old School, is just a hoot to be around, the perfect DRY sense of humor. I've known him since 1977 off & on. He was a crew chief with some of the "best of the best" back in the 935 & 962 day's of Porsche IMSA program. He had a shop "Gilmore Automotive" in Seattle for 20+years, he did one off Ferrari, Merc, Porsche, etc. Restoration's. He thought he would try to retire, well that didn't work, (Too many "Honey Do" list's )  So he had a shop built here in Port Orchard, I went in to see what a "Old School Garage" was, and here's Joe standing there  Long story longer, I started taking care of the customer cars, Detailing for fun & free (I'm retired) and of course when I brought the Cobra, I asked if he would finish the build. And since he's doing it at a better (Friends) price, it get's put on the list, when nothing else is being worked, mine gets worked on  Which is fine with me, when done it will be PERFECT. So now what's left, just the dash install (wiring done) seats, belts, door panel's, carpets, tinkling with drivetrain (it's a running, driving car) just gen. sorting. Joe & I are into vintage stereo's, so we have 2-stereo system's and listen to Jazz 8-hours a day. Needless to say, it a barrel of fun, every day I'm up there. The funniest thing, when people walk in the shop, and there is beautiful, well done, exotic cars here, people are drawn to the Cobra first  When people ask if it's real? Joe touches it and say's YES.  Hope that help's Glen, to see what a great place the Cobras at. As always Cheers Tom.
Last edited by Alfa02; 10-27-2018 at 06:10 AM..
|

10-29-2018, 03:26 AM
|
 |
CC Member

|
|
|
Join Date: Aug 2009
Location: Adelaide,
SA
Cobra Make, Engine: AP 289FIA 'English' spec.
Posts: 13,150
|
|

 Not Ranked
If you look back at post #65, there was a large hole to fill in the trunk floor side panel around the fuel inlet pipe.
Solution was to make up a split panel to close it up adequately. Here's what it looks like now:
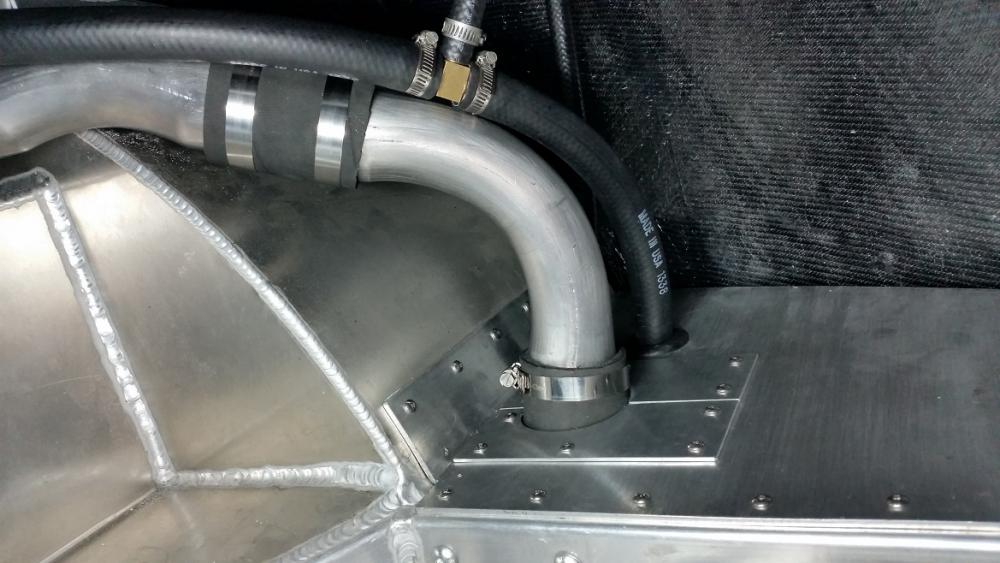
I haven't grommeted it 'cos I don't have a large enough grommet, and anyway, there is no relative movement between the inlet and the split panel so close to the tank.
I'm waiting on a large enough P-clamp to better secure the breather pipe to finish off the job.
Cheers,
Glen |

11-21-2018, 03:00 AM
|
 |
CC Member

|
|
|
Join Date: Aug 2009
Location: Adelaide,
SA
Cobra Make, Engine: AP 289FIA 'English' spec.
Posts: 13,150
|
|

 Not Ranked
The 25mm P-clips eventually came. So, the fuel tank breather and the tank end of the carbon canister hose/pipe are now secured adequately:
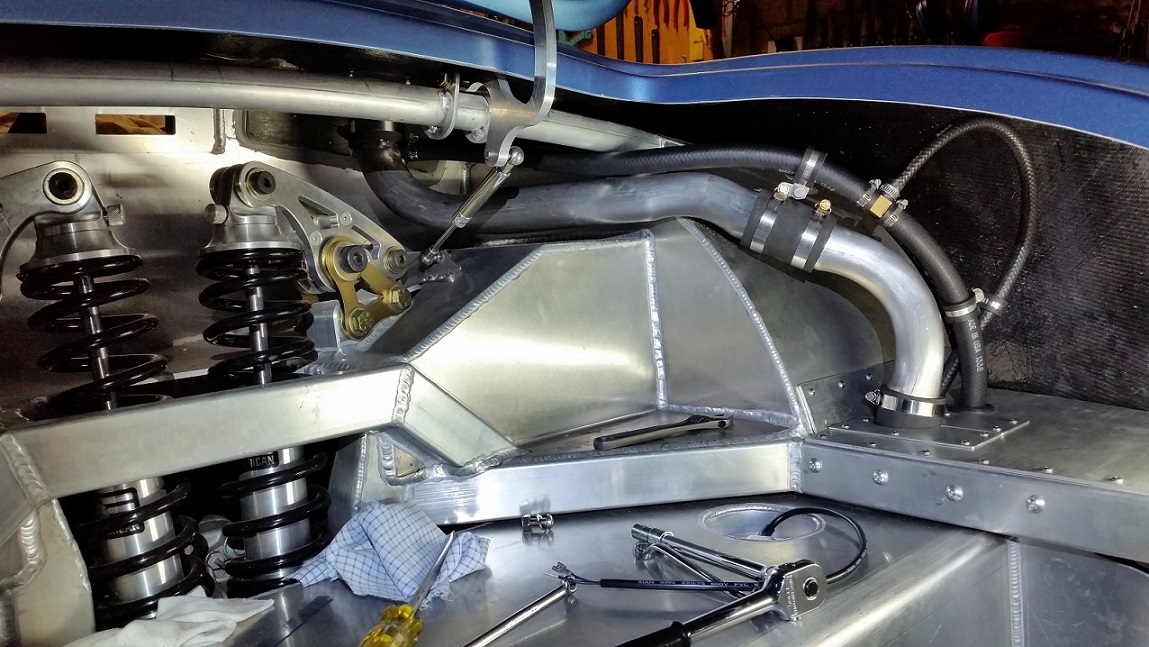
Now working on connecting the charcoal canister to the hose at the tank, so I'm routing a line under the diff., through the inside of the tunnel to the charcoal canister which is hiding just outside the engine bay and between the LHS (front) upper and lower wishbones.
Cheers,
Glen
Last edited by xb-60; 11-21-2018 at 11:37 PM..
Reason: typo
|

11-25-2018, 08:36 PM
|
 |
CC Member

|
|
|
Join Date: Aug 2009
Location: Adelaide,
SA
Cobra Make, Engine: AP 289FIA 'English' spec.
Posts: 13,150
|
|

 Not Ranked
More work on the fuel system.
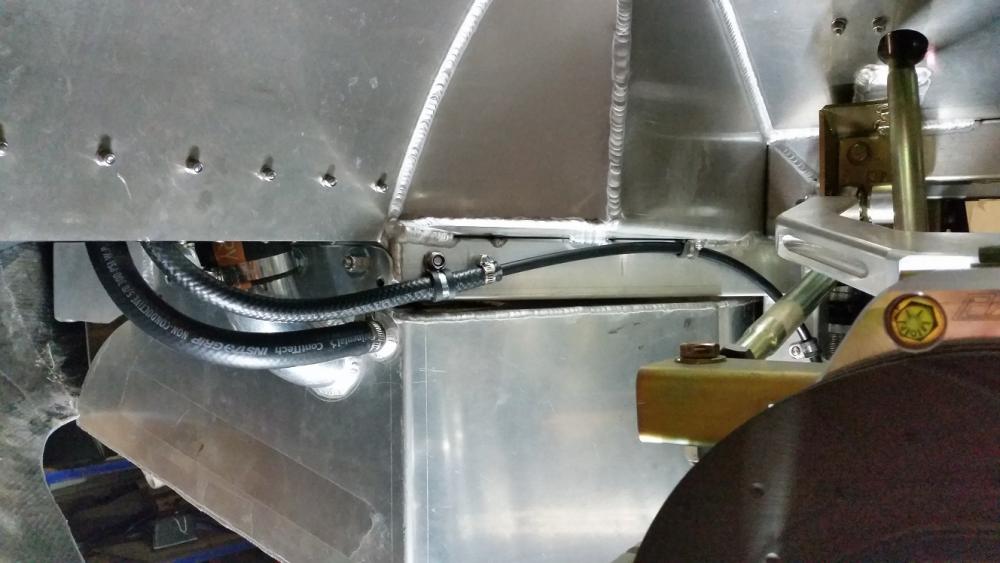
The 2" hose is the fuel inlet (of course). The 25mm/1" OD hose is the breather from just below the filler, and the smallest hose/pipe is the line going forward to the charcoal canister.
Cheers,
Glen |

11-29-2018, 07:05 PM
|
 |
CC Member

|
|
|
Join Date: Aug 2009
Location: Adelaide,
SA
Cobra Make, Engine: AP 289FIA 'English' spec.
Posts: 13,150
|
|

 Not Ranked
A nice little pre-Christmas surprise came in the post yesterday. It's a Lucas ammeter that I'd been looking for (at a reasonable price) for some time.
I was going to use another similar Lucas ammeter, a 50 amp version that I'd 'cobbled' together a while back, but this one turned up on EBay and it's more correct for an early 289 English car.
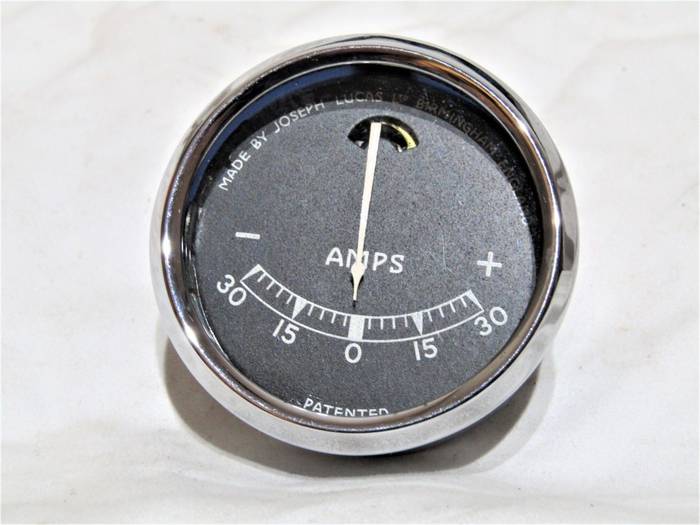
It came here from the UK in less time than something ordered from interstate Australia 
Cheers,
Glen
Last edited by xb-60; 11-30-2018 at 06:21 PM..
|

12-10-2018, 10:52 PM
|
 |
CC Member

|
|
|
Join Date: Aug 2009
Location: Adelaide,
SA
Cobra Make, Engine: AP 289FIA 'English' spec.
Posts: 13,150
|
|

 Not Ranked
Comments....
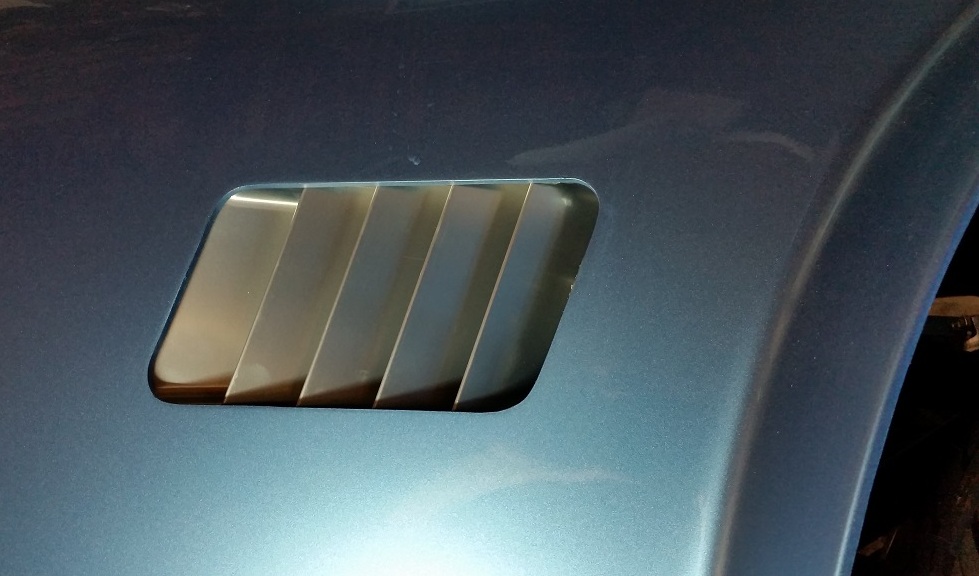 Paint or leave bare alloy as-is?
Looking at pictures of originals, overwhelming number are painted but a few are 'bare'.
(Positioning isn't 100%, currently setting them up to locate securing brackets)
Cheers,
Glen
Last edited by xb-60; 12-10-2018 at 10:56 PM..
|

12-11-2018, 04:53 AM
|
 |
CC Member

|
|
|
Join Date: Aug 2013
Location: Canandaigua,
NY
Cobra Make, Engine: SPF MKII Riverside Racer FIA
Posts: 2,496
|
|

 Not Ranked
Glenn,
I like them painted, but given the subtle contrast with the body color that you have there, it does look nice bare.
Jim
__________________

Last edited by 1795; 12-12-2018 at 04:51 AM..
|

12-11-2018, 03:13 PM
|
 |
CC Member

|
|
|
Join Date: Jan 2004
Location: Queanbeyan,
NSW
Cobra Make, Engine: AP 289 USRRC #98 The Ken Miles Tribute Car
Posts: 1,134
|
|

 Not Ranked

Painted mine.... cause I had to!
__________________
289 FIA Cobras RULE! 
|

12-12-2018, 09:39 PM
|
|
CC Member

|
|
|
Join Date: Jun 2012
Location: Naracoorte,
SA
Cobra Make, Engine: CR Cobra 3169
Posts: 818
|
|

 Not Ranked
If you leave it bare then it might start oxidising over time and will be a pain to clean. What about powder coating it clear? JD
|
 Posting Rules
|
You may not post new threads
You may not post replies
You may not post attachments
You may not edit your posts
HTML code is Off
|
|
|
All times are GMT -7. The time now is 02:39 AM.
Links monetized by VigLink
|


