Welcome to Club Cobra! The World's largest
non biased Shelby Cobra related site!
- » Representation from nearly all
Cobra/Daytona/GT40 manufacturers
- » Help from all over the world for your
questions
- » Build logs for you and all members
- » Blogs
- » Image Gallery
- » Many thousands of members and nearly 1
million posts!
YES! I want to register an account for free right now!
p.s.: For registered members this ad will NOT show
 
 Main Menu
|
 Nevada Classics
|
 Advertise at CC
|
 January 2025
|
| S |
M |
T |
W |
T |
F |
S |
| |
|
|
1 |
2 |
3 |
4 |
| 5 |
6 |
7 |
8 |
9 |
10 |
11 |
| 12 |
13 |
14 |
15 |
16 |
17 |
18 |
| 19 |
20 |
21 |
22 |
23 |
24 |
25 |
| 26 |
27 |
28 |
29 |
30 |
31 |
|
|
 CC Advertisers
|
|

08-16-2010, 06:23 PM
|
|
CC Member

|
|
|
Join Date: May 2009
Cobra Make, Engine:
Posts: 135
|
|

 Not Ranked
Quote:
Originally Posted by RestoCreations

I was just confused and did not put much thought into the tank. I actually was referring to the oil puke tank on the firewall, but simply did not realize that it was an oil puke tank. Is it a good idea to have one or just something else to look pretty in the engine compartment? Ive never heard of an engine having an oil puke tank. |
The oil tank is typically not used anymore. It was where all the drivetrains oils vented to, but today, we use breathers on the engine on the valve covers, the trans has it's own and the Kirkham's provide the one for the rear, so I believe these days the guys who put them on probably do it for the original look and of course, you can make them functional too. I was going to put one on, but they were out of stock and then I did not feel like doing it later. But maybe one of these days.
In short, it's your call. If you want the look go for it. |
-
Advertising


10-04-2010, 02:53 PM
|
 |
CC Member

|
|
|
Join Date: May 2010
Location: Birmingham,
AL
Cobra Make, Engine: Kirkham 289 FIA, 363 Stroker
Posts: 751
|
|

 Not Ranked
New suspension, differential, etc are in the works at Kirkham currently. I should have a functional roller in the near future.
Just thought i would share since the parts should be here in a few weeks. I should be able to turn my full attention to this car in about two weeks.
|

10-11-2010, 07:38 PM
|
 |
CC Member

|
|
|
Join Date: May 2010
Location: Birmingham,
AL
Cobra Make, Engine: Kirkham 289 FIA, 363 Stroker
Posts: 751
|
|

 Not Ranked
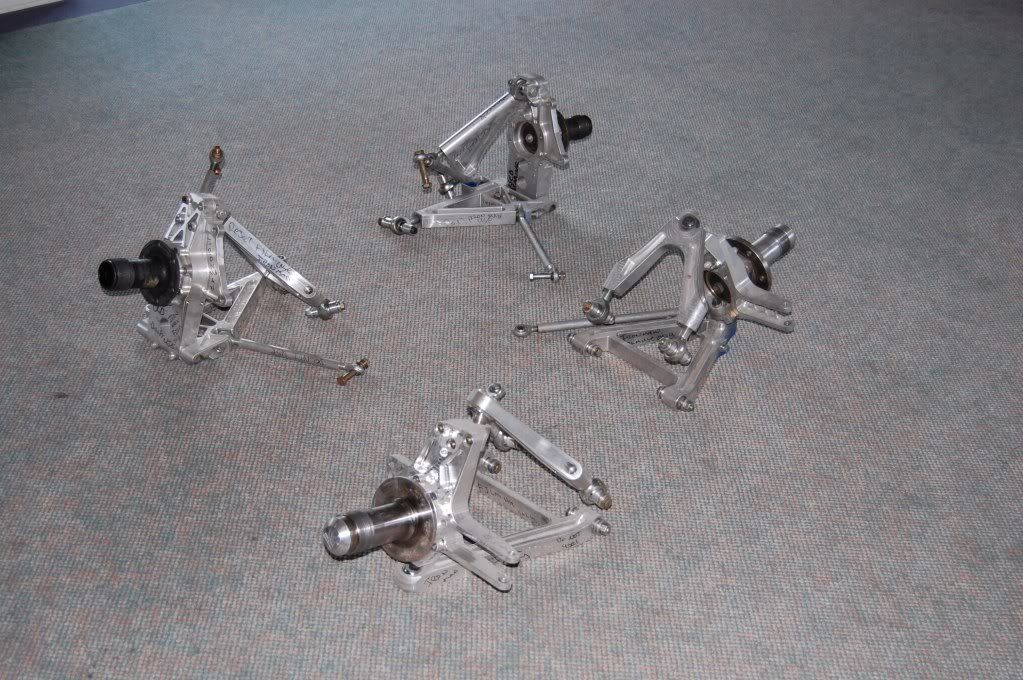
Old suspension is out. Im ready to start with a clean slate.
I figured out why the front wheels were on one side and the rear on the other-One rear tire was mounted on a front wheel and one front tire on a rear wheel.
Front
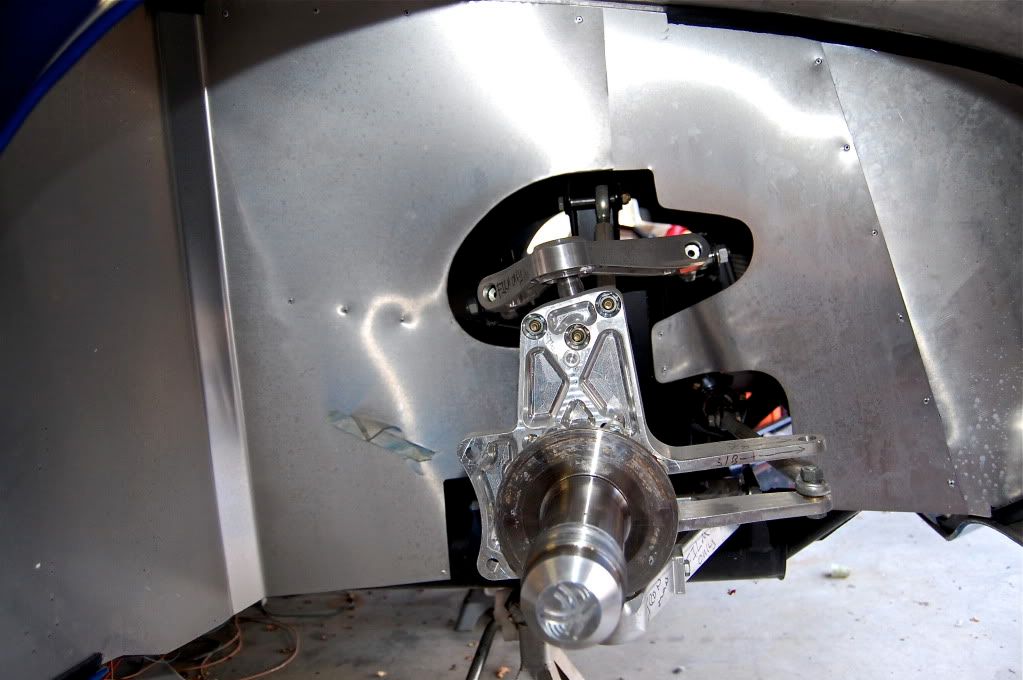
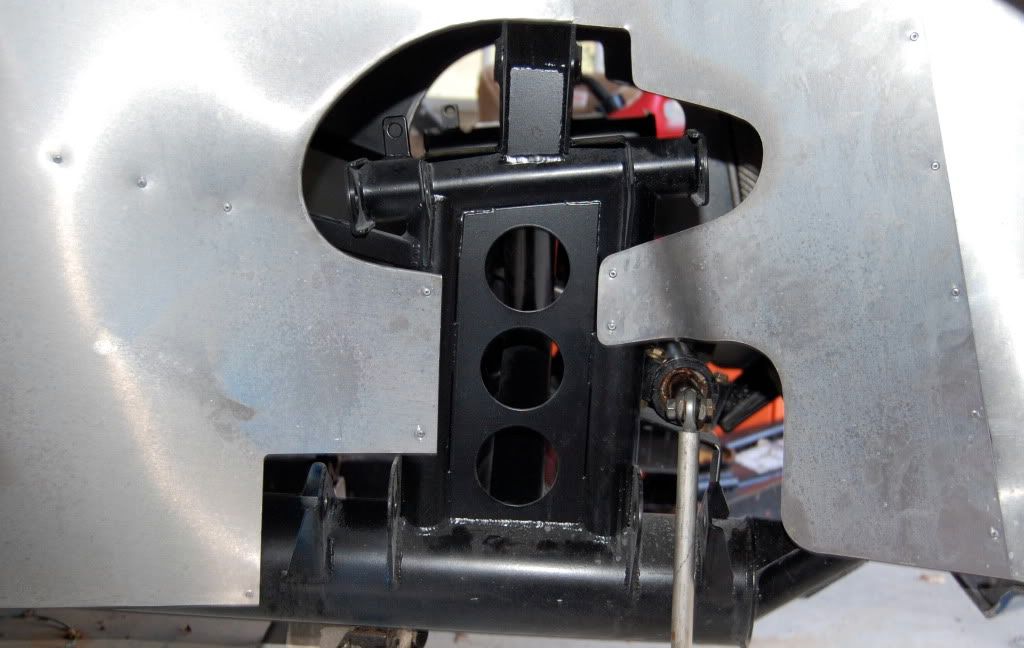
Rear
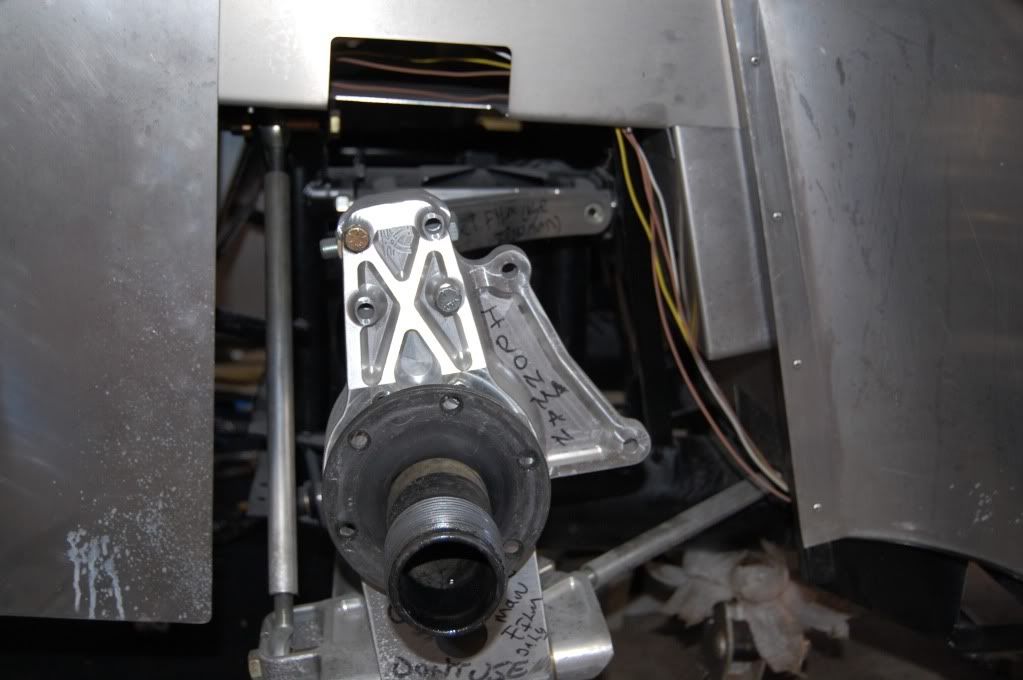
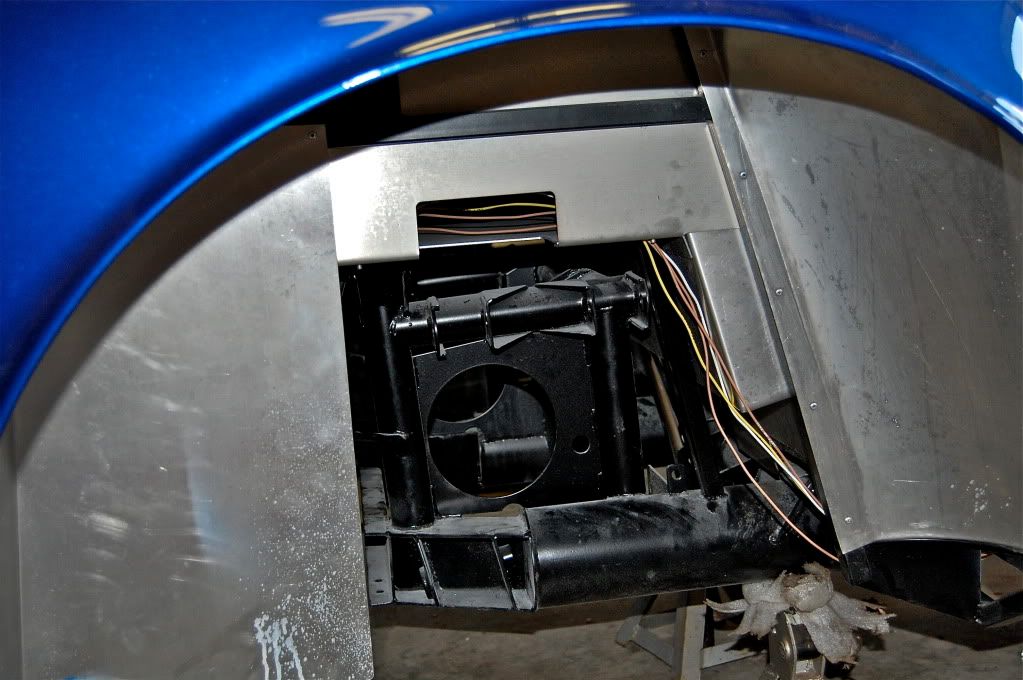
Can anyone tell me if this is the correct steering sector rod?
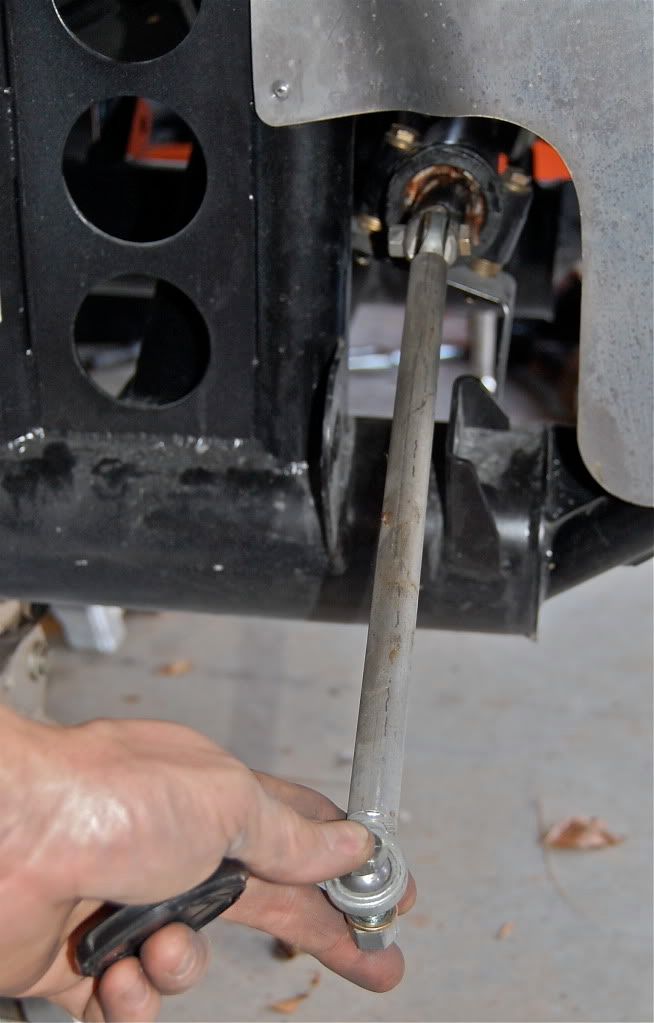
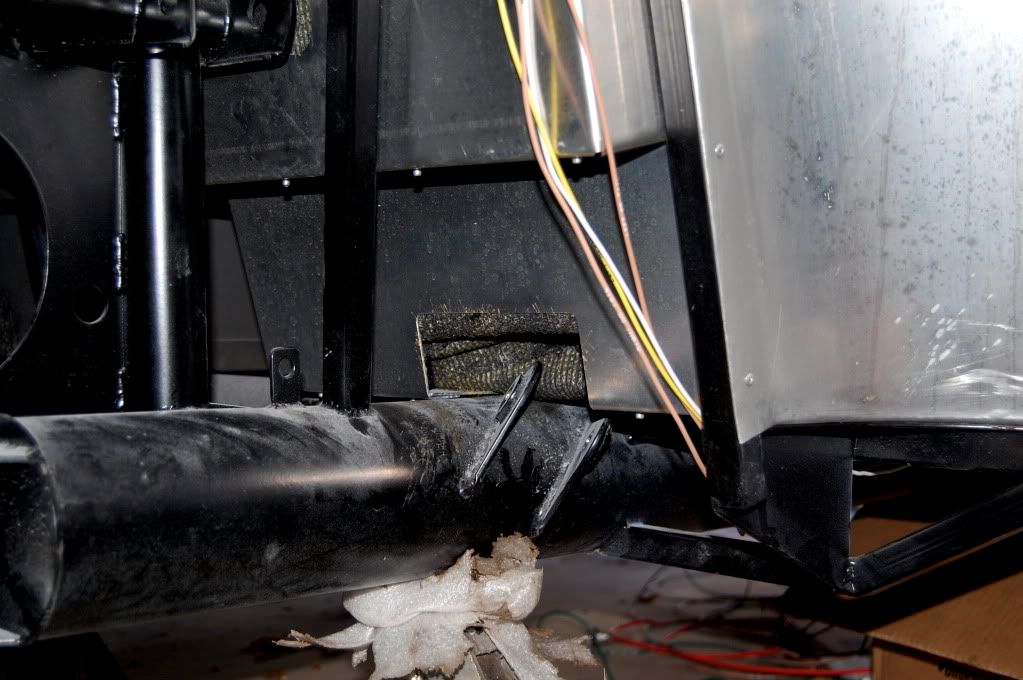
And, should this carpet area be exposed after the suspension is installed? The only reason i can think for it to be exposed is for access to the lower control arm stabilizer bolt. Is the carpet simply cut out and the area left open, or does something cover these areas?
All reject and proto-type suspension components are out
 |

10-12-2010, 01:29 AM
|
 |
CC Member

|
|
|
Join Date: Jun 2004
Location: Leicestershire,
UK
Cobra Make, Engine: Kirkham #523, 427 S/O
Posts: 1,137
|
|

 Not Ranked
Hi,
The steering rod certainly isn't the same as mine, so I suspect it isn't correct. There should also be a rubber boot on the inner end.
The hole in the floor should be covered by a vacuum formed black plastic cover on the inside of the car, the same or very similar to the ones inside the trunk (shown below).
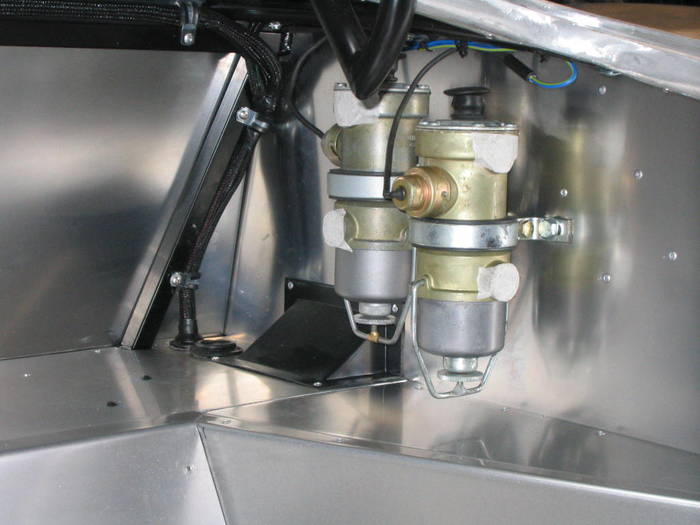
This is simply pop-riveted in place.
Paul
Last edited by FatBoy; 10-12-2010 at 01:31 AM..
|

10-12-2010, 08:24 AM
|
 |
CC Member

|
|
|
Join Date: May 2010
Location: Birmingham,
AL
Cobra Make, Engine: Kirkham 289 FIA, 363 Stroker
Posts: 751
|
|

 Not Ranked
Thanks! David thought the steering sector was bad, so i guess i will put that on the list as well with the plastic covers. I appreciate the reply and the photos!
|

10-14-2010, 04:02 PM
|
 |
CC Member

|
|
|
Join Date: May 2010
Location: Birmingham,
AL
Cobra Make, Engine: Kirkham 289 FIA, 363 Stroker
Posts: 751
|
|

 Not Ranked
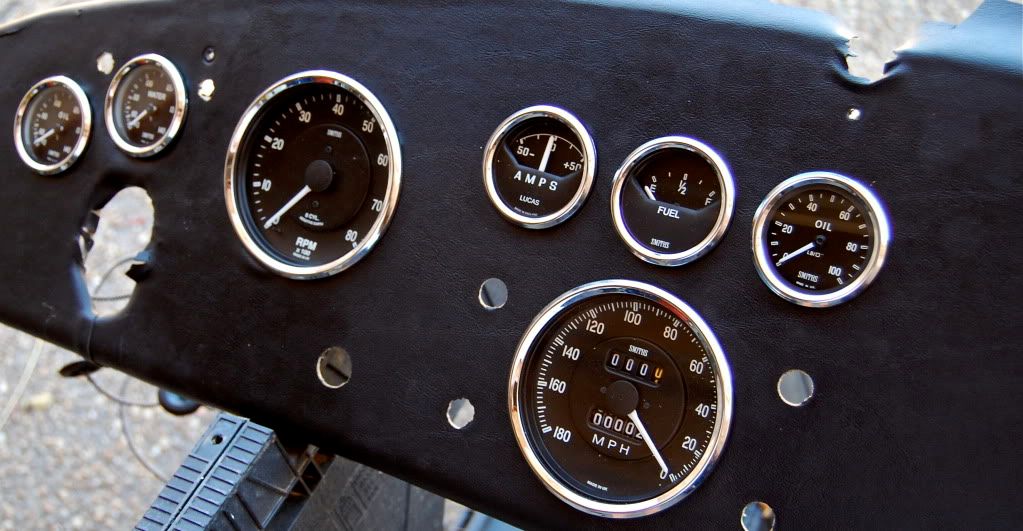
One small step forward. Not many things are more beautiful than the original style Smiths gauges. I will most likely swap the fuel and oil pressure gauges to give the dash a more balanced look.
Last edited by RestoCreations; 10-14-2010 at 04:06 PM..
|

10-18-2010, 08:53 PM
|
 |
CC Member

|
|
|
Join Date: May 2010
Location: Birmingham,
AL
Cobra Make, Engine: Kirkham 289 FIA, 363 Stroker
Posts: 751
|
|

 Not Ranked
 Milestone
The wiring is finished! I spent about 12 hours on it total. If you need a nice harness that is about as straightforward as they come, i recommend Ron Francis wiring. I also recommend powerbraid wire wrap from painless wiring-great stuff!!! Ill post pictures soon.
|

10-18-2010, 09:56 PM
|
 |
Senior Club Cobra Member

|
|
|
Join Date: Dec 2007
Cobra Make, Engine: ERA FIA 'Street' Build
Posts: 2,128
|
|

 Not Ranked
Your project is coming along very nicely. Hang onto those 'reject' parts, would make for a nice display along with some photos at a car show  |

10-19-2010, 07:42 AM
|
 |
CC Member

|
|
|
Join Date: Apr 2009
Location: Bethesda,
MD
Cobra Make, Engine: CSX 6022, navy blue, period correct 427 SO
Posts: 2,154
|
|

 Not Ranked
This looks great!
One comment on the order of the gauges (if it matters to you). The correct order for the small gauges from left to right is: Oil temp, Oil Pressure, Water Temp, Amps, Fuel Pressure/Level. Just thought I'd mention it as it is obviously easier to change now if you want to.
__________________
“There are only three sports: bullfighting, motor racing, and mountaineering; all the rest are merely games.”
www.partskeeper.com
(Less time searching, more time wrenching & driving)
|

10-19-2010, 07:56 AM
|
 |
CC Member

|
|
|
Join Date: May 2010
Location: Birmingham,
AL
Cobra Make, Engine: Kirkham 289 FIA, 363 Stroker
Posts: 751
|
|

 Not Ranked
Thanks for the gauge order!
-i was looking in a couple of books I had and at some pictures from the Mecum auction of an original car trying to figure out the correct order. It appeared that they varied from car to car, so i just picked the order that was most similar to the original car that i had pictures of and then swapped the fuel and oil pressure around last night due to the difference in the gauges. |

10-19-2010, 12:03 PM
|
 |
Full Blown Member

|

|
|
Join Date: Sep 2008
Cobra Make, Engine: KMP 427 S/C, Twin Paxton 511 FE
Posts: 2,594
|
|

 Not Ranked
Restocreations,
Thanks for the updates. This build is quite unique and fun. 
rodneym |

10-20-2010, 05:33 PM
|
 |
CC Member

|
|
|
Join Date: May 2010
Location: Birmingham,
AL
Cobra Make, Engine: Kirkham 289 FIA, 363 Stroker
Posts: 751
|
|

 Not Ranked
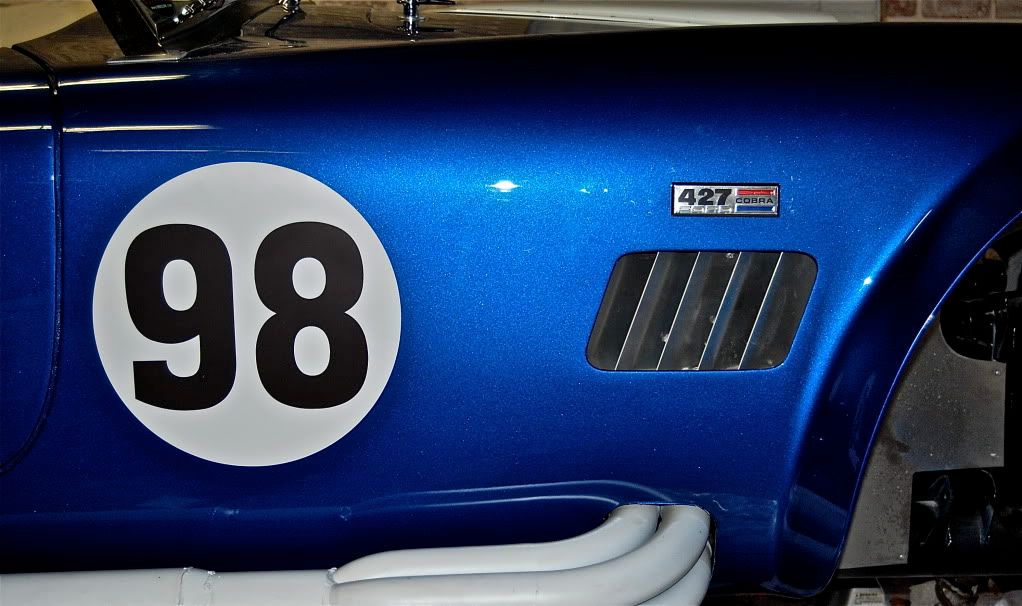
 Emblems
One more very small step while i am waiting on other parts to arrive.
I tried my best to locate the emblems in the exact location where the original Cobras had them installed. Im working with pictures of original cars from past Mecum auctions.
Traditionally i am more of a fan of very dark blue or guardsman, but this metallic blue is really starting to grow on me.
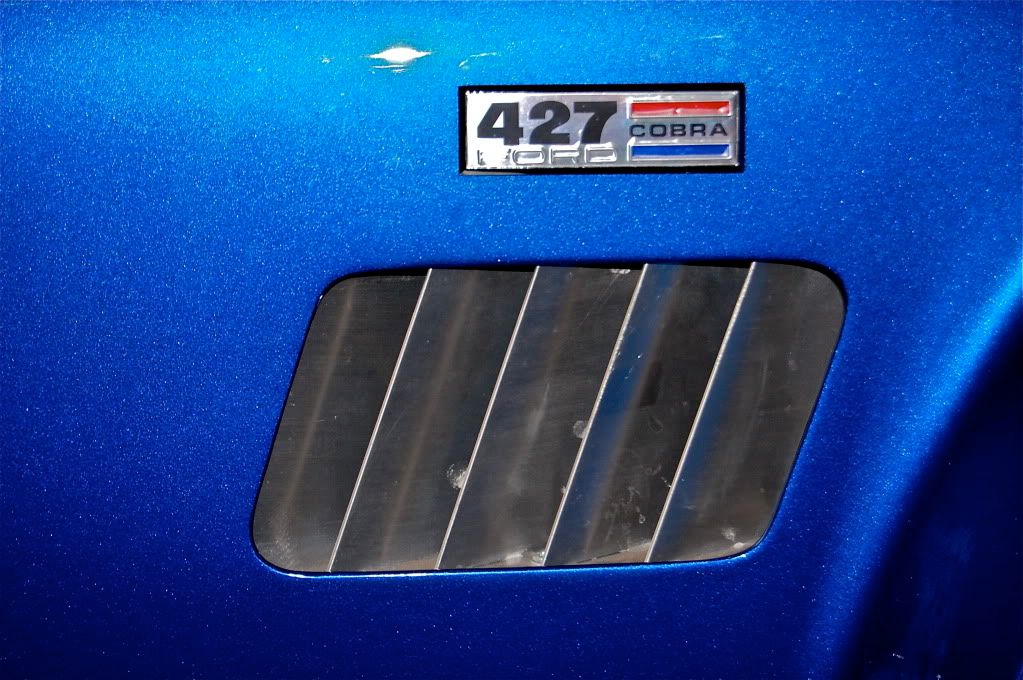
Last edited by RestoCreations; 10-20-2010 at 05:37 PM..
|

10-20-2010, 06:57 PM
|
|
CC Member

|
|
|
Join Date: May 2008
Location: Sacramento,Ca.,
Ca.
Cobra Make, Engine: Midstates (2001)
Posts: 1,724
|
|

 Not Ranked
R.C...did Kirkham paint your car or did the studio paint it ???
and how close are you to haveing the "motovation" ready ???
|

10-20-2010, 07:06 PM
|
 |
CC Member

|
|
|
Join Date: May 2010
Location: Birmingham,
AL
Cobra Make, Engine: Kirkham 289 FIA, 363 Stroker
Posts: 751
|
|

 Not Ranked
I think the Kirkhams subbed the paint work out to someone, but i am not sure.
Motovation?
|

10-21-2010, 11:55 AM
|
 |
CC Member

|
|
|
Join Date: Jun 2004
Location: Leicestershire,
UK
Cobra Make, Engine: Kirkham #523, 427 S/O
Posts: 1,137
|
|

 Not Ranked
The clearance hole around the exhaust looks very tight. It is certainly MUCH tighter than mine and you might have issues with the exhausts contacting the bodywork with the torque reaction of the engine. 
It's looking good though. 
I assume the "Motovation" is the engine. 
Paul |

10-21-2010, 02:12 PM
|
|
CC Member

|
|
|
Join Date: May 2008
Location: Sacramento,Ca.,
Ca.
Cobra Make, Engine: Midstates (2001)
Posts: 1,724
|
|

 Not Ranked
Yes....the engine...
|

10-21-2010, 02:26 PM
|
 |
CC Member

|
|
|
Join Date: May 2010
Location: Birmingham,
AL
Cobra Make, Engine: Kirkham 289 FIA, 363 Stroker
Posts: 751
|
|

 Not Ranked
I thought it was a little tight as well. I might need to enlarge it and then make polished aluminum plates to go around the pipes-ive seen one original cobra that had a plate like i am describing for heat protection. It looked good.
The car will receive an Aluminum shelby 427 FE block, Edelbrock heads, all forged 482 stroker kit, hydraulic roller cam, and either a turkey pan with a holley carb or webers with the 10 degree manifold. I will have to wait and see how much money is left once the car nears completion to see if the webers will be feasible or not.
|

10-22-2010, 09:44 PM
|
 |
CC Member

|
|
|
Join Date: May 2010
Location: Birmingham,
AL
Cobra Make, Engine: Kirkham 289 FIA, 363 Stroker
Posts: 751
|
|

 Not Ranked
New eyes were installed this evening. I purchased these from GB cars for 25.00 a piece as opposed to the 150.00 price per bucket on some of the vendor sites. I could have reused the buckets that came with the car, but the rings were damaged.
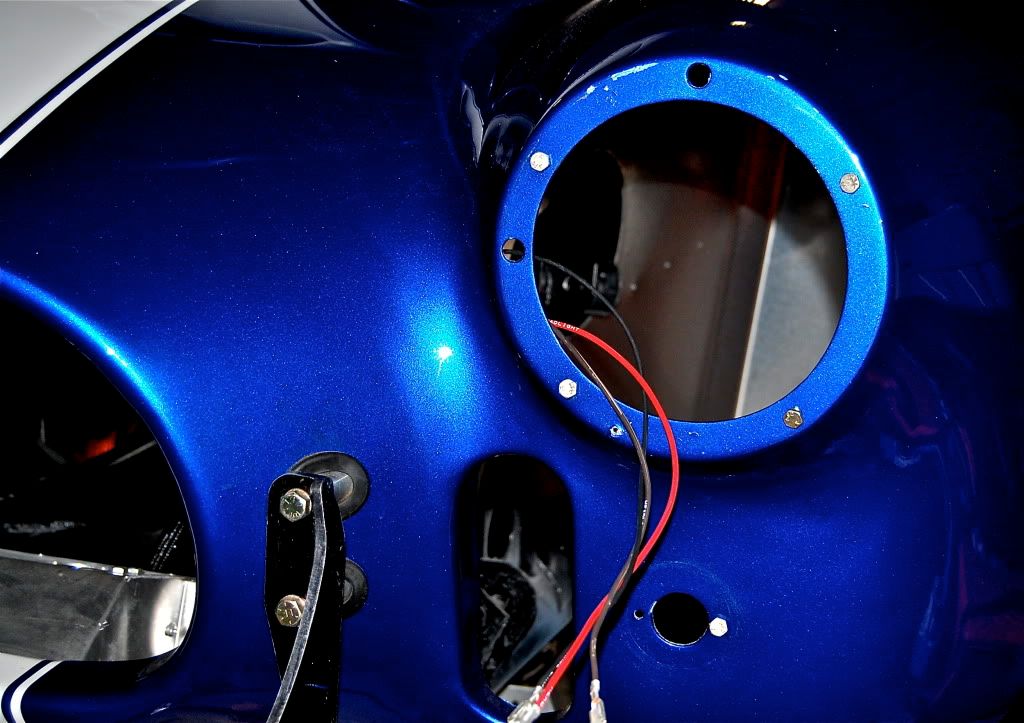
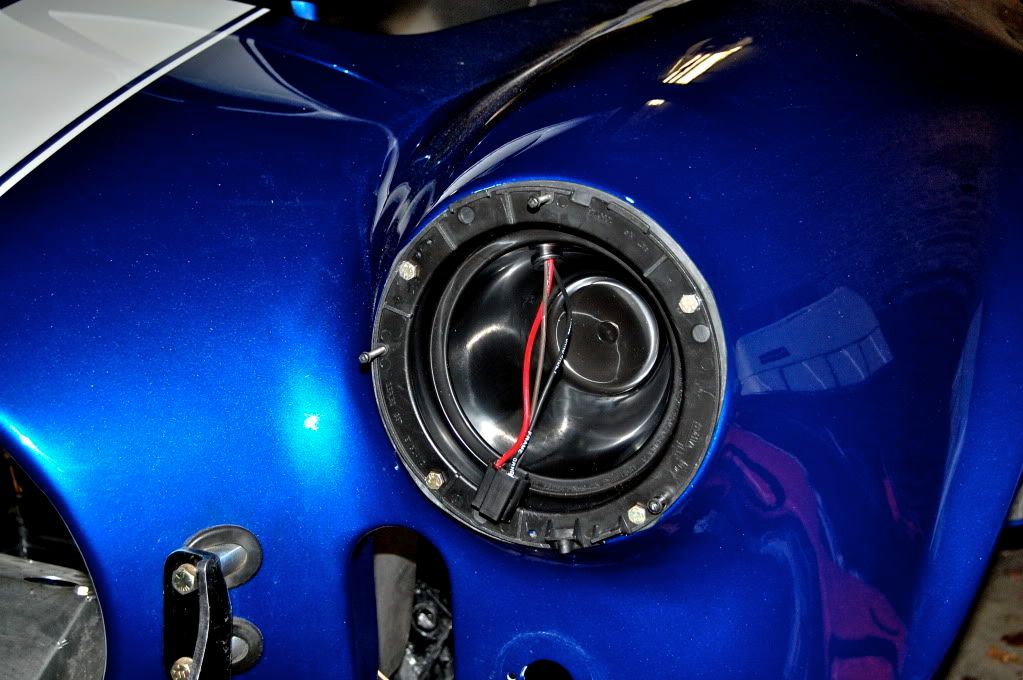
Fresh new wiring-done correctly i might add.
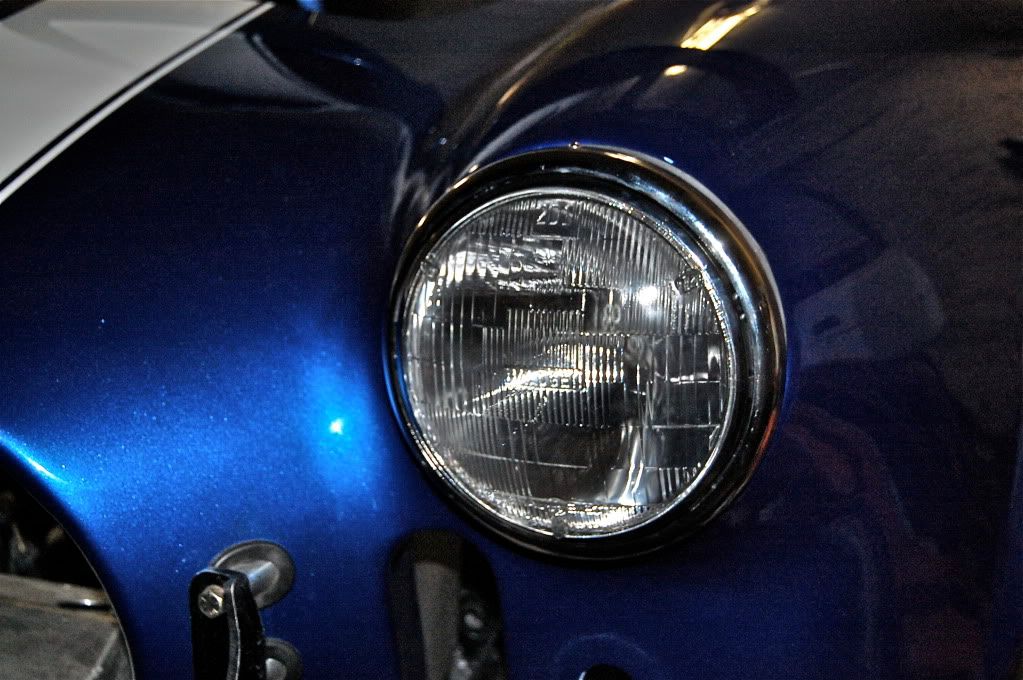
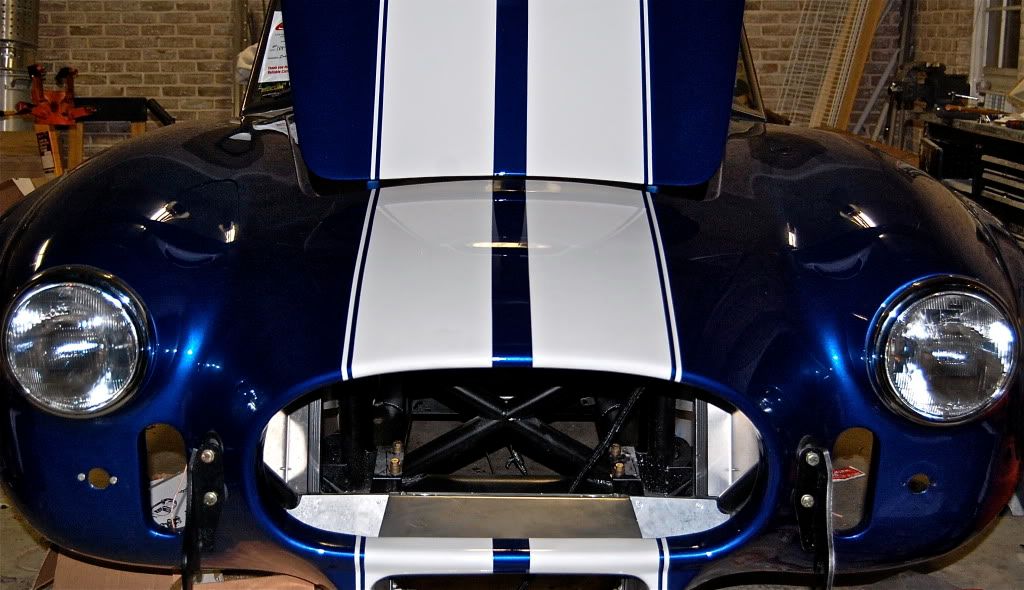
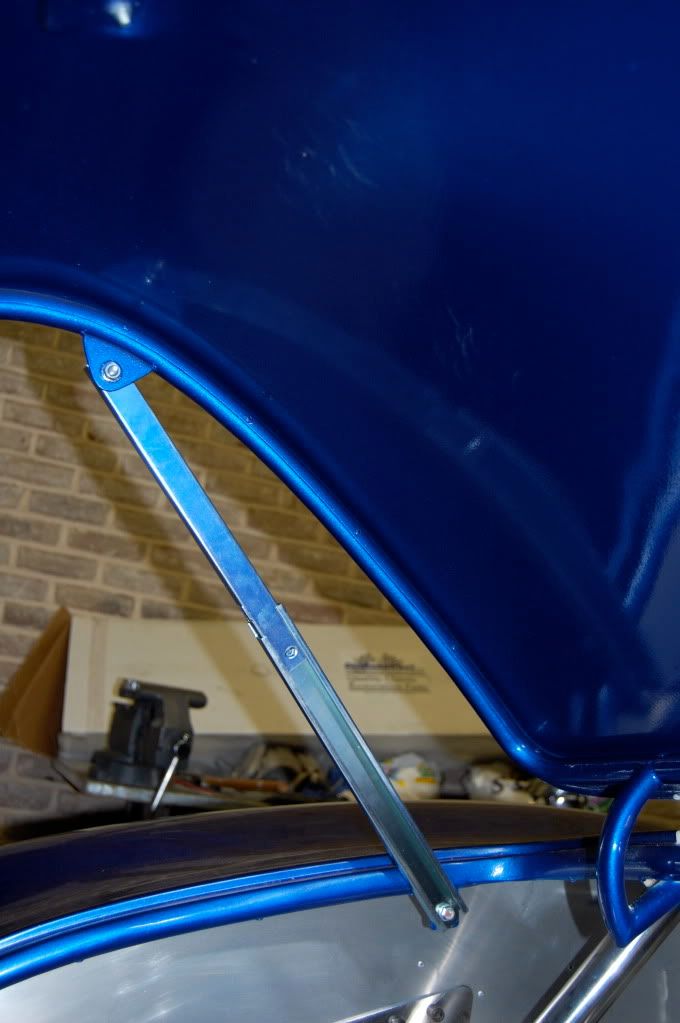
Hood prop from Cobra Restorers. Its nice not to be forced to prop it open with my head anymore while i work in the engine compartment.
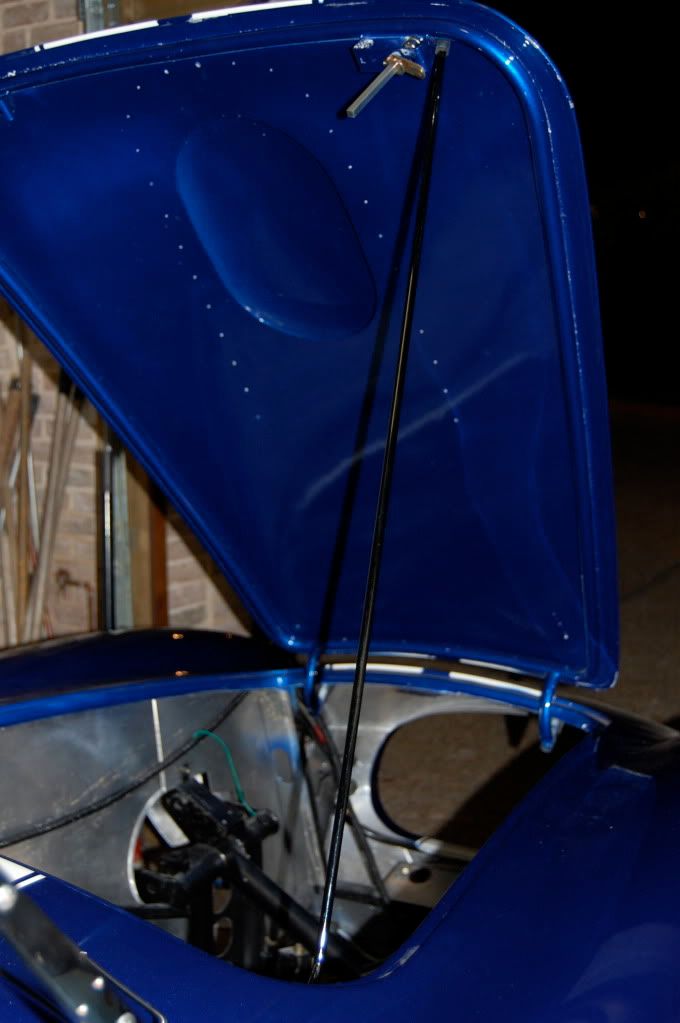
Trunk prop rod-previously installed. It looks blue due to the reflection, but its actually gold cadmium plated. I bought this from finishline and when it arrived i realized that I did not need the brackets attached to the ends. I simply drilled the rivets out, removed the end brackets, and then attached directly to the mounting locations on the car.
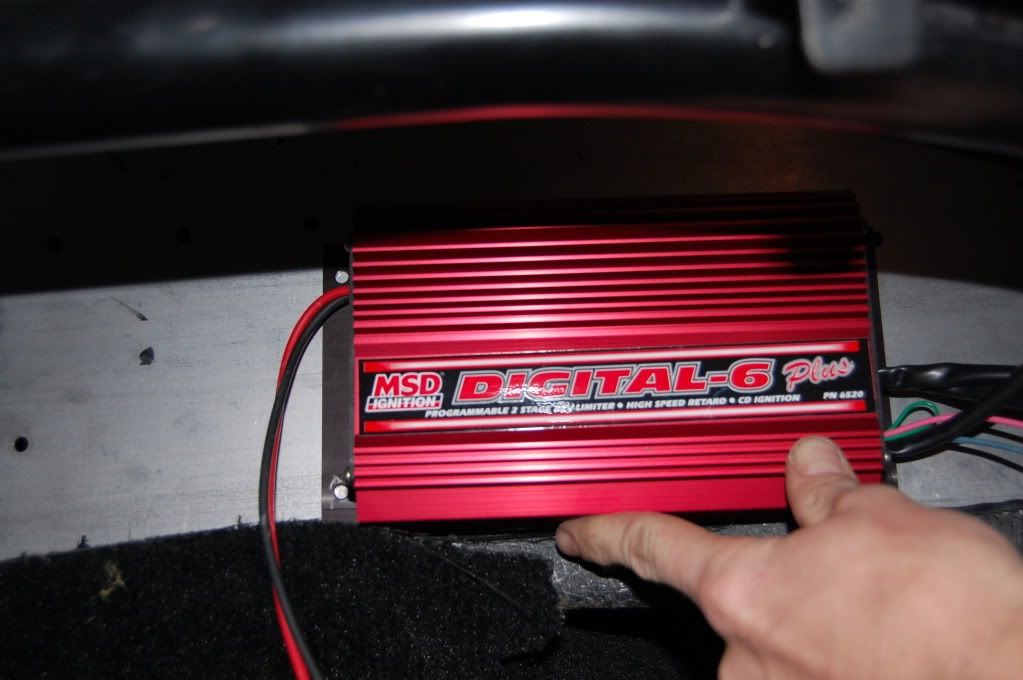
And this nice fella came in today from summit. I will attach it to the firewall tomorrow and hook up the wires. In between watching college football.
Last edited by RestoCreations; 10-22-2010 at 09:51 PM..
|

10-26-2010, 08:13 PM
|
 |
CC Member

|
|
|
Join Date: May 2010
Location: Birmingham,
AL
Cobra Make, Engine: Kirkham 289 FIA, 363 Stroker
Posts: 751
|
|

 Not Ranked
The New Suspension came in today. I installed the front suspension and the differential this evening. The differential took a good bit of persuasion to get it past the frame rails and for it to properly seat in place.
I cleaned up frame and panels-no more blue overspray

The NEW suspension from Kirkham is pure artwork.


Check out the new safety feature-or i assume it is new.

Driver's side


Rear-before installation of the differential(still need to give the frame a few more wipe downs to remove the dust)

Differential in place


Last edited by RestoCreations; 10-26-2010 at 08:51 PM..
|

10-26-2010, 09:59 PM
|
 |
Senior Club Cobra Member

|
|
|
Join Date: Dec 2007
Cobra Make, Engine: ERA FIA 'Street' Build
Posts: 2,128
|
|

 Not Ranked
resto ... nice work! Those pieces are beautiful and as would be expected, fit the car perfectly. You have been making great progress lately, any thoughts as to how soon you will be ready to install the motor and trans?
|
 Posting Rules
|
You may not post new threads
You may not post replies
You may not post attachments
You may not edit your posts
HTML code is Off
|
|
|
All times are GMT -7. The time now is 03:41 PM.
|
|


 Linear Mode


