Welcome to Club Cobra! The World's largest
non biased Shelby Cobra related site!
- » Representation from nearly all
Cobra/Daytona/GT40 manufacturers
- » Help from all over the world for your
questions
- » Build logs for you and all members
- » Blogs
- » Image Gallery
- » Many thousands of members and nearly 1
million posts!
YES! I want to register an account for free right now!
p.s.: For registered members this ad will NOT show
 
 Main Menu
|
 Nevada Classics
|
 Advertise at CC
|
 January 2025
|
| S |
M |
T |
W |
T |
F |
S |
| |
|
|
1 |
2 |
3 |
4 |
| 5 |
6 |
7 |
8 |
9 |
10 |
11 |
| 12 |
13 |
14 |
15 |
16 |
17 |
18 |
| 19 |
20 |
21 |
22 |
23 |
24 |
25 |
| 26 |
27 |
28 |
29 |
30 |
31 |
|
|
 CC Advertisers
|
|

07-23-2007, 07:42 AM
|
 |
CC Member

|
|
|
Join Date: Mar 2001
Location: Provo,
Ut
Cobra Make, Engine: Kirkham, 427
Posts: 6,990
|
|

 Not Ranked
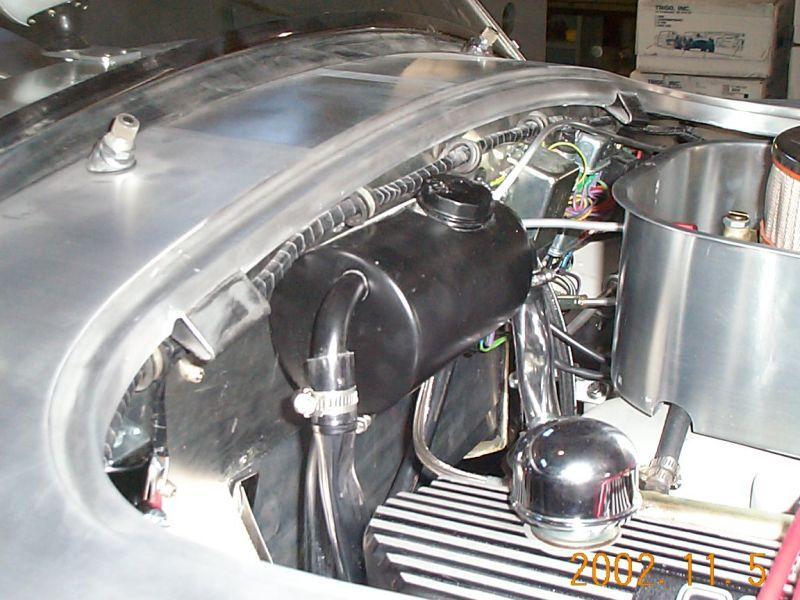
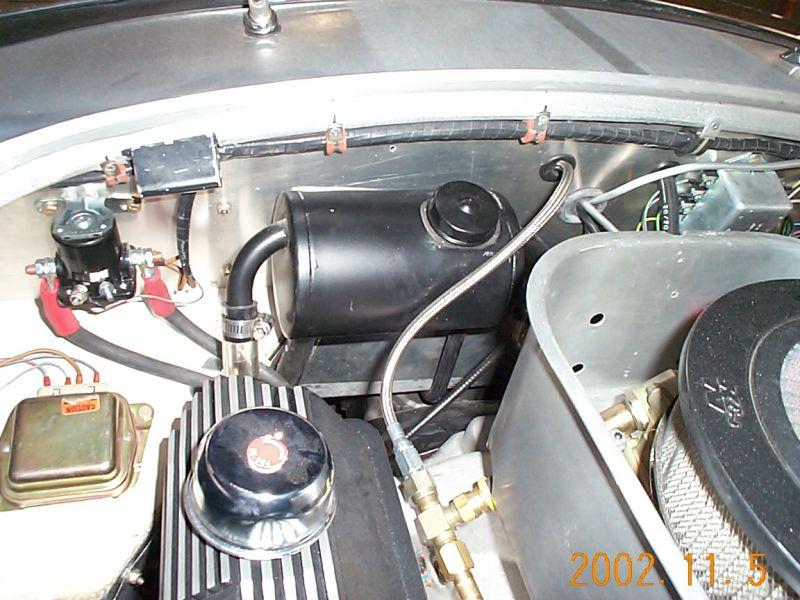
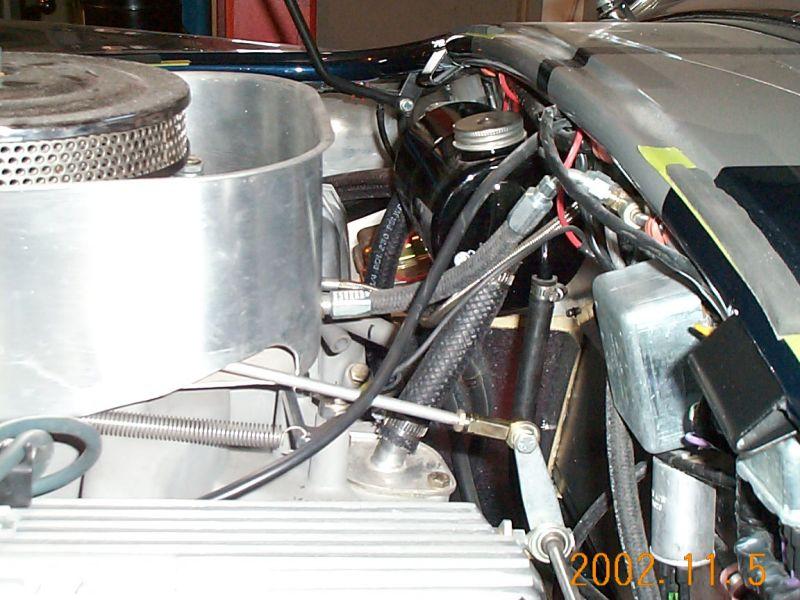
The oil puke tank mounts on the firewall on the right side of the car. The breather tube lines up with the intake manifold breather. It is hard to explain, but I will get a photo posted for you.
David    |
-
Advertising


07-23-2007, 07:58 AM
|
 |
Senior Club Cobra Member

|

|
|
Join Date: Mar 2001
Location: Northport,
NY
Cobra Make, Engine: Kirkham, KMP178 / '66 GT350H, 4-speed
Posts: 10,362
|
|

 Not Ranked
Last edited by computerworks; 07-23-2007 at 08:08 AM..
|

07-23-2007, 08:45 AM
|
|
CC Member

|
|
|
Join Date: May 2006
Location: Exeter,
CA
Cobra Make, Engine: KMP 498
Posts: 495
|
|

 Not Ranked
Do you have a dimension from CL of car? Thanks Are one of those your car?
|

07-23-2007, 08:48 AM
|
 |
Senior Club Cobra Member

|

|
|
Join Date: Mar 2001
Location: Northport,
NY
Cobra Make, Engine: Kirkham, KMP178 / '66 GT350H, 4-speed
Posts: 10,362
|
|

 Not Ranked
No.
...and, no.
...my firewall, though.

If nothing gets added here today, I can take dimensions for you tonite.
Last edited by computerworks; 07-23-2007 at 12:06 PM..
|

07-30-2007, 10:30 PM
|
|
CC Member

|
|
|
Join Date: May 2006
Location: Exeter,
CA
Cobra Make, Engine: KMP 498
Posts: 495
|
|

 Not Ranked
Just installed the Dif. Do the EM Brake cables go over or under? They were already in and I just just the diff up. The half shafts: Does the female side go at the diff or vis versa?
Thanks
|

07-31-2007, 12:20 AM
|
 |
CC Member

|
|
|
Join Date: Dec 2001
Location: San Diego,
CA
Cobra Make, Engine:
Posts: 2,979
|
|

 Not Ranked
My cables are routed over the diff. Don't remember on the shafts.
__________________
Remember, It's never too early to start beefing up your obituary.
|

07-31-2007, 07:20 AM
|
 |
CC Member

|
|
|
Join Date: Mar 2001
Location: Provo,
Ut
Cobra Make, Engine: Kirkham, 427
Posts: 6,990
|
|

 Not Ranked
big-boss,
We install the e brake cables under the diff.
We install the female portion of the 1/2 shafts inboard.
David
   |

07-31-2007, 09:02 AM
|
|
CC Member

|
|
|
Join Date: May 2006
Location: Exeter,
CA
Cobra Make, Engine: KMP 498
Posts: 495
|
|

 Not Ranked
David, If you have a chance. Dims on the three holes for the puk tank. Thanks.
|

07-31-2007, 09:07 PM
|
 |
CC Member

|
|
|
Join Date: Oct 2003
Location: Hermosa Beach,
Ca
Cobra Make, Engine: Kirkham 289 fia kmp#325
Posts: 132
|
|

 Not Ranked
David,
Looking along the frame rails from the front of the car, the third cross member from the front has what looks to be a mounting bracket/box welded to the cross member. I am gathering that is for the transmission (toploader)?
My questions is: if I am using the TKO and your custom bracket do I need to remove that welded on bracket/box before installing the Tremec?
Thanks,
__________________
Mike G.
|

08-01-2007, 10:32 AM
|
 |
CC Member

|
|
|
Join Date: Mar 2001
Location: Provo,
Ut
Cobra Make, Engine: Kirkham, 427
Posts: 6,990
|
|

 Not Ranked
Big-boss,
I will check the holes and see. We are currently out of the oil tanks and we are waiting on them from Poland. I will see, however, if we have a drawing here. I may have to brush up on my Polish!
Caustic_Cobra,
You can put either transmission in one of our cars that has the Tremec mounts welded on them. They do not interfere with each other. The Top-Loader mounts on the front bracket and the Tremec mounts on the rear bracket.
David
   |

08-01-2007, 11:34 AM
|
|
CC Member

|
|
|
Join Date: May 2006
Location: Exeter,
CA
Cobra Make, Engine: KMP 498
Posts: 495
|
|

 Not Ranked
David, If you can just measure the one in the "Assembly Manule" Thanks again.
|

08-01-2007, 12:33 PM
|
 |
CC Member

|
|
|
Join Date: Oct 2003
Location: Hermosa Beach,
Ca
Cobra Make, Engine: Kirkham 289 fia kmp#325
Posts: 132
|
|

 Not Ranked
Thanks, David
__________________
Mike G.
|

08-01-2007, 01:45 PM
|
 |
CC Member

|
|
|
Join Date: Mar 2001
Location: Provo,
Ut
Cobra Make, Engine: Kirkham, 427
Posts: 6,990
|
|

 Not Ranked
That car is on the "Fast Lap" of Utah right now. It is Miller Motorsports car. My car and my brother's car are also both up at the track right now.
I will find one...somewhere.
David
   |

08-01-2007, 09:00 PM
|
|
CC Member

|
|
|
Join Date: May 2006
Location: Exeter,
CA
Cobra Make, Engine: KMP 498
Posts: 495
|
|

 Not Ranked
David, More great picture tahnks.
?: What fuel pressure regulator? Are you using the mechanical pump as well? Can you give us a plumbing sketch? Bypass fuel pump? Do we need to run a return line? Thanks keep it comming. I am gaining ground fast. Also I had to do some swearing to get the trans tunnel off- I just trimmed around the brake lever- Is that right or did I take it off wrong? I assumed I did not need to remove brake lever.
|

08-01-2007, 09:44 PM
|
 |
CC Member

|
|
|
Join Date: Jan 2003
Cobra Make, Engine: Once Owned CSX4803, CSX803 block, Keith Craft 468, Suspension by Tom Barnard, Built by Kris Kincaid
Posts: 161
|
|

 Not Ranked
 Re: Engine Install
David,
Any need to put a level on the engine after bolting it down to ensure it's level? Also, did you install your new hydralic throwout bearing "do wiki" on this car? What makes this design superior (for less headaches) than previous solutions? Thanks!
__________________
Bluedog
|

08-01-2007, 11:18 PM
|
|
Banned

|
|
|
Join Date: Oct 2003
Location: Yorba Linda,
CA
Cobra Make, Engine: SPF w/392CI stroker
Posts: 3,293
|
|

 Not Ranked
 Engine Install...
David,
I know you guys are pros ("...our installs take about 10 minutes."), but I have to ask why:
1. You wouldn't place any protective coverings/blankets over that beautiful bodywork? I realize at one point you mention a 1/4" clearance on the bottom of the pan. 
2. The chains holding up the motor look like they would pound those polished valve covers. Do you folks at least wrap them up with shop towels?
BTW, your piece on swapping out the tranny input shaft was so thorough that it scared the @#$% out of me to the point that I would never attempt the R&R myself! 
-Dean |

08-01-2007, 11:45 PM
|
|
CC Member

|
|
|
Join Date: Jul 2007
Location: Ravensdale,
WA
Cobra Make, Engine: alum 427 side oiler block. Edelbrock heads. Roller crank, roller cam, 2-4 barrel carbs, quick change rear-end, 683 hp....oh! and ostrich skin heated seats!
Posts: 7
|
|

 Not Ranked
Wow - nice job. Where is the car now? We have seen one very similiar to it here in WA state. Where did you get the aluminum body from? You guys have done a really nice job.
|

08-02-2007, 09:50 AM
|
 |
CC Member

|
|
|
Join Date: Mar 2001
Location: Provo,
Ut
Cobra Make, Engine: Kirkham, 427
Posts: 6,990
|
|

 Not Ranked

big-boss,
We install bypassing fuel pressure regulators on any of our own cars. It is not original, but like many original things, they need to be thrown out the window. I highly recommend them as they greatly reduce vapor lock and boiling the fuel in the bowls and making carbs running like crap. The bypassing fuel system is complicated. I will take a picture of the entire system when I can get a car around here. I will do it on the next Miller Motorsports car that we do. That will be a couple of weeks.
A brief description is as follows:
We run the fuel from the gas tank to the fuel filter (on cars that get that option) -electric fuel pump-mechanic fuel pump-carb-fuel pressure bypassing regulator-fuel tank.
Trimming the tunnel is wrong. You have to unbolt the e brake lever to take the tunnel out. It is not that hard to do. You only have to unbolt the through bolt. But, who cares! No big deal. I wouldn't worry one little bit about it...but you can always call next time 
Bluedog,
No, we don't level out the engine because we already did that when we made the mounts. We just bolt them in now.
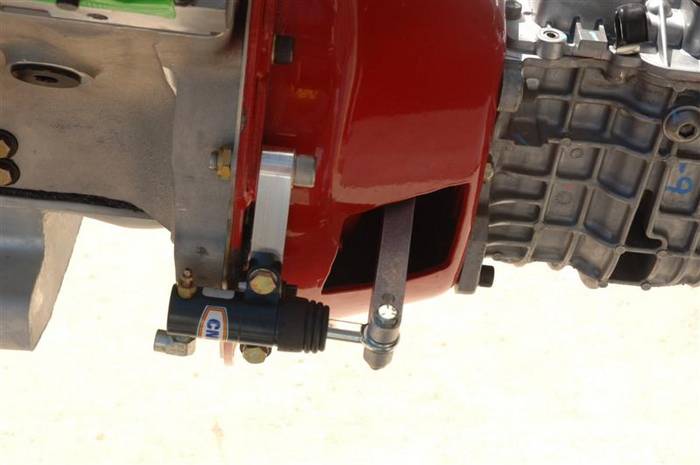
We did mount our new slave cylinder throw out bearing assembly to this engine. It is NOT a hydraulic throw out bearing--it is a mechanical throw out bearing assembly with a lever that is actuated by a hydraulic slave cylinder. There are less headaches with this one because they DON'T leak!!! If they do, you simply change the slave cylinder and you don't have to take the seats, tunnel, (along with the ebrake handle), drive shaft, and transmission out! There are lots of pictures of it on the build blog and here is another one.
 |

08-02-2007, 10:09 AM
|
 |
CC Member

|
|
|
Join Date: Mar 2001
Location: Provo,
Ut
Cobra Make, Engine: Kirkham, 427
Posts: 6,990
|
|

 Not Ranked

Dean,
The actual dropping in the motor is only 10 minutes. Getting the motor ready to drop in is about 8 hours however! There are so many things that the engine builder doesn't do. Make the coil wire, bolt on the carb, bolt on the turkey pan, bolt on the clutch, pressure plate, flywheel, pilot bearing, oil pressure sending unit, oil temperature sending unit, water temperature sending unit, throttle linkage, dial in the bell housing, change the input shaft on the tranny, bolt on the tranny, change the shifter, hook up the bypassing fuel regulator, etc, etc, etc. (All future topics coming up!) Then, hooking it all up takes a lot of time. (But we are working hard to MINIMIZE that time as much as possible.) There are a million things to hook up.
We never place anything on the body work for several reasons.
It is impossible to find a clean towel, cover, whatever, to cover the fenders with. If there is any dirt, shavings, crap, gremlins, whatever, hiding in the cover it will scratch the car. So, we just don't touch the body work when we are installing the motor. If you look closely at the pictures of my guys, you can see they only touch the body wherever there is a tube that connects the body to the chassis. Covers invite people to set things on them--like wrenches, parts, etc. With no cover, no one puts anything on them.
The angle you are looking at the chains on the spreader bar is deceiving. The spreader we use was specifically made to be quite a bit WIDER than the valve covers. There is NO WAY the chains can touch the valve covers during the install. Wrapping cloths just takes up time finding them and putting the on. It is MUCH better to simply make the spreader bar such that it is impossible to scratch the valve covers in the first place.
Funny, I always thought changing out the input shaft was not too difficult--until I posted all of the steps required!
David
   |

08-02-2007, 10:10 AM
|
 |
CC Member

|
|
|
Join Date: Mar 2001
Location: Provo,
Ut
Cobra Make, Engine: Kirkham, 427
Posts: 6,990
|
|

 Not Ranked
SumFun,
Thank you for your kind words! We have a few cars in Washington now. We are the manufacturer of the cars. We make our aluminum bodies in an old MiG fighter factory in Poland.
David
   |
 Posting Rules
|
You may not post new threads
You may not post replies
You may not post attachments
You may not edit your posts
HTML code is Off
|
|
|
All times are GMT -7. The time now is 06:57 PM.
|
|


 Linear Mode


