The shifting problem is real and the bell housing alignment is also
very real. When I did my bell housing I did not use the Lakewood adjustable alignment dowels. If you ever use them you will know why — they are difficult to use in the extreme if you are looking for a near zero runout on the finished job.
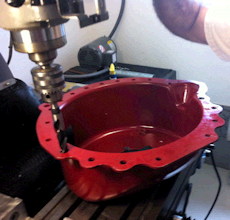
When I did my bell housing I drilled out the dowel pin holes in the bell housing to allow movement on the back of the block. Here is a pic of the bell housing in the mill as I drill out the holes. You don't need a mill, a drill press will work fine. The mill was free the drill press was not.

After drilling out the Lakewood registration holes, you mount the can to the back of the block w/o a clutch or flywheel. Attach a dial indicator to the crank by using one of the flywheel bolt holes and the usual erector set hardware to position a dial indicator.
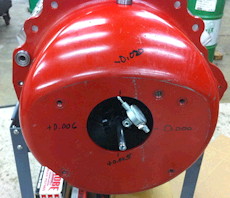
Check your alignment at 12, 3, 6, and 9 o'clock. The first check is going to be way out of whack. Take the total misalignment left and right (later top and bottom) divide it by 2 and write the number on the can with a sharpie. Loosen the attaching bolts and using a large rubber mallet tap the can at either 3 or 9 o'clock to bring it as close to zero as you can at this point. Do the exact same procedure to get the vertical alignment to it's own zero.
Here is a pic of my can in the alignment phase;

The process will likely take you three attempts and each one will get progressively closer. Because the job (done this way) is so easy I shot for a zero run out. I got close. My vertical mis alignment was zero and my horizontal misalignment was 0.001" which for all intents and purposes is zero.
At this point you want to tighten all your attaching fasteners down and recheck the can to make sure it has not moved. Mine did not. If yours does loosen the fasteners slightly and use the large rubber mallet to bring the can back to a zero runout and retighten the fasteners with one last registration check.
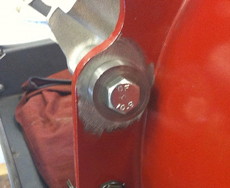
Now you need to make two relatively thick 1" diameter spacers with a drilled and reamed hole for the locating dowel pins to register in. Slip your spacers over the locating dowels. Massage them for can clearance and push them down until they are flat against the flange of the can.
At this point you weld them to the can. All you need is two (three if you are paranoid) stitch welds to permanently attach them to the can. This is what the job will look like just before welding;

Do not use a gas welder it will put too much heat into the flange and warp it. Use a TIG welder or a cheapo Harbor Freight MIG welder.
When you are done you can remove and install the can as much as you want and it will always index the same.
Like Patrick said this will make an unbelievable improvement in the shift quality department for a TKO box. Sadly this is not the end of the story. Most TKO's will still misbehave, some more often than others. The fix is the Liberty suite of modifications. Here is link to another thread where I describe the Liberty stuff, click here =>
Liberty Shifting Mods
An unmentioned co-conspiritor in the TKO shifting quality problem is the rear mounted shifter that adds complexity and additional internal shift linkage to accomplish the shifting event. My next recommendation is going to offend the originalists but it will make the owners smile with shifting excellence. BTW it is a mod that Kirkham has done on more than a couple of their cars including the uber expensive billet Cobra for Larry Ellison.
The mod is to move the shifter up to the mid shift position. The link above will document the mod and here is a pic of the Ellison billet Kirkham with it (using Kirkham manufacutred items) click here =>
Kirkham Mid Shift scroll to page 158 (the section starts on page 150)
Ed


 2Likes


 Linear Mode


